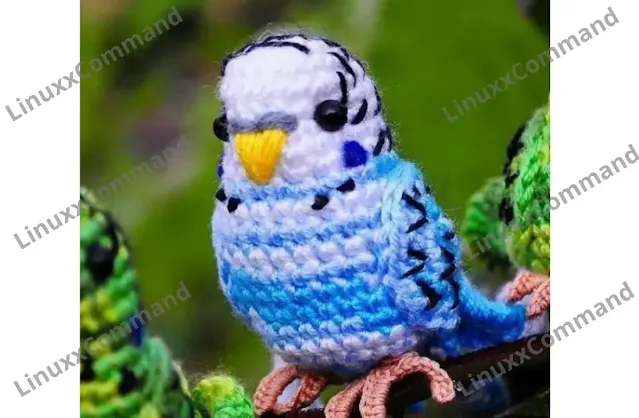
Hello amigurumi lovers and beautiful visitors
I wanted to share the free amigurumi patterns for you here. In my article, I will share 1 pattern and how to make it for you. At the end of my article, I will share amigurumi patterns that can generate ideas for you.
Materials and Tools
- Yarn of different colors
- Hook
- Eyes for toys
- Filler for toys
- Wire
- Needle for sewing details
- Scissors
Conventions
- KA – amigurumi ring
- sc – single crochet
- pr – increase
- ub – beauty
- (…) xn – repeat n times
Head-Torso
We start knitting with yellow thread:
- 6 sc in KA
- (pr) x 6 (12)
- (1 sc, inc) x 6 (18)
- (2 sc, inc) x 6 (24)
- 24 sc
- (3 sc, inc) x 6 (30)
- 30 sc
- (4 sc, inc) x 6 (36)
- 9-13. 36 sc for 5 rows
- (8 sc, inc) x 4 (40)
- 15-16. 40 sc for 2 rows
- (9 sc, inc) x 4 (44)
- 44 sc, change the thread to green
- 44 sc
- (10 sc, inc) x 4 (48)
- (11 sc, inc) x 4 (52)
- 22-24. 52 sc for 3 rows
- (11 sc, dec) x 4 (48)
- 48 sc
- (10 sc, dec) x 4 (44)
- 44 sc
- (9 sc, dec) x 4 (40)
- 40 sc
- (8 sc, dec) x 4 (36)
- 36 sc
- (4 sc, dec) x 6 (30)
- (1 sc, dec) x 10 (20) Fill the form with synthetic wadding
- (ub) x 10 (10)
- Decrease loops until the hole narrows. Cut the thread. Pull off the loops.
Round Wing (2 Parts)
We start knitting with yellow thread:
- 6 sc in KA
- (pr) x 6 (12)
- (1 sc, inc) x 6 (18)
- Change the thread to green
- (2 sc, inc) x 6 (24)
- Change the thread to yellow
- (3 sc, inc) x 6 (30)
- (4 sc, inc) x 6 (36)
- Embroider feathers with black thread.
Wing-Feather (2 Parts)
We start knitting with green thread:
- 6 sc in KA
- (pr) x 6 (12)
- (1 sc, inc) x 6 (18)
- (2 sc, inc) x 6 (24)
- (3 sc, inc) x 6 (30)
- Change the thread to yellow
- (4 sc, inc) x 6 (36)
- (5 sc, inc) x 6 (42)
- Change the thread to green
- (6 sc, inc) x 6 (48)
- Make the last loop of the increase in dc. Fold the wing in half and tie ssn. My wing is slightly stuffed with filler, but I think you can leave it empty 🙂
Tail
We knit with green thread:
- 6 sc in KA
- (1 sc, inc) x 3 (9)
- (2 sc, inc) x 3 (12)
- 4-5. 12 sc for 2 rows
- (dec, 4 sc) x 2 (10)
- 7-12. 10 sc for 6 rows
- 4 sc, inc, inc, 4 sc (12)
- 12 sc
- 5 sc, inc, inc, 5 sc (14)
- 14 sc
- 6 sc, inc, inc, 6 sc (16)
- 16 sc
Assembling the Toy
Place the wing-feather so that the top of the lobule is on the color change line and sew the wing at this point and in the center of the wing.
Place a round wing on top and sew along the upper semicircle.
Stuff, pin, and sew on a ponytail.
Draw feathers on the tail with blue threads.
In the middle of the muzzle, between 8 and 11 rows, embroider a beak 3 loops wide.
In the 8th row across the beak, embroider the bridge of the nose.
Between 8 and 9 rows at a distance of 4-5 loops, pull off the head, marking the place under the eyes.
On the tuft of the parrot, embroider feathers along the lines of rows, radially diverging from the center of the eye.
Sew on eyes. I have these large beads (I think a small button on a leg will work well.)
Embroider an eyelid around the eye.
In the 11th row, embroider feather-cheeks. Small feathers at a distance of 2 loops from the beak. Large feather embroider between 11 and 13 rows through 1 pearl from the previous feather.
Make wire legs. I have a wire with a cross section of 0.4 mm (very thin, it is better to take thicker).
Feel free to tag me (@freeamigurumii) in your photos on Instagram or Facebook if you’d like!
All Finished.


0 Comments:
Post a Comment