Top Ad 728x90

Showing posts with label Free Crochet Patterns. Show all posts

Search results for Amigurumi Blue Bear Free Pattern

by


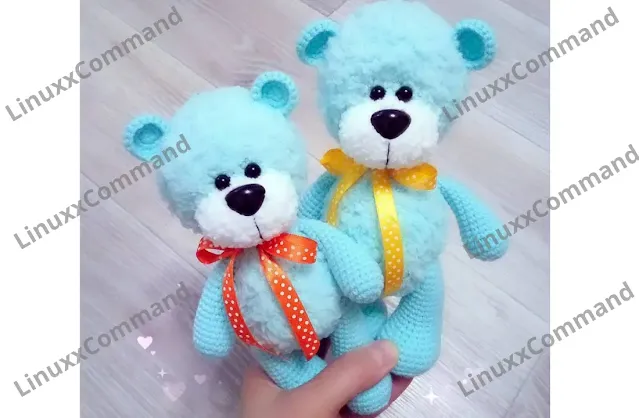
Free Crochet Bear Pattern

Follow this free crochet pattern to make a bear using Himalaya Toffee Baby yarn and a 3.5 mm crochet hook.
Designed by Mariya Kostychenko (@mariya.kostychenko)
Photo by @_iraida_hm_
Translated by allfreeamigurumipatterns.com

Materials:

  • Yarn: Himalaya Toffee Baby (50 g/85 m, 100% micro polyester) and Pehorka Detskaya novinka (50 g/200 m, 100% acrylic)
  • Hook size: 3.5 mm and 2.0 mm
  • Safety nose and eyes
  • Yarn or embroidering floss for mouth
  • Sewing needle and scissors
  • Fiberfill

Abbreviations:

  • R = row
  • mc = magic circle (magic ring)
  • ch = chain
  • st = stitch
  • sc = single crochet
  • inc = 2 sc in the next stitch
  • dec = single crochet 2 stitches together
  • BLO = back loop only
  • (12) = number of stitches you should have at the end of the round/row
  • (…)*6 = repeat whatever is between the brackets the number of times stated

Head

With Himalaya Toffee Baby yarn and 3.5 mm crochet hook:

  • R 1: 6 sc in mc (6)
  • R 2: (inc)*6 (12)
  • R 3: (1 sc, inc)*6 (18)
  • R 4: (2 sc, inc)*6 (24)
  • R 5: (3 sc, inc)*6 (30)
  • R 6: (4 sc, inc)*6 (36)
  • R 7: (5 sc, inc)*6 (42)
  • R 8-11: 42 sc (4 rows)
  • R 12: (5 sc, dec)*6 (36)
  • R 13: (4 sc, dec)*6 (30)
  • R 14: (3 sc, dec)*6 (24)
  • R 15: (2 sc, dec)*6 (18)
  • R 16: (1 sc, dec)*6 (12)
  • R 17: (dec)*6 (6)
  • F.o.

Body

With Himalaya Toffee Baby and 3.5 mm crochet hook:

  • R 1: 6 sc in mc (6)
  • R 2: (inc)*6 (12)
  • R 3: (1 sc, inc)*6 (18)
  • R 4: (2 sc, inc)*6 (24)
  • R 5: (3 sc, inc)*6 (30)
  • R 6: (4 sc, inc)*6 (36)
  • R 7-10: 36 sc (4 rows)
  • R 11: (4 sc, dec)*6 (30)
  • R 12-13: 30 sc (2 rows)
  • R 14: (3 sc, dec)*6 (24)
  • R 15: 24 sc
  • R 16: (2 sc, dec)*6 (18)
  • R 17: 18 sc
  • R 18: (1sc, dec)*6 (12)
  • R 19-20: 12 sc (2 rows)
  • F.o. and leave a long tail for sewing

Arms (make 2)

With Pehorka Detskaya novinka yarn and 2.0 mm crochet hook:

  • R 1: 6 sc in mc (6)
  • R 2: (inc)*6 (12)
  • R 3: (1 sc, inc)*6 (18)
  • R 4-6: 18 sc (3 rows)
  • R 7: dec, 16 sc (17)
  • R 8: dec, 15 sc (16)
  • R 9: dec, 14 sc (15)
  • R 10: dec, 13 sc (14)
  • R 11: dec, 12 sc (13)
  • R 12: dec, 11 sc (12)
  • R 13: dec, 10 sc (11)
  • R 14: dec, 9 sc (10)
  • R 15-18: 10 sc (4 rows)
  • R 19: (dec)*5
  • F.o. and leave a long tail for sewing

Legs (make 2)

With Pehorka Detskaya novinka yarn and 2.0 mm crochet hook:

  • Make 6 ch.
  • Make an oval, work on both sides of the chain:
  • R 1: From the 2nd ch from hook: 4 sc, 3 sc in last st, on the opposite side of the chain: 3 sc, inc (12)
  • R 2: inc, 3 sc, 3 inc, 3 sc, 2 inc (18)
  • R 3: inc, 6 sc, 2 inc, 6 sc, inc, 2 sc (22)
  • R 4: 1 sc, inc, 6 sc, 5 inc, 6 sc, 2 inc, 1 sc (30)
  • R 5: BLO 30 sc
  • R 6-8: 30 sc (3 rows)
  • R 9: 9 sc, (dec, 1 sc)*4, 9 sc (26)
  • R 10: 7 sc, (dec, 1 sc)*4, 7 sc (22)
  • R 11: 22 sc
  • R 12: 8 sc, (dec, 1 sc)*2, 8 sc (20)
  • R 13: 8 sc, 2 dec, 8 sc (18)
  • R 14-22: 18 sc (9 rows)
  • R 23: (dec, 1 sc)*6 (12)
  • R 24: (dec)*6 (6)
  • F.o. and leave a long tail for sewing

Ears (make 2)

With Pehorka Detskaya novinka yarn and 2.0 mm crochet hook:

  • R 1: 6 sc in mc (6)
  • R 2: (inc)*6 (12)
  • R 3: (1 sc, inc)*6 (18)
  • R 4: 18 sc
  • F.o. and leave a long tail for sewing
Muzzle

With Himalaya Toffee Baby and 3.5 mm crochet hook:

  • R 1: 6 sc in mc (6)
  • R 2: (inc)*6 (12)
  • R 3: (1 sc, inc)*6 (18)
  • F.o. and leave a long tail for sewing
Amigurumi Kitty Heart Free Pattern

by


Kitty Heart Free Amigurumi Pattern

Designed by Vera Izgrebina and Elena Lepekhina. You can use YarnArt Dolce, Velour Yarn, cotton, or acrylic yarn.

Designed by Vera Izgrebina and Elena Lepekhina
Photos by Elena Lepekhina and Irina Stafeeva
Translated by allfreeamigurumipatterns.com

Abbreviations:

  • R = row
  • mc = magic circle
  • sc = single crochet
  • ch = chain
  • inc = 2 sc in the next stitch
  • dec = single crochet 2 stitches together
  • ( ) = number of stitches you should have at the end of the round/row
  • ( )* 6 = repeat whatever is between the brackets the number of times stated

Hands (make 2)

  • R 1: 6 sc in mc (6)
  • R 2-5: 6 sc (6)
  • Fold top of hand flat and 3 sc through both sides across.

Legs (make 2)

  • R 1: 6 sc in mc (6)
  • R 2: 6 inc (12)
  • R 3: (1 sc, inc)*6 (18)
  • Don’t cut the yarn on the second leg! Crochet 9 sc on the second leg, then join the first leg:

Body

  • R 4: 3 inc on the first leg, 15 sc, 15 sc on the second leg, 3 inc (42) (place with increases – belly)
  • R 5-9: 42 sc (42)
  • R 10: (5 sc, dec)*6 (36)
  • R 11: 36 sc (36)
  • R 12: (4 sc, dec)*6 (30)
  • R 13: 30 sc (30)
  • R 14: (3 sc, dec)*6 (24)
  • R 15: 24 sc (24)
  • R 16: (2 sc, dec)*6 (18)
  • R 17: 5 sc, 3 sc together with sc of the 1st hand, 6 sc, 3 sc together with sc of the 2nd hand, 1 sc (18)
  • R 18: (1 sc, dec)*6 (12)
  • R 19-20: 12 sc (12)

Continue Crocheting the Head:

  • R 21: 12 inc (24)
  • R 22: (3 sc, inc)*6 (30)
  • R 23: (4 sc, inc)*6 (36)
  • R 24: (5 sc, inc)*6 (42)
  • R 25: (6 sc, inc)*6 (48)
  • R 26-34: 48 sc (48)
  • Insert safety eyes between R 31 and R 32.
  • R 35: (6 sc, dec)*6 (42)
  • R 36: (5 sc, dec)*6 (36)
  • R 37: (4 sc, dec)*6 (30)
  • R 38: 30 sc (30)
  • Fold top of head flat and 15 sc through both sides across.
  • F.o., leaving a long tail. Pull the yarn from the center of the top to the neck to make ears more clear.

Tail

  • R 1: 10 ch
  • R 2: in 2nd ch from hook 9 sc (9)

Flora the bee crochet pattern

by


Cute Amigurumi Bee with a Wreath of Flowers

Take a look at this cute amigurumi bee wearing a wreath of flowers. You can crochet a wonderful spring bee for yourself, which will be a wonderful gift for any occasion and a true friend for a child or adult. The size of the finished honey bee is approximately 22 cm (8.6″).

Designed and photos by @vivi_toys
Translated by Amiguroom Toys

Materials:

  • Yarn: YarnArt Jeans, colors: yellow #88, brown #70, white #62, purple #19, pink #18, blue #75, peach #73, beige #03, green #69
  • Hook size: 2.25 or 2.0 mm
  • 10 mm safety eyes
  • Some beads for flowers
  • Dry pastel crayon for cheeks
  • Sewing needle and scissors
  • Sewing pins
  • Knitting needle
  • Fiberfill

Abbreviations:

  • R = row
  • mc = magic circle
  • ch = chain
  • sl st = slip stitch
  • sc = single crochet
  • dc = double crochet
  • hdc = half double crochet
  • inc = 2 sc in the next stitch
  • dec = single crochet 2 stitches together
  • F.o. = finish off
  • (12) = number of stitches you should have at the end of the round/row
  • (…) *6 = repeat whatever is between the brackets the number of times stated

Free Amigurumi Bee Pattern

Legs and Arms (make 4)

With brown yarn:

  • R 1: 6 sc in mc (6)
  • R 2: (inc)*6 (12)
  • R 3-14: 12 sc (12 rows)
  • Stuff with fiberfill.
  • R 15: (dec)*6
  • Pull the opening, fasten and hide yarn tail inside.

Horns (make 2)

With brown yarn: Stuff as you go.

  • R 1: 5 sc in mc (5)
  • R 2: (inc)*5 (10)
  • R 3: (1 sc, inc)*5 (15)
  • R 4-5: 15 sc (2 rows)
  • R 6: (1 sc, dec)*5 (10)
  • R 7: (3 sc, dec)*2 (8)
  • R 8-15: 8 sc (8 rows)
  • F.o. and leave a long tail for sewing.

Sting

With brown yarn:

  • R 1: 5 sc in mc (5)
  • R 2: 5 sc
  • R 3: (inc)*5 (10)
  • R 4-6: 10 sc (3 rows)
  • Stuff with fiberfill.
  • F.o. and leave a long tail for sewing.

Wings (make 2)

With white yarn:

  • R 1: 6 sc in mc (6)
  • R 2: (inc)*6 (12)
  • R 3: (1 sc, inc)*6 (18)
  • R 4: (2 sc, inc)*6 (24)
  • R 5: (3 sc, inc)*6 (30)
  • R 6-9: 30 sc (4 rows)
  • R 10: (4 sc, dec)*5 (25)
  • R 11-13: 25 sc (3 rows)
  • R 14: (3 sc, dec)*5 (20)
  • R 15-16: 20 sc (2 rows)
  • R 17: (2 sc, dec)*5 (15)
  • R 18: (1 sc, dec)*5 (10)
  • R 19: (dec)*5 (5)
  • Don’t stuff with fiberfill.
  • F.o. and leave a long tail for sewing.

Head and Body of Amigurumi Bee are Crocheted as One Piece.

Body

With brown yarn:

  • R 1: 6 sc in mc (6)
  • R 2: (inc)*6 (12)
  • R 3: (1 sc, inc)*6 (18)
  • R 4: (2 sc, inc)*6 (24)
  • R 5: (3 sc, inc)*6 (30)
  • R 6: (4 sc, inc)*6 (36)
  • R 7: (5 sc, inc)*6 (42)
  • R 8: (6 sc, inc)*6 (48)
  • R 9: (7 sc, inc)*6 (54)
  • R 10: (8 sc, inc)*6 (60)
  • R 11: 60 sc
  • Change to yellow yarn:
  • R 12-16: 60 sc (5 rows)
  • Change to brown yarn:
  • R 17-21: 60 sc (5 rows)
  • Change to yellow yarn:
  • R 22-26: 60 sc (5 rows)
  • Change to brown yarn:
  • R 27: 60 sc
  • R 28: (8 sc, dec)*6 (54)
  • R 29: (7 sc, dec)*6 (48)
  • R 30: (6 sc, dec)*6 (42)
  • R 31: (5 sc, dec)*6 (36)
  • R 32: (4 sc, dec)*6 (30)
  • Stuff with fiberfill.
  • R 33: (3 sc, dec)*6 (24)
Continue Crocheting the Head:
  • R 34: (inc)*24 (48)
  • R 35: (7 sc, inc)*6 (54)
  • R 36: (8 sc, inc)*6 (60)
  • R 37: (9 sc, inc)*6 (66)
  • R 38: (10 sc, inc)*6 (72)
  • R 39-50: 72 sc (12 rows)
  • R 51: (10 sc, dec)*6 (66)
  • R 52: (9 sc, dec)*6 (60)
  • R 53: (8 sc, dec)*6 (54)
  • R 54: (7 sc, dec)*6 (48)
  • R 55: (6 sc, dec)*6 (42)
  • Insert safety eyes between R 46 and R 47 at the distance of 8 st from each other.
  • R 56: (5 sc, dec)*6 (36)
  • R 57: (4 sc, dec)*6 (30)
  • Stuff with fiberfill.
  • R 58: (3 sc, dec)*6 (24)
  • R 59: (2 sc, dec)*6 (18)
  • R 60: (1 sc, dec)*6 (12)
  • R 61: (dec)*6 (6)
  • Finish stuffing.
  • F.o.

Embroider eyebrows and mouth with brown yarn.
Embroider whites of the eyes with white yarn.

Sew horns on the head.
Sew wings and sting to the body (view video at 09:08).

Attach arms and legs using thread attaching How to attach jointed legs on amigurumi

Tint cheeks using dry pastel crayon or embroider them with pink yarn.

Flower (make 11)

  • Make 23 ch.
  • R 1: From the 4th chain from hook: (1 hdc, 1 dc, 1 hdc in one st; 1 sl st in next st)*10

Leaf (make 15)

  • Make 7 ch.
  • R 1: From the 2nd chain from hook: 1 sl st, 1 sc, 1 hdc, 1 dc, 1 hdc, 3 sc in one st, on the other side: 1 hdc, 1 dc, 1 hdc, 1 sc, 1 sl st, 1 ch.
  • Make sl st chain across the center of the leaf (view video at 17:10).
  • Leave a long tail for sewing.

Headband

  • Make 60 ch, join in ring with sl st.
  • R 1: 60 sc
  • Leave a long tail for sewing.

Sew leaves to flowers. Sew flowers with leaves to the headband.

Amigurumi Sweet Small Snowman Free Pattern

by


Amigurumi Snowman Pattern

This simple and quick amigurumi snowman pattern will help you create a charming little snowman that stands about 13 cm (5.2″) tall with its hat. The head and body are crocheted as a single piece, making it a fast project! Enjoy!

Designed and photos by @fayni_toys
Translated by allfreeamigurumipatterns.com

Materials:

  • Yarn: YarnArt Jeans (white, black, red), YarnArt Begonia (orange)
  • Hook size: 1.75 mm
  • 6 mm safety eyes
  • Two buttons
  • Black embroidery floss
  • Sewing needle and scissors
  • Fiberfill

Abbreviations:

  • R = row
  • mc = magic circle
  • ch = chain
  • sc = single crochet
  • inc = 2 sc in the next stitch
  • dec = single crochet 2 stitches together
  • BLO = back loop only
  • FLO = front loop only
  • F.o. = finish off
  • (12) = number of stitches at the end of the round/row
  • (...) *6 = repeat the instructions within parentheses the number of times stated

Head-Body:

With white yarn:

R 1: 6 sc in mc (6)
R 2: (inc)*6 (12)
R 3: (1 sc, inc)*6 (18)
R 4: 1 sc, inc, (2 sc, inc)*5, 1 sc (24)
R 5: (3 sc, inc)*6 (30)
R 6: 2 sc, inc, (4 sc, inc)*5, 2 sc (36)
R 7: (5 sc, inc)*6 (42)
R 8-14: 42 sc (7 rows)

Insert safety eyes between R 10 and R 11, 8 stitches apart.

R 15: (5 sc, dec)*6 (36)
R 16: 2 sc, dec, (4 sc, dec)*5, 2 sc (30)
R 17: (3 sc, dec)*6 (24)
R 18: 1 sc, dec, (2 sc, dec)*5, 1 sc (18)
R 19: (4 sc, dec)*3 (15)
R 20: (inc)*15 (30)
Stuff with fiberfill.
R 21: 30 sc
R 22: 2 sc, inc, (4 sc, inc)*5, 2 sc (36)
R 23: 36 sc
R 24: (5 sc, inc)*6 (42)
R 25: 42 sc
R 26: 3 sc, inc, (6 sc, inc)*5, 3 sc (48)
R 27-35: 48 sc (9 rows)
R 36: 3 sc, dec, (6 sc, dec)*5, 3 sc (42)
R 37: (5 sc, dec)*6 (36)
R 38: 2 sc, dec, (4 sc, dec)*5, 2 sc (30)
R 39: (3 sc, dec)*6 (24)
R 40: 1 sc, dec, (2 sc, dec)*5, 1 sc (18)
R 41: (1 sc, dec)*6 (12)
Finish stuffing.
R 42: (dec)*6 (6)
F.o.

Hat:

With black yarn:

R 1: 6 sc in mc (6)
R 2: (inc)*6 (12)
R 3: (1 sc, inc)*6 (18)
R 4: 1 sc, inc, (2 sc, inc)*6, 1 sc (24)
R 5: BLO 24 sc
R 6-7: 24 sc (2 rows)
Change to red yarn:
R 8-9: 24 sc (2 rows)
Change to black yarn:
R 10: FLO 24 sc
R 11: 48 sc
F.o.

Stuff with fiberfill and sew the hat onto the head at R 10 of the hat.

Carrot (Nose):

R 1: 4 sc in mc (4)
R 2: (1 sc, inc)*2 (6)
R 3: (2 sc, inc)*2 (8)
(You can crochet the carrot in the back loop only).
F.o. and leave a long tail for sewing.

Scarf:

With red yarn:

Make 53 ch.
R 1: From the 2nd ch from hook: BLO 52 sc, turn.
R 2: BLO 52 sc, turn.
R 3: BLO 52 sc.
F.o.

Assembly:

  • Embroider the arms and mouth using black thread.
  • Sew buttons on the belly.
  • Decorate the hat with an applique or embroidery as desired.

Enjoy your little snowman!

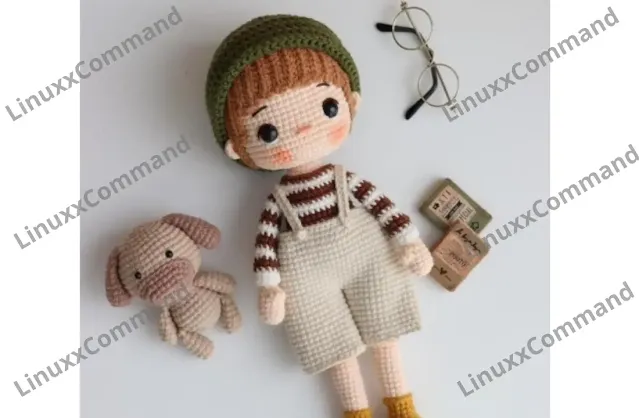
CUTE CROCHET PHILIPE DOLL AMIGURUMI FREE PATTERN

by


Easy and Free Amigurumi Pattern

If you enjoy making amigurumi, here I share this easy and free amigurumi pattern for you. Your kids will love these toys.

Materials

  • Body and shoes: Yarn Art Jeans (73) (84) & Etrofil Baby Cotton (70743)
  • Pullover: Yarn Art Jeans (62) (70)
  • Hair: Etrofil Baby Cotton (70743)
  • Beanie: Etrofil Jeans (026)
  • Overalls: Etrofil Baby Cotton (70112)
  • 10 mm, 5 mm safety eyes
  • Brown and white thin yarn for eyes
  • Fiberfill
  • Silicone glue
  • Stick for neck

Abbreviations

  • X: Single crochet
  • V: Increase
  • A: Decrease
  • Sh: Magic ring
  • Ch: Chain
  • Cc: Slip stitch
  • BLO: Take from rear loop
  • FLO: Take from front loop
  • W: Work the same single crochet 3 times in one stitch
  • Hdc: Half double crochet
  • Dc: Double crochet

Head

Rnd 1: 6x in sh (6x)

Rnd 2: (V)6 (12x)

Rnd 3: (X, V)6 (18x)

Rnd 4: (2x, V)6 (24x)

Rnd 5: (3x, V)6 (30x)

Rnd 6: (4x, V)6 (36x)

Rnd 7: (5x, V)6 (42x)

Rnd 8: (6x, V)6 (48x)

Rnd 9: (7x, V)6 (54x)

Rnd 10: 54x

Rnd 11: (8x, V)6 (60x)

Rnd 12-21: 60x (10 rows)

Rnd 22: 25x, 1ch, (skip 1x), 10x, 1ch, (skip 1x), 23x (60x)

Rnd 23: 23x, (V, 2x)6, 19x (68x)

Rnd 24-26: 68x (3 rows)

Place the eyes to the spaces.

Rnd 27: 23x, (A, 2x)6, 19x (60x)

Rnd 28: 4x, A, (8x, A)5, 4x (54x)

Rnd 29: (7x, A)6 (48x)

Rnd 30: 3x, A, (6x, A)5, 3x (42x)

Rnd 31: (5x, A)6 (36x)

Fill out the head.

Rnd 32: 2x, A, (4x, A)5, 2x (30x)

Rnd 33: (3x, A)6 (24x)

Rnd 34: X, A, (2x, A)5, X (18x)

Finish with Cc.

Hair

Rnd 1: 6x in sh (6x)

Rnd 2: (V)6 (12x)

Rnd 3: (X, V)6 (18x)

Rnd 4: (2x, V)6 (24x)

Rnd 5: (3x, V)6 (30x)

Rnd 6: (4x, V)6 (36x)

Rnd 7: (5x, V)6 (42x)

Rnd 8: (6x, V)6 (48x)

Rnd 9: (7x, V)6 (54x)

Rnd 10: 54x

Rnd 11: (8x, V)6 (60x)

Rnd 12-18: 60x (7 rows)

Rnd 19: 22x, *22ch start from the 3rd, 20hdc, combine with Cc, *21ch start from the 3rd, 19hdc, combine with Cc, *17ch start from the 3rd, 15hdc, combine with Cc, *15ch start from the 3rd, 13hdc, combine with Cc

Fasten off and leave a bit of yarn for sewing.

Ears

Into Sh:

*2ch, 4dc, 2ch, Cc

Close the ring.

Turn inside out and fasten it to the head, knitting it in place.

Arms

Rnd 1: 6x in sh (6x)

Rnd 2: (V)6 (12x)

Rnd 3-5: 14x (3 rows)

Rnd 6: 2x, (4dc)V knit to the same X, 9x (15x)

Rnd 7: 2x, (4dc)A, 9x (12x)

Rnd 8: (X, A)4 (8x)

Rnd 9-12: 8x (4 rows)

Rnd 13: X, V, X, V, X, V, X, X (11x)

Cut the yarn.

Pullover (Arms)

Start with white yarn, 12ch start from 2nd.

Rnd 1: 11x (combine)

Rnd 2: 11x

Switch to brown yarn (70):

Rnd 3-4: 11x (2 rows)

Switch to white yarn:

Rnd 5-6: 11x (2 rows)

Switch to brown yarn:

Rnd 7-8: 11x (2 rows)

Switch to white yarn:

Rnd 9-10: 11x (2 rows)

Switch to brown yarn:

Rnd 11-12: 11x (2 rows)

Switch to white yarn:

Rnd 13-14: 11x (2 rows)

Switch to brown yarn:

Rnd 15: 11x (cut the yarn)

Feet (First Foot)

5ch start from 2nd:

Rnd 1: 3x, W (knit to the same point 3 times), 3x, W (12x)

Rnd 2: 3x, V, V, V, 3x, V, V, V (18x)

Rnd 3: 4x, V, X, V, X, V, 4x, V, X, V, X, V (24x)

Rnd 4: 4x, V, X, V, plug the loop pointer here (26x)

Switch to yellow yarn (84):

Rnd 5: BLO 26x

Rnd 6: 26x

Switch to brown yarn:

Rnd 7: FLO 26cc

Glue the plastic base with silicone.

Body

Rnd 1: 16x, V, V, V 16x, V, V, V, X (44x)

Rnd 2-9: 44x (8 rows)

Rnd 10: 8x, A, 20x, A, 12x (42x)

Switch to brown yarn (70):

Rnd 11-12: 42x (2 rows)

Switch to white yarn:

Rnd 13: (5x, A)6 (36x)

Rnd 14: 36x

Switch to brown yarn:

Rnd 15-16: 36x (2 rows)

Switch to white yarn:

Rnd 17-18: 36x (2 rows)

Switch to brown yarn:

Rnd 19: 6x, (combine the first arm with 3x), 14x, (combine the second arm with 3x), 10x (46x)

Rnd 20: 9x, A, 8x, A, 10x, A, 10x, A, X (42x)

Switch to white yarn:

Rnd 21: (5x, A)6 (36x)

Rnd 22: (4x, A)6 (30x)

Switch to the body color:

Rnd 23: BLO (3x, A)6 (24x)

Rnd 24: (2x, A)6 (18x)

Switch to brown yarn:

Rnd 25-26: 18x (2 rows)

Let a bit of yarn for sewing and cut.

Overalls

31ch, start from 2nd:

Rnd 1: 30x (combine)

Rnd 2-11: 30x (10 rows)

Knit one more time the same and combine.

Beanie

Rnd 1: 12dc in sh

Rnd 2: (V)12 (24dc)

Rnd 3: (dc, V)12 (36dc)

Rnd 4: (2dc, V)12 (48dc)

Rnd 5: (3dc, V)12 (60dc)

Rnd 6-15: 60dc (10 rows)

SEARCH RESULTS FOR AMIGURUMICUTE BEAR FREE PATTERN

by


Easy and Free Amigurumi Teddy Bear Pattern (35 cm)

If you enjoy making amigurumi, here I share this easy and free amigurumi pattern for you. Your kids will love these toys.

Materials

  • Teddy bear about 35 cm (13.7″) high.
  • Yarn: Himalaya Dolphin Baby (more than one skein of main color)
  • Hook size: 4.5 mm
  • Black YarnArt Jeans yarn for embroidering eye brows and nose
  • 12 mm safety eyes
  • Thin thread in the tone of yarn for sewing details together
  • Sewing needle and scissors
  • Fiberfill

Abbreviations

  • AR – Amigurumi Magic ring
  • MR – Amigurumi Magic ring
  • App – application
  • ll – lift loop
  • sc – Single Crochet
  • inc – Increase
  • dec – Decrease
  • tr – Triple Crochet / Treble Crochet
  • st – Stitch
  • dc – Double Crochet
  • hdc – Half Double Crochet
  • sl-st – Slip Stitch
  • ch – Chain
  • ..in – make increase into the same stitch as many as the number which is given in front of “inc” abbreviation (e.g., 3inc, 4inc..).
  • FLO – Crochet into front loops only
  • BLO – Crochet into back loops only
  • BL – Bobble Stitch – do 5dc all in the same stitch and then yarn over and pull through all the loops on your hook (the original loop + 1 loop for each partially completed dc).

Head

R 1: 6 sc in mc (6)

R 2: (inc)x6 (12)

R 3: (1 sc, inc)x6 (18)

R 4: (2 sc, inc)x6 (24)

R 5: (3 sc, inc)x6 (30)

R 6: (4 sc, inc)x6 (36)

R 7: (5 sc, inc)x6 (42)

R 8: (6 sc, inc)x6 (48)

R 9-14: 48 sc (6 rows)

Insert safety eyes between R 9 and R 10.

R 15: (6 sc, dec)x6 (42)

R 16: (5 sc, dec)x6 (36)

R 17: (4 sc, dec)x6 (30)

R 18: (3 sc, dec)x6 (24)

R 19: (2 sc, dec)x6 (18)

Stuff with fiberfill.

Fasten off.

Ears (make 2)

R 1: 8 sc in mc (8)

R 2: (inc)x8 (16)

R 3: 16 sc

R 4: (3 sc, inc)x4 (20)

Fasten off.

Muzzle

With white yarn:

Make 7 ch.

Make an oval starting from the 2nd ch from hook, work on both sides of the chain.

R 1: From the 2nd ch from hook: 5 sc, 3 sc in last st, turn and crochet on the opposite side of the chain: 4 sc, inc (14)

R 2: 1 ch, inc, 4 sc, (inc)x3, 4 sc, (inc)x2 (20)

R 3: 1 ch, inc, 5 sc, (1 sc, inc)x4, 5 sc, inc (26)

R 4: 1 ch, inc, 6 sc, (2 sc, inc)x4, 6 sc, inc (32)

R 5: 32 sc

Fasten off.

Sew muzzle to the head, put some stuffing inside the muzzle before you finish.

Sew ears to the head.

Embroider eye brows and nose with black yarn.

Arms (make 2)

R 1: 6 sc in mc (6)

R 2: (inc)x6 (12)

R 3: (5 sc, inc)x2 (14)

R 4: (3 sc, inc)x3, 2 sc (17)

R 5: 17 sc

R 6: dec, (1 sc, dec)x5 (11)

R 7-11: 11 sc (5 rows)

R 12: 9 sc, dec (10)

R 13-14: 10 sc (2 rows)

R 15: 8 sc, dec (9)

R 16-17: 9 sc (2 rows)

Stuff 3/4 full.

Fold top of arm flat and 5 sc through both sides across.

Fasten off.

Legs (make 2)

Make 7 ch.

Make an oval starting from the 2nd ch from hook, work on both sides of the chain.

R 1: From the 2nd ch from hook: 5 sc, 4 sc in last st, turn and crochet on the opposite side of the chain: 4 sc, 3 sc in one st (16)

R 2: inc, 4 sc, (inc)x4, 4 sc, (inc)x3 (24)

R 3: inc, 1 sc, 4 sc, (inc, 1 sc)x4, 4 sc, (inc, 1 sc)x3 (32)

R 4: BLO 32 sc

R 5: 32 sc

R 6: 7 sc, (dec)x6, 8 sc, (dec)x2, 1 sc (24)

R 7: 6 sc, (dec)x4, 10 sc (20)

R 8: 3 sc, (dec)x6, 5 sc (14)

R 9-13: 14 sc (5 rows)

R 14: 12 sc, dec (13)

R 15: 13 sc

R 16: 11 sc, dec (12)

R 17-19: 12 sc (3 rows)

Stuff with fiberfill.

Fold top of leg flat and 6 sc through both sides across.

Fasten off.

Body

R 1: 6 sc in mc (6)

R 2: (inc)x6 (12)

R 3: (1 sc, inc)x6 (18)

R 4: (2 sc, inc)x6 (24)

R 5: (3 sc, inc)x6 (30)

R 6: (4 sc, inc)x6 (36)

R 7: (5 sc, inc)x6 (42)

R 8: 42 sc

R 9: 8 sc, 6 sc together with sc of the 1st leg, 14 sc, 6 sc together with sc of the 2nd leg, 8 sc (42)

R 10-11: 42 sc (2 rows)

R 12: (5 sc, dec)x6 (36)

R 13-14: 36 sc (2 rows)

R 15: (4 sc, dec)x6 (30)

R 16: 30 sc

R 17: (3 sc, dec)x6 (24)

R 18-19: 24 sc (2 rows)

R 20: (2 sc, dec)x6 (18)

R 21: 3 sc, (5 sc together with sc of the 1st arm, 4 sc, 5 sc together with sc of the 2nd arm, 1 sc) (18)

R 22: 18 sc

Stuff with fiberfill.

Fasten off.

Tail

R 1: 6 sc in mc (6)

R 2: (inc)x6 (12)

R 3: 12 sc

Fasten off.

Sew tail to the body.

Search results for Little amigurumi cat free pattern

by


A free and easy amigurumi pattern to create a cute 3.5-inch cat doll (9 cm).

The perfect size for little hands! To make this amigurumi cat you need only basic skills and a little time. The head, body, legs, and arms are crocheted in the same way as for the dog and bear by @bumbee_crochet.

Designed and photo by @bumbee_crochet

Materials:

  • Yarn: ΥаrnArt Jeans, Gazzal Βаbу Сotton or ΑlÑ–ze Сοttοn Gоld
  • Hook size: 1.75-2.0 mm
  • 10 mm safety eyes
  • Black thread for eyebrows, lashes, and whiskers
  • Pink thin yarn or embroidery thread for a nose
  • Sewing needle and scissors
  • Fiberfill

Abbreviations:

  • R = row
  • mc = magic circle
  • sc = single crochet
  • inc = increase (2 sc in the next stitch)
  • dec = decrease (single crochet 2 stitches together)
  • (12 st) = number of stitches you should have at the end of the round/row

Free Amigurumi Cat Pattern

Head

R 1: 6 sc in mc (6 st)

R 2: (inc)*6 (12 st)

R 3: (1 sc, inc)*6 (18 st)

R 4: (2 sc, inc)*6 (24 st)

R 5: (3 sc, inc)*6 (30 st)

R 6: (4 sc, inc)*6 (36 st)

R 7-8: 36 sc (2 rows)

R 9: (11 sc, inc)*3 (39 st)

R 10: 39 sc

R 11: (12 sc, inc)*3 (42 st)

R 12: 42 sc

R 13-15: 42 sc (3 rows)

Place the safety eyes between rows 11 and 12 with 8 sc between them.

R 16: (5 sc, dec)*6 (36 st)

R 17: (4 sc, dec)*6 (30 st)

R 18: (3 sc, dec)*6 (24 st)

R 19: (2 sc, dec)*6 (18 st)

R 20: (4 sc, dec)*3 (15 st)

Fasten off and cut the yarn.

Ears (make 2)

R 1: 6 sc in mc (6 st)

R 2: (1 sc, inc)*3 (9 st)

R 3: (2 sc, inc)*3 (12 st)

Don’t stuff. Fold edges together and crochet two sides together with 5 sc.

Fasten off and cut the yarn. Leave a long tail for sewing.

Arms (make 2)

R 1: 7 sc in mc (7 st)

R 2-4: 7 sc (4 rows)

Don’t stuff. Fold the edges together and crochet two sides together with 3 sc.

Fasten off. Leave a long tail for sewing.

Legs (make 2)

R 1: 6 sc in mc (6 st)

R 2: (inc)*6 (12 st)

R 3: Back loops only – 12 sc

R 4: 12 sc

Fasten off. Leave a long tail for sewing.

Tail

R 1: 6 sc in mc (6 st)

R 2-6: 6 sc (5 rows)

Don’t stuff. Fasten off. Leave a long tail for sewing.

Body

R 1: 6 sc in mc (6 st)

R 2: (inc)*6 (12 st)

R 3: (1 sc, inc)*6 (18 st)

R 4: (2 sc, inc)*6 (24 st)

R 5: (3 sc, inc)*6 (30 st)

R 6-9: 30 sc (4 rows)

R 10: 9 sc, (dec)*6, 9 sc (24 st)

R 11: (6 sc, dec)*3 (21 st)

R 12: (5 sc, dec)*3 (18 st)

R 13: (4 sc, dec)*3 (15 st)

R 14-15: 15 sc (2 rows)

Fasten off and cut the yarn. Leave a long tail for sewing.

Assembly

  • Embroider eyebrows, lashes, whiskers with black thread and the nose with pink yarn.
  • Sew the ears to the head.
  • Sew the head to the body.
  • Sew arms to the body between rows 13 and 14.
  • Sew the legs to the body.
  • Sew the tail to the body.

Amigurumi Plush Bunny Emilia Free Pattern

by


Hello dear Amigurumi Followers

Today we share Amigurumi Plush Bunny Emilia Free Pattern for you. As you know, we share new free amigurumi patterns every day. The main crochets are gazelle, amigurumi bear, pola, crochet panda, penguin, giraffe, llama, pig, bunny, clown, lamb, bee, crochet unicorn, amigurumi doll, fox, penguin, dinosaur, crochet elephant, hippo, monkey, crochet cat, crochet dog and more …

Today's daily new amigurumi free crochet pattern is Amigurumi Plush Bunny Emilia.

I want to give you some information about this amigurumi free pattern: Plush Bunny Emilia.

Materials

  • Yarn “Himalaya Dolphin Baby” (gray 80325) (2 skeins)
  • Himalaya Dolphin Baby yarn (white 80301)
  • Yarn “Alize Softy” (white No 55)
  • Hooks: No 5 (4mm), No 2.5 (3mm), No 8
  • Discs (3cm – 4pcs), (4cm – 4pcs), or joints of the same size
  • Pins 4cm and 3.3cm long
  • Eyes: 18mm
  • Spout: 18mm
  • Eyelashes
  • Glue (Moment glue)
  • Round nose pliers
  • Markers
  • Scissors
  • Thick thread for stitching parts
  • Needle

Abbreviations

  • MR – Magic ring
  • Ch – Chain
  • Sc – Single crochet
  • Inc – Increase
  • Dec – Decrease
  • Sl st – Slip stitch
  • Hdc – Half double crochet

The finished crochet plush bunny size is approximately 26 cm.

Amigurumi Plush Bunny Emilia Free Pattern

Legs (Make 2)

  • Rnd 1: We start crocheting in white. We collect a chain of 5 ch.
  • Rnd 2: In the second loop from the hook 1sc, 2sc, in the last 4th loop we crochet 5sc, turn; 2sc, 3sc in one loop (13)
  • Rnd 3: inc, 3sc, 4inc, 3sc, 2inc (20)
  • Rnd 4: 2inc, 4sc, (inc, 1sc)*3, 4sc, inc, 3sc (26)
  • Rnd 5-6: 26 sc
  • Rnd 7: 7sc, (dec, 1sc)*4, 7sc (22)
  • Rnd 8: 6sc, 2dec, 1sc, 2dec, 7sc (18)
  • Rnd 9: 7sc, 2dec, 7sc (16)
  • Rnd 10: Color change to gray: 16sc
  • Rnd 11: 6sc, 2dec, 6sc (14)
  • Rnd 12: 7sc, inc, 6sc (15) +1sc to shift row
  • Rnd 13: 6sc, inc, 8sc (16)
  • Rnd 14: 8sc, inc, 7sc (17)
  • Rnd 15: 8sc, inc, 8sc (18)
  • Rnd 16: inc, 17sc (19)
  • Rnd 17: 19sc

After we finish crocheting the 17th row, we will insert a disc with a cotter pin.

Right Leg:

Between the 15th and 16th rows we insert a disc with a cotter pin, go down 1st row, in the 16th row at we had an increase, we count from it (including an increase) 5sc, insert a disk with cotter pin (joint). Next, we finish knitting the leg, (18, 19 and 20 rows).

Don’t forget to fill the leg!

  • Rnd 18: 1sc, dec, 16sc (18)
  • Rnd 19: (1sc, dec)*6 (12)
  • Rnd 20: 6 dec

Cut the thread, pull the hole, hide the tip.

The right leg is ready!

Left Leg:

We crochet the left leg in the same way as the right one, only we will insert the disk with the cotter pin from the other sides.

  • Rnd 15: Between 15 and 16 rows we insert a disk with a cotter pin (joint), go down 2 rows, back from the end of the 17th row, we count 5sc, insert the disc with the cotter pin (joint).

Don’t forget to fill the leg!

The left leg is done!

Paws (Make 2)

  • Rnd 1: 6 sc in MR
  • Rnd 2: 6inc (12)
  • Rnd 3: 2sc, inc, (1sc, inc)*3, 3sc (16)
  • Rnd 4-5: 16sc
  • Rnd 6: 4sc, 4dec, 4sc (12)
  • Rnd 7: 12sc
  • Rnd 8: Color change to gray: 12sc
  • Rnd 9-10: 12sc
  • Rnd 11: inc, 5sc, inc, 5sc (14)
  • Rnd 12-14: 14sc

After we finish crocheting the 14th row, we will insert a disk with a cotter pin (joint).

Right Foot:

We count 5 sc forward, between the 13th and 14th rows we insert a disk with a cotter pin (joint).

Don’t forget to stuff your paw!

  • Rnd 15: 1sc, dec, 5sc, dec, 4sc (12)
  • Rnd 16: 6 dec. Cut the thread, pull the hole, hide the tip.

The right paw is ready!

Left Foot:

After we finish knitting the 14th row, we will insert a disk with a cotter pin (joint).

  • We count back 3sc, between the 13th and 14th rows we insert a disk with a cotter pin (joint).

Don’t forget to stuff your paw!

We complete the crocheting of the foot, we crochet the 15th and 16th rows.

Body

  • Rnd 1: 6sc in MR
  • Rnd 2: 6inc (12)
  • Rnd 3: (1sc, inc)*6 (18)
  • Rnd 4: (2sc, inc)*6 (24)
  • Rnd 5: (3sc, inc)*6 (30)
  • Rnd 6: (4sc, inc)*6 (36)
  • Rnd 7: 36sc
  • Rnd 8: (5sc, inc)*6 (42)
  • Rnd 9-14: 42sc (6 rnds)
  • Rnd 15: 14 sc, dec, 1sc, 4dec, 1sc, dec, 14sc (36)
  • Rnd 16: (4sc, dec)*6 (30)

After we finish knitting the 16th row, we will fasten the legs!

From the MR we count 7 rows, insert the legs between the 7th and 8th rows. The distance between the fastening stitch of the legs in front is 18 sc (taking into account reductions, i.e. reduction counts as 1sc).

Next, we continue to knit the body to the end.

  • Rnd 17-19: 30sc (3 rows)
  • Rnd 20: (3sc, dec) * 6 (24)
  • Rnd 21-22: 24 sc (at the end of 22 rows we crochet + 3sc to shift the row)
  • Rnd 23: (2sc, dec) * 6 (18)
  • Rnd 24: 18sc.

Fasten the thread, cut off, hide.

Insert paws: Between the 19th and 20th rows we fasten the legs, the distance between them in front is 12sc (decrease as 1sc).

Head

  • Rnd 1: 6sc in MR
  • Rnd 2: 6inc (12)
  • Rnd 3: (1sc, inc)*6 (18)
  • Rnd 4: (2sc, inc)*6 (24)
  • Rnd 5: (3sc, inc)*6 (30)
  • Rnd 6: (4sc, inc)*6 (36)
  • Rnd 7: (5sc, inc)*6 (42)
  • Rnd 8: 42sc
  • Rnd 9: (6sc, inc)*6 (48)
  • Rnd 10-14: 48sc (5 rnds)
  • Rnd 15: 3sc, dec, (6sc, dec)*5, 3sc (42)
  • Rnd 16: (5sc, dec)*6 (36)
  • Rnd 17: 2sc, dec, (4sc, dec)*5, 2sc (30)
  • Rnd 18: (3sc, dec)*6 (24)
  • Rnd 19: 1sc, dec, (2sc, dec)*5, 1sc (18)

Muzzle

  • Rnd 1: We crochet a chain of 6 ch
  • Rnd 2: 4sc, 5sc in one loop, turn, 3sc, 3sc in one loop. Next, crochet in a circle.
  • Rnd 3: inc, 4sc, 4inc, 3sc, 3inc
  • Rnd 4: 1sc, inc, 4sc, (inc, 1sc)*4, 3sc, (inc, 1sc)*3
  • Rnd 5: inc, 4sc, inc, (2sc, inc)*4, 4sc, (inc, 2sc)*3
  • Rnd 6-7: 38sc

(Alize softy yarn is very difficult, especially when crocheted with it, so if you have 1 – 2 sc more, it’s not scary)

Making the Muzzle

  • Glue eyelashes to the eyes.
  • We insert the eyes between 9 and 10 rows, the distance between the eyes is 7sc.
  • We insert a nose into the muzzle, after we sew the muzzle.
  • We sew from the beginning of the 9th row to the end of the 16th.
  • We stuff the muzzle a little.
  • We make a tightening from the nose to the very bottom of the muzzle.

Ears (Make 2)

  • Rnd 1: 8 hdc in MR slst
  • Rnd 2: 8inc from hdc (16) slst
  • Rnd 3: (1hdc, inc)*8 (24)
  • Rnd 4: 24hdc
  • Rnd 5: (2hdc, inc)*8 (32)
  • Rnd 6-7: 32hdc
  • Rnd 8: 6hdc, dec, 14hdc, dec, 8hdc (30)
  • Rnd 9: 30hdc
  • Rnd 10: 6hdc, dec, 13hdc, dec, 7hdc (28)
  • Rnd 11: 28hdc
  • Rnd 12: 7hdc, dec, 12hdc, dec, 5hdc (26)
  • Rnd 13: 7hdc, dec,10hdc, dec, 5hdc (24)
  • Rnd 14: 6hdc, dec, 10hdc, dec, 4hdc (22)
  • Rnd 15: 22hdc + 2hdc to shift row
  • Rnd 16: 5hdc, dec, 9hdc, dec, 4hdc (20)
  • Rnd 17: 5hdc, dec, 8hdc, dec, 3hdc (18)
  • Rnd 18: 18hdc + 2hdc to shift row
  • Rnd 19: 3hdc, dec, 8hdc, dec, 3hdc (16)
  • Rnd 20: 3hdc, dec, 6hdc, dec, 3hdc (14)
  • Rnd 21: 3hdc, dec, 5hdc, dec, 2hdc (12)
  • Rnd 22: 3hdc, dec, 4hdc, dec, 1hdc (10) + 1 hdc for row shift
  • Rnd 23: 10 hdc

Cut the thread, fasten, hide.

Ears are ready!

Tail

  • Rnd 1: 6sc in MR
  • Rnd 2: 6inc (12)
  • Rnd 3: (1sc, inc)*6 (18)
  • Rnd 4-5: 18sc
  • Rnd 6: (1sc, dec)*6 (12)
  • Rnd 7: 6 dec

Cut the thread, fasten to hide.

Assembly

  • We sew the head to the body, then we sew the ears, and at the very least sew on a ponytail.

Amigurumi Crochet Cat Lily Free Pattern

by


Hello dear Amigurumi Followers

Today we share Amigurumi Crochet Cat Lily Free Pattern for you. As you know, we share new free amigurumi patterns every day. The main crochets are gazelle, amigurumi bear, pola, crochet panda, penguin, giraffe, llama, pig, bunny, clown, lamb, bee, crochet unicorn, amigurumi doll, fox, penguin, dinosaur, crochet elephant, hippo, monkey, crochet cat, crochet dog and more …

Today's daily new amigurumi free crochet pattern is Amigurumi Crochet Cat Lily.

I want to give you some information about this amigurumi free pattern: Crochet Cat Lily.

Necessary materials:

  • Yarn: YarnArt Jeans (05 and 65)
  • Filler: Holofiber
  • Hooks: 2mm for kitty and 2.5mm for dress
  • Eyes: Plastic 10 mm

Abbreviations:

  • MR – Magic ring
  • Ch – Chain
  • Sc – Single crochet
  • Inc – Increase
  • Dec – Decrease
  • Slst – Slip stitch
  • Dc – Double crochet
  • Hdc – Half double crochet
  • BLO – Back loop only
  • Tch – Turning chain stitch

Amigurumi Crochet Cat Lily Free Pattern:

Head

  • Rnd 1) 6sc in MR (6)
  • Rnd 2) (inc)Ñ…6 (12)
  • Rnd 3) (sc, inc)Ñ…6 (18)
  • Rnd 4) (2sc, inc)Ñ…6 (24)
  • Rnd 5) (3sc, inc)Ñ…6 (30)
  • Rnd 6) (4sc, inc)Ñ…6 (36)
  • Rnd 7) (5sc, inc)Ñ…6 (42)
  • Rnd 8) (6sc, inc)Ñ…6 (48)
  • Rnd 9) (7sc, inc)Ñ…6 (54)
  • Rnd 10-16) 54sc (7 rows)
  • Rnd 17) 11sc, (sc, inc)Ñ…6, 8sc, (inc, sc)Ñ…6, 11sc (66)
  • Rnd 18-20) 66sc (3 rows)
  • Rnd 21) 13sc, (sc, dec)Ñ…6, 6sc, (dec, sc)Ñ…6, 11sc (54)
  • Rnd 22) 54sc
  • Rnd 23) (7sc, dec)Ñ…6 (48)
  • Rnd 24) (6sc, dec)Ñ…6 (42)
  • Rnd 25) (5sc, dec)Ñ…6 (36)
  • Rnd 26) (4sc, dec)Ñ…6 (30)
  • Rnd 27) (3sc, dec)Ñ…6 (24)
  • Rnd 28) (4sc, dec)Ñ…4 (20)

Fasten the eyes between rows 15 and 16, between the increments on the cheeks.

Ears (Make 2)

  • Rnd 1) 6sc in MR (6)
  • Rnd 2) 6sc
  • Rnd 3) (inc)Ñ…6 (12)
  • Rnd 4) (sc, inc)Ñ…6 (18)
  • Rnd 5) (2sc, inc)Ñ…6 (24)
  • Rnd 6-9) 24sc

Fold in half and connect the two sides with 11 sc.

We have completed the amigurumi cat ears. Now let’s crochet the body part.

Body

  • Rnd 1) 6sc in MR (6)
  • Rnd 2) (inc)Ñ…6 (12)
  • Rnd 3) (sc, inc)Ñ…6 (18)
  • Rnd 4) (2sc, inc)Ñ…6 (24)
  • Rnd 5) (3sc, inc)Ñ…6 (30)
  • Rnd 6) (4sc, inc)Ñ…6 (36)
  • Rnd 7) (5sc, inc)Ñ…6 (42)
  • Rnd 8) (6sc, inc)Ñ…6 (48)
  • Rnd 9) (7sc, inc)Ñ…6 (54)
  • Rnd 10-19) 54sc (10 rows)
  • Rnd 20) (7sc, dec)Ñ…6 (48)
  • Rnd 21-22) 48sc (2 rows)
  • Rnd 23) (6sc, dec)Ñ…6 (42)
  • Rnd 24-25) 42sc (2 rows)
  • Rnd 26) (5sc, dec)Ñ…6 (36)
  • Rnd 27-28) 36sc (2 rows)
  • Rnd 29) (4sc, dec)Ñ…6 (30)
  • Rnd 30-31) 30sc (2 rows)
  • Rnd 32) (3sc, dec)Ñ…6 (24)
  • Rnd 33-34) 24sc (2 rows)
  • Rnd 35) (4sc, dec)Ñ…4 (20)
  • Rnd 36-37) 20sc (2 rows)

Fasten off the thread, cut it, leaving the tip for sewing.

Now, let’s crochet the arms and legs of the amigurumi toy.

Arms (Make 2)

  • Rnd 1) 6sc in MR (6)
  • Rnd 2) (inc)Ñ…6 (12)
  • Rnd 3) (2sc, inc)Ñ…4 (16)
  • Rnd 4-5) 16sc (2 rows)
  • Rnd 6) 14sc, dec (15)
  • Rnd 7) 13sc, dec (14)
  • Rnd 8) 12sc, dec (13)
  • Rnd 9) 11sc, dec (12)
  • Rnd 10-28) 12sc (19 rows)
  • Rnd 29) (dec)Ñ…6 (6)

Pull off the loops.

Sew between rows 5 and 6 from the neck.

Legs (Make 2)

We begin crocheting with yarn in the color of the shoes.

  • Chain of 7 ch.
  • Rnd 1) 5sc, 6sc in one loop, 5sc (16)
  • Rnd 2) 5sc, (inc)x6, 5sc (22)
  • Rnd 3) 3sc in one sc of the previous row, 4sc, (sc, inc)x6, 5sc (30)
  • Rnd 4) inc, sc, inc, 4sc, (2sc, inc) x6, 5sc (38)
  • Rnd 5) sc, inc, 2sc, inc, 33sc (40)
  • Rnd 6) 40sc for the BLO.
  • Rnd 7-9) (3 rows): 40 sc for both walls, crochet 2-3 more sc for symmetry.
  • Rnd 10) dec, 13sc, dec, (sc, dec) x4, 11sc (34), crochet 1 more sc for symmetry.
  • Change the yarn to the main color.
  • Rnd 11) 12sc, (dec)x5, 12sc (29)
  • Rnd 12) 9sc, (dec) x6, 8sc (23), insert the insole.
  • Rnd 13) 7sc, (dec)x5, 6sc (18)
  • Rnd 14-28) 18sc (15 rows)
  • Rnd 29) (4sc, dec)x3 (15)
  • Rnd 30) (3sc, dec)x3 (12)
  • Rnd 31) (dec)x6 (6)

We tighten the hole with a needle.

Tie the sole with slst.

Let’s crochet an amigurumi cat dress

  • Make 31ch.
  • Rnd 1) 30 sc
  • Rnd 2) 3 Tch, 3dc, 2dc in one loop, 2ch, 2dc in one loop, 3dc, 2dc in one loop, 2ch, 2dc in one loop, 8dc, 2dc in one loop, 2ch, 2dc in one loop, 3dc, 2dc in one loop, 2ch, 2dc in one loop, 3dc, 1dc (raglan – in the arch: 2dc, 2ch, 2dc).
  • Rnd 3) 6 dc-raglan-7 dc-raglan-12 dc-raglan-7 dc-raglan-6 dc
  • Rnd 4) 9 dc-3 ch-18 dc-3 ch-9 dc (joint sleeves) (42)
  • Rnd 5) 42 dc
  • Rnd 6) 3 Tch, * (ch, skip 1 loop, dc) * 21 times
  • Rnd 7) 3 Tch, in arch ticks: (dc, ch, dc)*21 times, dc
  • Rnd 8) 3 Tch, ticks: 1, inc, *(2,inc)*6 times, 1, dc
  • Rnd 9-10) 3 Tch, 28 ticks, dc to 3 ch
  • Rnd 11) 3 Tch, ticks: 5 dc, inc, 5 dc, inc, 4 dc, inc, 5 dc, inc, 5 dc, dc
  • Rnd 12-16) 3 Tch, 32 ticks, dc in 3rd ch.

Search results forAmigurumi Crochet Dog Free Pattern

by


Hello dear Amigurumi Followers

Today we share Amigurumi Crochet Dog Free Pattern for you. As you know, we share new free amigurumi patterns every day. The main crochets are gazelle, amigurumi bear, pola, crochet panda, penguin, giraffe, llama, pig, bunny, clown, lamb, bee, crochet unicorn, amigurumi doll, fox, penguin, dinosaur, crochet elephant, hippo, monkey, crochet cat, crochet dog and more …

Today's daily new amigurumi free crochet pattern is Amigurumi Crochet Dog.

I want to give you some information about this amigurumi free pattern; Crochet Dog.

You will need:

  • Troickaya Kroha yarn (20% wool, 80% acrylic, 50 g/135 m)
  • 2.00 mm crochet hook
  • 10 mm safety eyes
  • Yarn needle and scissors
  • Fiberfill

Height: 27 cm (10.6”)

Abbreviations:

  • R – row
  • ch – chain
  • sc – single crochet
  • inc – increase (2 sc in one stitch)
  • dec – decrease (2 sc together)
  • [ ] – number of stitches you should have at the end of the row
  • ( ) – repeat whatever is between the brackets the given number of times

Amigurumi Crochet Dog Free Pattern:

Body

R 1: 6 sc in magic ring [6]

R 2: (inc) repeat 6 times [12]

R 3: (1 sc, inc) repeat 6 times [18]

R 4: (2 sc, inc) repeat 6 times [24]

R 5: (3 sc, inc) repeat 6 times [30]

R 6: (4 sc, inc) repeat 6 times [36]

R 7: (5 sc, inc) repeat 6 times [42]

R 8-13: 42 sc (6 rows)

R 14: (12 sc, dec) repeat 3 times [39]

R 15-17: 39 sc (3 rows)

R 18: (11 sc, dec) repeat 3 times [36]

R 19-20: 36 sc (2 rows)

R 21: (4 sc, dec) repeat 6 times [30]

R 22-23: 30 sc (2 rows)

R 24: (3 sc, dec) repeat 6 times [24]

R 25: 24 sc

Fasten off and leave a long tail for sewing.

Head

R 1: 6 sc in magic ring [6]

R 2: (inc) repeat 6 times [12]

R 3: (1 sc, inc) repeat 6 times [18]

R 4: (2 sc, inc) repeat 6 times [24]

R 5: (3 sc, inc) repeat 6 times [30]

R 6: (4 sc, inc) repeat 6 times [36]

R 7: (5 sc, inc) repeat 6 times [42]

R 8-10: 42 sc (3 rows)

R 11: (13 sc, inc) repeat 3 times [45]

R 12-13: 45 sc (2 rows)

R 14: (14 sc, inc) repeat 3 times [48]

R 15-16: 48 sc (2 rows)

R 17: (15 sc, inc) repeat 3 times [51]

R 18: (16 sc, inc) repeat 3 times [54]

R 19: (8 sc, inc) repeat 6 times [60]

R 20: (9 sc, inc) repeat 6 times [66]

R 21-23: 66 sc (3 rows)

R 24: (9 sc, dec) repeat 6 times [60]

R 25: (8 sc, dec) repeat 6 times [54]

R 26: (7 sc, dec) repeat 6 times [48]

R 27: (6 sc, dec) repeat 6 times [42]

R 28: (5 sc, dec) repeat 6 times [36]

R 29: (4 sc, dec) repeat 6 times [30]

R 30: (3 sc, dec) repeat 6 times [24]

Fasten off.

Nose (brown)

R 1: 6 sc in magic ring [6]

R 2: (inc) repeat 6 times [12]

R 3: (inc) repeat 3 times, 3 sc, (inc) repeat 3 times, 3 sc [18]

R 4: 18 sc

R 5: (1 sc, dec) repeat 2 times, 6 sc, (dec, 1 sc) repeat 2 times [14]

Fasten off and leave a long tail for sewing.

Sew the nose between R 18 and R 23.

Nose (grey)

Make 5 ch.

R 1: from the 2nd ch from hook: inc, 2 sc, 3 sc in last st, on the other side: 3 sc [10]

R 2: 2 inc, 2 sc, 3 inc, 2 sc, inc [16]

R 3: (1 sc, inc) repeat 2 times, 3 sc, (inc, 1 sc) repeat 2 times, inc, 3 sc, inc [22]

R 4-5: 22 sc (2 rows)

Fasten off and leave a long tail for sewing.

Sew the nose between R 18 and R 25.

Ears (make 2)

R 1: 6 sc in magic ring [6]

R 2: (inc) repeat 6 times [12]

R 3: (1 sc, inc) repeat 6 times [18]

R 4: (2 sc, inc) repeat 6 times [24]

R 5: (3 sc, inc) repeat 6 times [30]

R 6: 30 sc

R 7: (4 sc, inc) repeat 6 times [36]

R 8-11: 36 sc (4 rows)

R 12: (4 sc, dec) repeat 6 times [30]

R 13-14: 30 sc (2 rows)

R 15: (3 sc, dec) repeat 6 times [24]

R 16-17: 24 sc (2 rows)

R 18: (2 sc, dec) repeat 6 times [18]

R 19-20: 18 sc (2 rows)

R 21: (4 sc, dec) repeat 3 times [15]

R 22-23: 15 sc (2 rows)

R 24: (3 sc, dec) repeat 3 times [12]

R 25-26: 12 sc (2 rows)

Fasten off and leave a long tail for sewing.

Arms (make 2)

R 1: 6 sc in magic ring [6]

R 2: (inc) repeat 6 times [12]

R 3: (1 sc, inc) repeat 3 times, 6 sc [15]

R 4-6: 15 sc (3 rows)

R 7: (1 sc, dec) repeat 3 times, 6 sc [12]

R 8-21: 12 sc (14 rows)

Stuff the bottom part of the arm.

R 22: (dec) repeat 6 times [6]

Fasten off and leave a long tail for sewing.

Eye Spot

With 1.5 mm crochet hook:

Make 4 ch.

R 1: from the 2nd ch from hook: 2 sc, 3 sc in last st, on the other side: 2 sc, 2 sc in 1st st [9]

R 2: inc, 2 sc, 3 sc in next st, 4 sc, inc [13]

R 3: 2 inc, 4 sc, 3 inc, 4 sc, inc [18]

R 4: 2 inc, 5 sc, 3 inc, 5 sc, inc [23]

Fasten off and leave a long tail for sewing.

Sew the eye spot to the head between R 18 and R 25.

AMIGURUMI AWESOME BUNNY FREE PATTERN

by


If you enjoy making amigurumi, here I share this easy and free amigurumi pattern for you. Your kids will love these toys.

Materials:

  • Yarn: Lira Vita Cotton (60% cotton, 40% acrylic, 150 m/50 g)
  • Hook size: 1.4 mm
  • Black yarn for embroidering nose and eyebrows
  • Pink yarn for embroidering cheeks
  • 10 mm safety eyes
  • Sewing needle and scissors
  • Fiberfill

Abbreviations:

  • R: Row
  • mc: Magic Circle (Magic Ring)
  • ch: Chain
  • sc: Single Crochet
  • inc: 2 sc in the next stitch
  • dec: Single crochet 2 stitches together
  • F.o.: Fasten off
  • (12): Number of stitches at the end of the row
  • ( )* 6: Repeat whatever is inside the parentheses the number of times stated

Arms (Make 2)

  • R 1: 6 sc in mc (6)
  • R 2: (1 sc, inc) * 3 (9)
  • R 3-12: 9 sc (10 rows)
  • Stuff gently with fiberfill.
  • Fold top of arm flat and crochet 4 sc through both sides across.
  • F.o.

Ears (Make 2)

  • R 1: 6 sc in mc (6)
  • R 2: (inc) * 6 (12)
  • R 3: (1 sc, inc) * 6 (18)
  • R 4-7: 18 sc (4 rows)
  • R 8: (1 sc, dec) * 6 (12)
  • R 9-13: 12 sc (5 rows)
  • Don’t stuff with fiberfill.
  • Fold top of ear flat and crochet 6 sc through both sides across.
  • F.o. and leave a long tail for sewing.

Legs, Body, and Head (Crocheted as a single part)

Legs (Make 2)

  • R 1: 6 sc in mc (6)
  • R 2: (1 sc, inc) * 3 (9)
  • R 3: (2 sc, inc) * 3 (12)
  • R 4-5: 12 sc (2 rows)
  • R 6: (3 sc, inc) * 3 (15)
  • R 7-8: 15 sc (2 rows)
  • F.o.
  • Don’t cut the yarn when you finish the second leg!

From the second leg: 3 ch, join with the first leg.

Continue crocheting the body in the round:

  • R 9: 15 sc on the first leg, 3 sc in 3 ch, 15 sc on the second leg, 3 sc in 3 ch (opposite side) (36)
  • R 10-12: 36 sc (3 rows)
  • R 13: (5 sc, inc) * 6 (42)
  • R 14-16: 42 sc (3 rows)
  • R 17: (5 sc, dec) * 6 (36)
  • R 18: 36 sc
  • R 19: (4 sc, dec) * 6 (30)
  • R 20: 30 sc
  • R 21: (3 sc, dec) * 6 (24)
  • R 22: 24 sc
  • R 23: (2 sc, dec) * 6 (18)
  • Continue crocheting some sc. The R 24 should begin in the middle of the body.
  • R 24: 3 sc, 4 sc together with sc of the 1st arm, 5 sc, 4 sc together with sc of the 2nd arm, 2 sc (18)
  • R 25: 18 sc
  • R 26: (inc) * 18 (36)
  • R 27: (5 sc, inc) * 6 (42)
  • R 28: (6 sc, inc) * 6 (48)
  • R 29: (7 sc, inc) * 6 (54)
  • R 30: (8 sc, inc) * 6 (60)
  • R 31-42: 60 sc (12 rows)
  • Insert safety eyes between R 36 and R 37, about 3-4 stitches apart.
  • R 43: (8 sc, dec) * 6 (54)
  • R 44: (7 sc, dec) * 6 (48)
  • R 45: (6 sc, dec) * 6 (42)
  • R 46: (5 sc, dec) * 6 (36)
  • R 47: (4 sc, dec) * 6 (30)
  • R 48: (3 sc, dec) * 6 (24)
  • R 49: (2 sc, dec) * 6 (18)
  • R 50: (1 sc, dec) * 6 (12)
  • R 51: (dec) * 6 (6)
  • F.o.

Embroider a nose and eyebrows with black yarn. Embroider cheeks with pink yarn. Sew the ears to the head.

Search results forFREE AMIGURUMI CROCHET BUNNY FROM PLUSH YARN

by


Materials

  • Hook size: Recommended for yarn Himalaya Dolphin Baby or YarnArt Dolce
  • Yarn consumption: Approximately 1.5 skeins, using two colors
  • Safety eyes
  • Plastic joints for toy movement (for legs)
  • Fiberfill for stuffing

Abbreviations

  • sc: Single Crochet
  • inc: Increase
  • dec: Decrease
  • tr: Triple Crochet/Treble Crochet
  • st: Stitch
  • dc: Double Crochet
  • hdc: Half Double Crochet
  • sl-st: Slip Stitch
  • ch: Chain
  • ..in: Make increase into the same stitch (e.g., 3inc, 4inc...)
  • FLO: Crochet into front loops only
  • BLO: Crochet into back loops only
  • BL: Bobble Stitch – do 5 dc in the same stitch and then yarn over and pull through all loops on the hook.

Hands (Make 2)

  • R 1: 6 sc in MR (6)
  • R 2: (sc, inc) x 3 (9)
  • R 3-5: 9 sc (3 rows)
  • R 6: dec, 7 sc (8)
  • R 7: 8 sc
  • R 8: dec, 6 sc (7)
  • R 9-10: 7 sc (2 rows)
  • R 11: dec, 5 sc (6)

Legs (Make 2)

  • R 1: 5 ch, in the 2nd from the hook, 3 sc, in the last ch 3 sc, then on the other side, 2 sc, inc (10)
  • R 2: inc, 2 sc, (inc) x 3, 2 sc, (inc) x 2 (16)
  • R 3: sc, inc, 2 sc, (sc, inc) x 3, 2 sc, (sc, inc) x 2 (22)
  • R 4: Behind the back wall 22 sc
  • R 5: 22 sc
  • R 6: sc, dec, 3 sc, (dec) x 4, 4 sc, dec, 2 sc (16)
  • R 7: 4 sc, (dec) x 3, 4 sc, dec (12)
  • R 8-14: 12 sc (7 rows)
  • R 15: (dec) x 6 (6)
  • Pull off.

Body

  • R 1: 6 sc in MR (6)
  • R 2: (inc) x 6 (12)
  • R 3: (sc, inc) x 6 (18)
  • R 4: (2 sc, inc) x 6 (24)
  • R 5: (3 sc, inc) x 6 (30)
  • R 6: 11 sc, (sc, inc) x 4, 11 sc (34)
  • R 7-9: 34 sc (3 rows)
  • If the legs are on the joints, insert them into the body between the 6th and 7th rows.
  • + 2 sc for offset
  • R 10: 11 sc, (sc, dec) x 4, 11 sc (30)
  • R 11-13: 30 sc (3 rows)
  • + 1 sc for offset
  • R 14: (3 sc, dec) x 6 (24)
  • R 15: 24 sc
  • R 16: (2 sc, dec) x 6 (18)
  • + 1 sc for offset
  • R 17: 18 sc (We knit hands)
  • R 18: (sc, dec) x 6 (12)

Head

Continue with the same thread.

  • R 19: (inc) x 12 (24)
  • R 20: (sc, inc) x 12 (36)
  • + 2 sc for offset
  • R 21: (5 sc, inc) x 6 (42)
  • R 22: (6 sc, inc) x 6 (48)
  • R 23-28: 48 sc (6 rows)
  • R 29: (6 sc, dec) x 6 (42)
  • Insert safety eyes between rows 28 and 29.
  • R 30-31: 42 sc (2 rows)
  • + 1 sc for offset
  • R 32: (5 sc, dec) x 6 (36)
  • R 33: (4 sc, dec) x 6 (30)
  • Stuff the head.
  • R 34: (3 sc, dec) x 6 (24)
  • R 35: (2 sc, dec) x 6 (18)
  • R 36: (sc, dec) x 6 (12)
  • R 37: (dec) x 6 (6)
  • Pull off.

Muzzle

  • R 1: 6 ch, in the 2nd from the hook, inc, 3 sc, in the last ch 3 sc, on the other side 4 sc (12)
  • R 2: sc, inc, 3 sc, inc, sc, inc, 3 sc, inc (16)

Tail

  • R 1: 6 sc in MR (6)
  • R 2: 6 sc

Ears

Switch to a larger hook size. Alternate working through the front and back walls of the stitches.

  • R 1: 6 sc in MR (6)
  • R 2: (inc) x 6 (12)
  • R 3: (sc, inc) x 6 (18)
  • R 4: (2 sc, inc) x 6 (24)
  • R 5: (3 sc, inc) x 6 (30)
  • R 6-10: 30 sc (5 rows)
  • + 2 sc for offset
  • R 11: (3 sc, dec) x 6 (24)
  • R 12-13: 24 sc
  • + 1 sc for offset
  • R 14: (2 sc, dec) x 6 (18)
  • R 15: 18 sc
  • R 16: (sc, dec) x 6 (12)
  • R 17: (dec) x 6
  • Pull off.

Sew the tail to the back, the muzzle under the eyes, and the ears to the head.

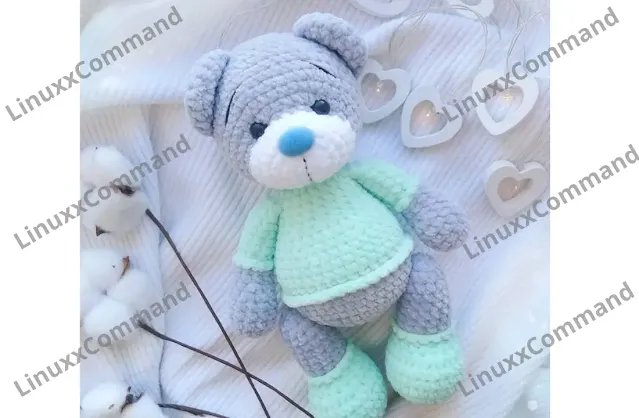
SEARCH RESULTSFOR CROCHET AMIGURUMI TEDDY BEAR FREE PATTERN

by


Materials:

  • Yarn: Himalaya Dolphin Baby (or Alize Softy in two threads)
  • Hook size: 3.5 mm or 4.0 mm
  • Safety eyes and nose
  • Thin thread in the tone of yarn for sewing
  • Sewing needle and scissors
  • Fiberfill

Abbreviations:

  • R = row
  • ch = chain
  • st = stitch
  • sc = single crochet
  • inc = 2 sc in the next stitch
  • dec = single crochet 2 stitches together
  • (12) = number of stitches you should have at the end of the round/row
  • (…)*6 = repeat whatever is between the brackets the number of times stated

Head

R 1: 2 ch, 6 sc on the 2nd ch (6)

R 2: (inc)*6 (12)

R 3: (1 sc, inc)*6 (18)

R 4: (2 sc, inc)*6 (24)

R 5: (3 sc, inc)*6 (30)

R 6: (4 sc, inc)*6 (36)

R 7: (5 sc, inc)*6 (42)

R 8-12: 42 sc (5 rows)

R 13: (5 sc, dec)*6 (36)

R 14: (4 sc, dec)*6 (30)

R 15: (3 sc, dec)*6 (24)

R 16: (2 sc, dec)*6 (18)

R 17: (4 sc, dec)*3 (15)

F.o.

Body

R 1: 2 ch, 6 sc on the 2nd ch (6)

R 2: (inc)*6 (12)

R 3: (1 sc, inc)*6 (18)

R 4: (2 sc, inc)*6 (24)

R 5: (3 sc, inc)*6 (30)

R 6: (4 sc, inc)*6 (36)

R 7: 36 sc

Change to sweater’s color:

R 8-9: 36 sc (3 rows)

R 10: (4 sc, dec)*6 (30)

R 11-12: 30 sc (2 rows)

R 13: (3 sc, dec)*6 (24)

R 14-15: 24 sc (2 rows)

R 16: (2 sc, dec)*6 (18)

R 17-18: 18 sc (2 rows)

R 19: (4 sc, dec)*3 (15)

F.o.

Arms (make 2)

R 1: 2 ch, 6 sc on the 2nd ch (6)

R 2: (inc)*6 (12)

R 3: (1 sc, inc)*6 (18)

R 4: 18 sc

R 5: (1 sc, dec)*6 (12)

R 6: 12 sc

Change to sweater’s color:

R 7-9: 12 sc (3 rows)

R 10: 10 sc, dec (11)

R 11: 11 sc

R 12: 9 sc, dec (10)

R 13: 10 sc

Fold top of arm flat and 5 sc through both sides across.

F.o.

Ears (make 2)

R 1: 2 ch, 6 sc on the 2nd ch (6)

R 2: (inc)*6 (12)

R 3: (1 sc, inc)*3, 6 sc (15)

F.o.

Muzzle

R 1: 2 ch, 6 sc on the 2nd ch (6)

R 2: (inc)*6 (12)

R 3: (1 sc, inc)*6 (18)

R 4: 18 sc

F.o.

Legs (make 2)

Make 5 ch.

Make an oval, work on both sides of the chain.

R 1: From the 2nd ch from hook: inc, 2 sc, 3 sc in last st, on the opposite side of the chain: 3 sc (10)

R 2: (3 inc, 2 sc)*2 (16)

R 3: (inc, 1 sc)*3, 2 sc, (inc, 1 sc)*3, 2 sc (22)

R 4-5: 22 sc (2 rows)

R 6: 3 dec, 2 sc, (dec, 1 sc)*3, 5 sc (16)

R 7: 2 dec, 2 sc, (dec, 1 sc)*2, 4 sc (12)

R 8-12: 12 sc (5 rows)

R 13: dec, 10 sc (11)

R 14: 11 sc

R 15: dec, 9 sc (9)

Make 2 sc, fold top of leg flat and 5 sc through both sides across.

F.o.

Little plush teddy bear amigurumi

by


These little plush teddy bears amigurumi are just about 12 cm (4.7″) tall. The perfect size for little hands! The legs, body and head of the crochet bear are made as one piece and sewing is a breeze. Have to try this free amigurumi pattern!

Designed and photos by @agafonova_toys_34
Translated by Amiguroom Toys

Materials:

  • Yarn: Himalaya Dolphin Baby: main color (1/4 skein), color for skirt (a little yarn)
  • 4.0 mm crochet hook
  • Safety eyes
  • Black embroidery thread or fine yarn
  • Sewing needle and scissors
  • Fiberfill

Abbreviations:

  • R = row
  • mc = magic circle
  • ch = chain
  • st = stitch
  • sl st = slip stitch
  • sc = single crochet
  • inc = 2 sc in the next stitch
  • dec = single crochet 2 stitches together
  • BLO = back loop only
  • FLO = front loop only
  • F.o. = finish off
  • ( ) = number of stitches you should have at the end of the round/row
  • ( ) * 6 = repeat whatever is between the brackets the number of times stated

Free crochet plush teddy bear pattern

Legs-body-head

Legs (make 2)

R 1: 6 sc in mc (6)

R 2: (1 sc, inc) * 3 (9)

R 3: 9 sc

R 4: 9 sc, sl st

F.o.

Don’t cut the yarn when you finish the second leg!

Body-head

From the second leg: 3 ch, join with the first leg.

R 5: 9 sc on the 1st leg, 3 sc in 3 ch, 9 sc on the 2nd leg, 3 sc in 3 ch (opposite side) (24)

R 6-7: 24 sc (2 rows)

R 8: BLO 24 sc

R 9: 24 sc

R 10: (2 sc, dec) * 6 (18)

R 11: 18 sc

R 12: (1 sc, dec) * 6 (12)

Stuff with fiberfill.

Continue crocheting the head:

R 13: (inc) * 12 (24)

R 14: (3 sc, inc) * 6 (30)

R 15-17: 30 sc (3 rows)

R 18: (3 sc, dec) * 6 (24)

Insert safety eyes between R 17 and R 18.

R 19: (2 sc, dec) * 6 (18)

Stuff with fiberfill.

R 20: (1 sc, dec) * 6 (12)

R 21: (dec) * 6 (6)

F.o.

Arms (make 2)

R 1: 6 sc in mc (6)

R 2-5: 6 sc (4 rows)

Fold top of arm flat and 3 sc through both sides across.

F.o. and leave a yarn tail about 15 cm long.

Ears (make 2)

R 1: 6 sc in mc (6)

R 2: (inc) * 6 (12)

F.o. and leave a yarn tail about 15 cm long.

Tail

R 1: 6 sc in mc (6)

R 2: (1 sc, inc) * 3 (9)

R 3: (1 sc, dec) * 3 (6)

F.o. and leave a yarn tail about 15 cm long.

Skirt

Join yarn to the front loop of 1st st on R 8 of the body.

R 1: FLO (3 ch, 1 sc, 3 ch, 1 sc) – repeat to the end of row

F.o.

Bow

Make 2 ch.

In the 2nd chain from hook: 2 ch, 2 dc, 2 ch, sl st, 2 ch, 2 dc, 2 ch, sl st

F.o. and leave a yarn tail about 25-30 cm long.

Wrap the middle of the bow with yarn a couple of times and sew to the head.

Assembly

  • Sew the arms, ears, and tail to the body.
  • Embroider a nose and eyebrows using embroidery thread or fine yarn.

Crochet Chicken Reese Amigurumi Free Patterns PDF

by


Hello friends, today I shared the crochet chicken amigurumi pattern for you. You can give the amigurumi toy, which is suitable for the spring season, as a gift to children. You can make more creative amigurumi chicken crochet using different colors of yarn. Since it is in the category of farm animals, this free amigurumi patterns toy will be educational for children.

We will crochet all the parts separately. Let’s sew the completed parts into place on the body part. You can crochet the collar and comb of the free amigurumi crochet chicken pattern using different color yarns. Thank you to the creator of the amigurumi toy. Follow me to see the latest amigurumi crochet patterns.

Crochet Chicken Reese Amigurumi Free Patterns PDF

Designer: les.mailles.du.rocher

Materials

  • Cotton ricorumi (white, yellow, red)
  • Crochet hook: 3mm
  • Yarn needle
  • Fiberfill for stuffing
  • Safety eyes 6mm
  • Stitch marker
  • Scissors

Abbreviation

  • Rnd - round
  • MR - magic ring
  • ch - chain
  • st - stitch
  • slst - Slip Stitch
  • sc - single crochet
  • inc - increase
  • dec - decrease
  • FLO - Front loop only
  • BLO - Back loop only
  • hdc - half double crochet
  • dc - double crochet
  • (*) - repeat till the end of round
  • ([]) - total number of stitches in the round

Head & Body

In white

Rnd 1: MR, 6sc [6]

Rnd 2: (inc)* [12]

Rnd 3: (1sc, inc)* [18]

Rnd 4: 18sc [18]

Rnd 5: (2sc, inc)* [24]

Rnd 6: 24sc [24]

Rnd 7: (3sc, inc)* [30]

Rnd 8: (2sc, inc, 2sc)* [36]

Rnd 9: (5sc, inc)* [42]

Rnd 10-13: 42sc [42]

Rnd 14: (5sc, dec)* [36]

Rnd 15: (4sc, dec)* [30]

Rnd 16: (3sc, dec)* [24]

Insert the safety eyes between rounds 9 & 10 approx 5 stitches apart.

Rnd 17: (2sc, dec)* [18]

Stuff firmly the head.

Rnd 18: (1sc, inc, 1sc)* [24]

Rnd 19: (1sc, inc)* [36]

Rnd 20: (5sc, inc)* [42]

Rnd 21: (3sc, inc, 3sc)* [48]

Rnd 22-29: 48sc [48]

Rnd 30: BLO- (dec)* [24]

Rnd 31: (dec)* [12]

Rnd 32: (dec)* [6]

Fasten off.

Beak

In yellow

Rnd 1: MR, 4sc [4]

Rnd 2: (1sc, inc)* [6]

Rnd 3: (1sc, inc)* [9]

Rnd 4: 9sc [9], 1 slst

Fasten off, leaving a tail for sewing.

Collar

In red. Make a chain 32 and crochet:

[1sc, 1 slst, 1sc, in next same stitch: (hdc, dc, ch 2, crochet 1 slst in 2nd ch, dc, hdc)]* repeat till the end of the chain, fasten off and join around the neck.

Feet (x2)

In yellow

Rnd 1: MR, 4sc [4]

Rnd 2: (1sc, inc)* [6]

Rnd 3: (1sc, inc)* [9]

Rnd 4-5: 9sc [9]

Flatten the foot, crochet through both sides.

Rnd 6: (1sc, ch 2, 1sc in same stitch) x 3, 1 slst.

Fasten off.

Wings (x2)

In white. Make 2 parts as follows:

Rnd 1: MR, 6sc [6]

Rnd 2: 6sc [6]

Fasten off 1st part, but don’t cut the 2nd.

Rnd 3: After round 2 of 2nd part, continue crocheting 3sc, then join to the 1st part with 1sc, continue 5sc all around, then 3sc on the other side of 2nd part [12]

Rnd 4: 12sc [12]

Rnd 5: (4sc, dec)* [10]

Fasten off, leaving a tail for sewing.

Comb

In red. Make 3 parts as follow:

Rnd 1: MR, 6sc [6]

Rnd 2-3: 6sc [6]

Fasten off 1st and 2nd parts, but don’t cut the 3rd part, they will be joined together:

After round 3 of 3rd part, join to the 2nd part with 1sc, continue 2sc.

Join to the 1st part with 1sc, continue 5sc all around, then 3sc on the other side of 2nd part, and 3sc on the other side of 3rd part.

Fasten off, leaving a tail to sew to the head.

Free Crochet Patchy Teddy Bear Pattern

by


Free Crochet Teddy Bear Pattern

Do you want to make a patchwork crochet teddy bear? The answer is yes, but if you don’t know how, follow the free crochet teddy bear pattern instruction step by step and learn how to do it. The size of the completed teddy bear will be 21 cm. If your yarn selection and crochet hook size vary, the size of the crochet teddy bear may also vary. Our designer used a 2 mm hook when embroidering this teddy bear. All parts of the crochet teddy bear are made separately, and at the last stage, they are all fixed together. The pattern is beginner level. Additionally, after completing your teddy bear, you can decorate it with a scarf or other accessories. Stay tuned for more crochet animal amigurumi patterns!

Designer: evgeniya_pokhabova_toys

Body:

  • 1. 6 in MR
  • 2. inc*6=12sc
  • 3. sc, inc*6=18sc
  • 4. 2sc, inc*6=24sc
  • 5. 3sc, inc*6=30sc
  • 6. 4sc, inc*6=36sc
  • 7. 5sc, inc*6=42sc
  • 8. 6sc, inc*6=48sc
  • 9. 7sc, inc*6=54sc
  • 10. 8sc, inc*6=60sc
  • 11-18. 60sc (8 rows)
  • 19. (3sc, dec) *6, 30sc = 54sc
  • 20. 54sc
  • 21. 7sc, dec*6 = 48sc
  • 22. 48sc
  • 23. 6sc, dec*6 = 42sc
  • 24-25. 42sc
  • 26. 5sc, dec*6 = 36sc
  • 27-28. 36sc
  • 29. 4sc, dec*6 = 30sc
  • 30-31. 30sc
  • 32. 3sc, dec*6 = 24sc
  • Finish.

Head:

Main color.

  • 1. 6 in MR
  • 2. inc*6 = 12sc
  • 3. sc, inc*6 = 18sc
  • 4. 2sc, inc*6 = 24sc
  • 5. 3sc, inc*6 = 30sc
  • 6. 4sc, inc*6 = 36sc
  • 7. 5sc, inc*6 = 42sc
  • 8. 6sc, inc*6 = 48sc
  • 9. 48sc
  • 10. 7sc, inc*6 = 54sc
  • 11. 8sc, inc*6 = 60sc
  • 12. 60sc
  • 13. 9sc, inc*6 = 66sc
  • 14. 10sc, inc*6 = 72sc
  • 15-22. 72sc (8 rows)
  • 23. 10sc, dec*6 = 66sc
  • 24. 9sc, dec*6 = 60sc
  • 25. 8sc, dec*6 = 54sc
  • 26. 7sc, dec*6 = 48sc
  • 27. 6sc, dec*6 = 42sc
  • 28. 5sc, dec*6 = 36sc
  • 29. 4sc, dec*6 = 30sc
  • 30. 3sc, dec*6 = 24sc
  • Finish, leave thread for sewing.

Muzzle:

Main color.

  • 1. 6 in MR
  • 2. (4sc in one loop, 2sc) *2 = 12sc
  • 3. sc, inc*3, 3sc, inc*3, 2sc = 18sc
  • 4. 2sc, inc*3, 6sc, inc*3, 4sc = 24sc
  • 5. 3sc, (inc, sc) *3, 6sc, (inc, sc) *3, 3sc = 30sc
  • 6-7. 30sc
  • Finish, leave the thread for sewing.
  • Sew between rows 20 and 29.

Nose:

Use iris yarn (black color) and a 1.25 mm hook.

  • 1. 6 in MR
  • 2. (4sc in one loop) *2 = 12sc
  • 3. sc, inc*3, 3sc, inc*3, 2sc = 18sc
  • 4-5. 18sc
  • 6. (sc, dec) *6 = 12sc
  • Finish, leave the thread for sewing.

Ears:

Main color.

  • 1. 6 in MR
  • 2. inc*6 = 12sc
  • 3. (sc, inc) *6 = 18sc
  • 4. (2sc, inc) *6 = 24sc
  • 5. (3sc, inc) *6 = 30sc
  • 6-8. 30sc
  • 9. (3sc, dec) *6 = 24sc
  • Finish, leave the thread for sewing.

Legs:

Start with a contrasting color.

  • 1. 6 in MR
  • 2. (4sc in one loop, 2sc) *2 = 12sc
  • 3. sc, inc*3, 3sc, inc*3, 2sc = 18sc
  • 4. 2sc, inc*3, 6sc, inc*3, 4sc = 24sc
  • 5. 3sc, (inc, sc) *3, 6sc, (inc, sc) *3, 3sc = 30sc
  • 6. 4sc, (sc, inc) *3, 9sc, (sc, inc) *3, 5sc = 36sc
  • 7. 6sc, (inc, 2sc) *3, 9sc, (inc, 2sc) *3, 3sc = 42sc
  • 8-12. 42sc (5 rows)
  • 13. (12sc, dec) *3 = 39sc
  • 14. (11sc, dec) *3 = 36sc
  • 15. 36sc
  • 16. 4sc, (sc, dec) *4, 20sc = 32sc
  • 17. 4sc, (sc, dec) *2, 22sc = 30sc
  • 18. 30sc
  • 19. (3sc, dec) *6 = 24sc
  • 20. 24sc
  • 21. (2sc, dec) *6 = 18sc
  • 22. 18sc
  • 23-24. 18sc
  • 25. (sc, dec) *6 = 12sc
  • 26. 12sc
  • 27. dec*6
  • Finish, tighten the loops, hide the thread.
  • We do not stuff the upper part tightly.
  • Embroider stitches on the heels.
  • Sew between rows 11 and 12.

Arms:

Main color.

  • 1. 6 in MR
  • 2. inc*6 = 12sc
  • 3. sc, inc*6 = 18sc
  • 4. 2sc, inc*6 = 24sc
  • 5. 3sc, inc*6 = 30sc
  • 6-8. 30sc
  • 9. 8sc, dec*3 = 27sc
  • 10. 7sc, dec*3 = 24sc
  • 11. 9sc, dec*3, 9sc = 21sc
  • 12-14. 21sc
  • 15. (5sc, dec) *3 = 18sc
  • 16-21. 18sc (6 rows)
  • 22. (sc, dec) *6 = 12sc
  • 23. 12sc
  • 24. dec*6
  • Finish, tighten the loops, hide the thread.
  • Sew between rows 5 and 6.

Tail:

Main color.

  • 1. 6 in MR
  • 2. inc*6 = 12sc
  • 3. (sc, inc) *6 = 18sc
  • 4-5. 18sc
  • 6. (sc, dec) *6 = 12sc
  • Leave the thread for sewing.

Patches:

Contrasting yarn color

  • Large patch:
    1. 7 ch, in the second loop we knit 6 sc, ch, turn
    2-5. 6sc, leave thread for sewing.
  • Small patch:
    1. 6 ch, from the second loop we knit 5 sc, ch, turn
    2-5. 5sc, leave thread for sewing.

Assembly:

Now it’s time to sew all the parts together. Attach the head to the body, and then sew the arms, legs, ears, and tail in place. Add the muzzle and nose to complete your teddy bear’s face.

Once everything is sewn together, your adorable patchwork teddy bear is ready to be enjoyed! You can add a scarf, a hat, or any other accessories to make it even more special. Happy crocheting!

Free Sunflower Crochet Turtle Pattern

by


Free Sunflower Crochet Turtle Pattern

Greetings! We continue with the second beautiful amigurumi pattern of the day. The free crochet turtle pattern is here! Made with plush yarn, this adorable turtle will have a soft and cuddly texture. You can create different versions of this turtle by crocheting either a daisy or sunflower shell. The pattern is beginner-friendly, so even if you're new to amigurumi, you can easily follow along! Use any color plush yarn to bring your turtle to life — your imagination is the limit. Follow the step-by-step instructions below to create this lovely toy, and I'm sure kids will love it!

Designer: blue.beena

Terms and Abbreviations:

  • MR: Magic ring
  • Sc: Single crochet
  • Inc: Increase
  • Dec: Decrease
  • FLO: Front loop only
  • BLO: Back loop only
  • Ch: Chain
  • Dc: Double crochet
  • Ps: Picot stitch (ch 2, slst in second stitch from hook)

Head:

Using body colour yarn.

  • R1: 7 sc in MR (7)
  • R2: inc around (14)
  • R3: (1 sc, inc) x7 (21)
  • R4: (2 sc, inc) x7 (28)
  • R5: (3 sc, inc) x7 (35)
  • R6-8: sc around (35)
  • R9: (3 sc, dec) x7 (28)
  • Insert safety eyes between R4/R5, opposite each other.
  • Stuff head.
  • R10: dec around (14)
  • R11: dec around (7)
  • Stuff some more and sew close. Leave a long tail and sew to the body between the petals and the bottom of the shell (R11).

Big Fins:

  • R1: 7 sc in MR (7)
  • R2: inc around (14)
  • R3: (1 sc, inc) x7 (21)
  • R4: (2 sc, inc) x7 (28)
  • R5: (3 sc, inc) x7 (35)
  • Fasten off and sc through both sides.

Small Fins:

  • R1: 7 sc in MR (7)
  • R2: inc around (14)
  • R3: (1 sc, inc) x7 (21)
  • R4: (2 sc, inc) x7 (28)
  • Fasten off and sc through both sides.
  • Sew the big and small fins on each side of the body, opposite each other.

Daisy Shell (Yellow and White):

  • Start with yellow yarn.
  • R1: 8 sc in MR (8)
  • R2: inc around (16)
  • R3: (1 sc, inc) x8 (24)
  • R4: (2 sc, inc) x8 (32)
  • R5: (3 sc, inc) x8 (40)
  • R6: (4 sc, inc) x8 (48)
  • R7: (5 sc, inc) x8 (56)
  • R8-9: sc around (56)
  • Change to white yarn.
  • R10: FLO: (sc, ch 2, 2 dc, slst in same st then slst in next st). Repeat around.
  • Change to body colour yarn.
  • R11: Insert hook in BLO of round 10 and sc around (56)
  • R12: (5 sc, dec) x8 (48)
  • R13: (4 sc, dec) x8 (40)
  • R14: (3 sc, dec) x8 (32)
  • Add stuffing.
  • R15: (2 sc, dec) x8 (24)
  • R16: dec around (12)
  • Fasten off, stuff some more and sew closed.

Sunflower Shell (Brown and Yellow):

  • Start with brown yarn.
  • R1: 8 sc in MR (8)
  • R2: inc around (16)
  • R3: (1 sc, inc) x8 (24)
  • R4: (2 sc, inc) x8 (32)
  • R5: (3 sc, inc) x8 (40)
  • R6: (4 sc, inc) x8 (48)
  • R7: (5 sc, inc) x8 (56)
  • R8-9: sc around (56)
  • R10: FLO: (sc, ch 2, dc, ps, dc, slst in same st then slst in next st). Repeat around.
  • Change to body colour yarn.
  • R11: Insert hook in BLO of round 10 and sc around (56)
  • R12: (5 sc, dec) x8 (48)
  • R13: (4 sc, dec) x8 (40)
  • R14: (3 sc, dec) x8 (32)
  • Add stuffing.
  • R15: (2 sc, dec) x8 (24)
  • R16: dec around (12)
  • Fasten off, stuff some more and sew closed.

Your plush crochet turtle amigurumi toy is ready!

Now you've made your own crochet turtle with a sunflower or daisy shell! Enjoy your new plush toy, and don’t forget to share your creations with us! Follow us for more unique amigurumi animal patterns!

Top Ad 728x90