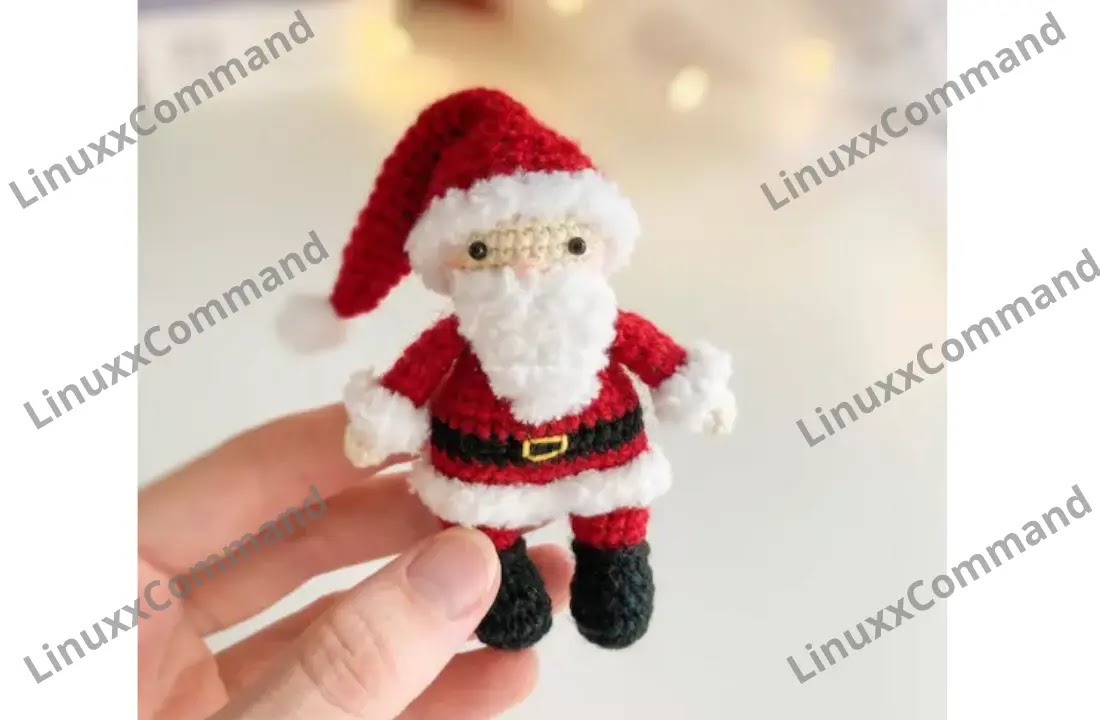
Hello amigurumi lovers and beautiful visitors, I wanted to share the free amigurumi patterns for you here. In my article I will share 1 pattern and how to make it for you. At the end of my article, I will share amigurumi patterns that can generate ideas for you.
Materials and Tools
- Yarn Alize Bella: beige
- Yarn Vita Brilliant: black
- Yarn Alize Angora Real: red
- Yarn Alize Softy: white
- Hook 1.5 mm
- Eyes for toys 3 mm
- Filler for toys
- Glue
- Needle for sewing details
- Scissors
Conventions
- KA – amigurumi ring
- vp – air loop
- ss – connecting column
- sc – single crochet
- pr – increase
- ub – beauty
- ZPR – rear half loop
- (…) xn – repeat n times
Hands (2 parts)
Beige color.
- 1: 6 sc in KA
- 2: (1 sc, inc) x 3 (9)
- 3-4: 9 sc (2 rows)
- Change to red
- 5: RFP 9 sc
- 6-10: 9 sc (5 rows)
Do not stuff, fold the handle in half and knit 4 sc. Cut the thread, hands will be tied. Attach white fluffy yarn to the 4th row and tie 9 sc in a circle. Cut the threads and hide.
Legs (2 parts)
Black color.
- 1: 6 sc in KA
- 2: 6 inc (12)
- 3: (1 sc, inc) x 6 (18)
- 4: 18 sc
- 5: 2 sc, 4 dec, 8 sc (14)
- 6: 2 sc, 2 dec, 8 sbn (12)
Knit 8 more sbn (to the middle of the back) and change the color to red.
- 7: ZPP 12 sbn
- 8-11: 12 sbn (4 rows) – stuff
Cut the thread on the first leg, tie the second leg in the same way, after that do not cut the thread. Attach black yarn to the 6th row and tie in a circle 12 sl-st. Fasten and hide the threads. Continue knitting the body.
Torso
Dial 3 ch from the second leg and attach the chain with sc to the first leg.
- 12: 12 sc on the first leg, inc, 1 sc, inc (increases in front), 12 sc on the second leg, 3 sc (32)
- 12: RFP 32 sc
- 14-15: 32 sc (2 rows)
- Change to black
- 16-17: 32 sc (2 rows)
- Change to red
- 18: 32 sc
- 19: 2 dec on the sides (30)
- 20: (3 sc, dec) x 6 (24)
- 21: 24 sc
- 22: (2 sc, dec) x 6 (18)
- 23: In this row, knit the handles symmetrically on the sides, 18 sc
- 24: (1 sc, dec) x 6 (12) – fill the body
- Change to beige
- 25: 12 sc
Next, we knit the head without cutting the thread.
Head
- 26: 12 inc (24)
- 27: (3 sc, inc) x 6 (30)
- 28-33: 30 sc (6 rows)
- 34: (3 sc, dec) x 6 (24)
- 35: (2 sc, dec) x 6 (18)
- 36: (1 sc, dec) x 6 (12) – fill the neck and head.
- 37: 6 dec
Cut the thread, pull the hole with a needle, fasten and hide the thread inside the head. Attach a white fluffy spin to the 12th row of the body and tie in a circle 32 sc, at the end of the sl-st. Fasten the threads and hide inside.
Beard
White fluffy yarn. At the beginning, leave a long thread, then sew a beard with it. Knit in turning rows = at the end of the row ch 1 and turn.
- 1: ch 7, from the second loop from the hook 6 sc
- 2: dec, 2 sc, dec (4)
- 3: 4 sc
- 4: 2 dec
- 5: 1 dec
Cut the thread, fasten and hide.
Hat
With red yarn, dial 27 ch and connect the chain in a circle with the help of ss. Knit in a circle.
- 1-2: 27 sc (2 rows)
- 3: (7 sc, dec) x 3 (24)
- 4-5: 24 sc (2 rows)
- 6: (6 sc, dec) x 3 (21)
- 7-8: 21 sc (2 rows)
- 9: (5 sc, dec) x 3 (18)
- 10-11: 18 sc (2 rows)
- 12: (4 sc, dec) x 3 (15)
- 13-14: 15 sc (2 rows)
- 15: (3 sc, dec) x 3 (12)
- 16-17: 12 sc (2 rows)
- 18: (2 sc, dec) x 3 (9)
- 19: 9 sc
- 20: (1 sc, dec) x 3 (6)
- 21: 6 sc
Cut the thread, pull the loops with a needle and hide the thread. Knit a pom-pom with white fluffy yarn: 6 sc in KA, sl-st in the first loop. Leave the thread for sewing, sew the pom-pom to the hat. Then attach white fluffy yarn to the edge of the cap and tie 27 sc in a circle, at the end of the sl-st, fasten and hide the thread.
Santa’s hat is ready.
Assembling the Toy
- Glue the eyes between the 5th and 6th rows of the head (counting from the beginning of knitting the head), between the eyes 6 sc.
- Embroider a nose with beige yarn between 4 and 5 rows, width 2 sc.
- Sew a beard under the nose.
- Put a hat on your head and sew it to your head.
- With a thin yellow thread, embroider a buckle on a black belt, width 2 sc, height 1 sc.
Feel free to tag me (@freeamigurumii) in your photos on Instagram or Facebook if you’d like!
All Finished.


0 Comments:
Post a Comment