Top Ad 728x90

Amigurumi Little Sweet Cat Free Pattern

by


Hello dear Amigurumi Followers

Today we share Amigurumi Little Sweet Cat Free Pattern for you. As you know we share new free amigurumi pattern every day. The main crochets are gazelle, amigurumi bear, pola, crochet panda, penguin, giraffe, llama, pig, bunny, clown, lamb, bee, crochet unicorn, amigurumi doll, fox, penguin, dinosaur, crochet elephant, hippo, monkey, crochet cat, crochet dog and more …

Today's daily new amigurumi free crochet pattern is Amigurumi Little Sweet Cat.

I want to give you some informations about this amigurumi free pattern: Little Sweet Cat.

You will need:

  • Cotton yarn (white, grey and black colors)
  • 2.0-2.5 mm crochet hook
  • 6 mm safety eyes
  • Stitch markers
  • Black thread and needle
  • Blush
  • Polyfill

Abbreviations:

  • R – row
  • sc – single crochet
  • st – stitch
  • hdc – half double crochet
  • sl st – slip stitch
  • inc – 2 single crochet in one stitch
  • dec – invisible decrease
  • [...] – number of stitches you should have at the end of the row
  • (...) – repeat whatever is between the brackets the given number of times

Amigurumi Little Sweet Cat Free Pattern:

Legs and Body (made as one piece)

Legs (make 2)

R 1: 6 sc in magic ring [6]

R 2: (inc) repeat 6 times [12]

R 3-5: 12 sc (3 rows)

Finish off.

Don’t cut the yarn from the second leg, now we will start making the body.

Body

R 1: make 2 ch on the 2nd leg and join the 1st leg with a sc, 12 sc on the 1st leg, 2 sc on the chain, 12 sc on the 2nd leg, 2 sc on chain (opposite side) [28]

R 2: (4 sc, inc) repeat 5 times, 3 sc [33]

R 3-4: 33 sc (2 rows)

R 5: (4 sc, dec) repeat 5 times, 3 sc [28]

R 6-7: 28 sc (2 rows)

R 8: (3 sc, dec) repeat 5 times, 3 sc [23]

R 9: 23 sc

R 10: (2 sc, dec) repeat 5 times, 3 sc [18]

R 11: (1 sc, dec) repeat 6 times [12]

Finish off.

Arms (make 2)

R 1: 6 sc in magic ring [6]

R 2: (1 sc, inc) repeat 3 times [9]

R 3: 2 dec, 5 sc [7]

R 4-10: 7 sc (7 rows)

Sl st and finish off, leaving a long tail for sewing.

Ears (make 2: one black, one grey)

R 1: 4 sc in magic ring [4]

R 2: (1 sc, inc) repeat 2 times [6]

R 3: (1 sc, inc) repeat 3 times [9]

R 4: (2 sc, inc) repeat 3 times [12]

R 5-6: 12 sc (2 rows)

Sl st and finish off, leaving a long tail for sewing.

Head

Start by making 9 chains: Black 3 ch, White 2 ch, Grey 4 ch [9]

Make an oval, starting from the 2nd chain from the hook, work on both sides of the chain.

R 1: from the 2nd ch from hook: G 3 sc, W 2 sc, B 2 sc, 3 sc on the last st, turn: 2 sc, W 2 sc, G 2 sc, 1 inc [18]

R 2: G 1 inc, 1 sc, W 4 sc, B 1 sc, 3 inc, 1 sc, W 4 sc, G 1 sc, 2 inc [24]

R 3: G 1 sc, 1 inc, W 6 sc, B (1 sc, inc) repeat 3 times, W 6 sc, G (1 sc, inc) repeat 2 times [30]

R 4: G 2 sc, W 8 sc, B 7 sc, W 8 sc, G 5 sc [30]

R 5: G 1 sc, W 10 sc, B 5 sc, W 10 sc, G 4 sc [30]

R 6: W 12 sc, B 3 sc, W 12 sc, G 3 sc [30]

R 7: W (4 sc, inc) repeat 6 times [36] – use only white yarn from this row

R 8: (5 sc, inc) repeat 6 times [42]

R 9: (6 sc, inc) repeat 6 times [48]

R 10-12: 48 sc (3 rows)

Insert safety eyes between R 10 and R 11, 9 stitches apart.

R 13: (6 sc, dec) repeat 6 times [42]

R 14: (5 sc, dec) repeat 6 times [36]

R 15: (4 sc, dec) repeat 6 times [30]

R 16: (3 sc, dec) repeat 6 times [24]

R 17: (2 sc, dec) repeat 6 times [18]

R 18: (1 sc, dec) repeat 6 times [12]

Sl st, finish off, leaving a long tail for sewing.

Sport (optional)

#1

R 1: 5 sc in magic ring [5]

Sl st and finish off, leaving a long tail for sewing.

#2

R 1: 6 sc in magic ring [6]

Sl st and finish off, leaving a long tail for sewing.

#3

R 1: 7 sc in magic ring [7]

Sl st and finish off, leaving a long tail for sewing.

Bag

With any color:

R 1: 6 hdc in magic ring [6]

R 2: 5 hdc, inc [7]

Don’t close, finish off, make one more.

Join 2 sides with sc around, chain 22, put the bag across the body and join the other end by sl st.

Finish off.

Assembly

Embroider a nose and whiskers on the head, put blush.

Sew the ears to the head, the arms to the body.

Sew the head to the body.

Attach the bag strap around.

Your adorable cat is ready!

Amigurumi Easter Chick Free Pattern

by


Hello amigurumi lovers and beautiful visitors, I wanted to share the free amigurumi patterns for you here. In my article I will share 1 pattern and how to make it for you. At the end of my article, I will share amigurumi patterns that can generate ideas for you.

Materials and Tools

  • Yarn: Color City Milk Cotton in yellow (chicken), white (shell), red (beak), bow color
  • Hook: 2 mm
  • Eyes for toys
  • Filler for toys
  • Needle for sewing details
  • Scissors

Conventions

  • KA – amigurumi ring
  • vp – air loop
  • ss – connecting column
  • sc – single crochet
  • ssn – double crochet
  • ub – beauty
  • pr – increase
  • (…) xn – repeat n times

Chick

In yellow:

1r. 6 sc in KA

2p. pr x 6 (12)

3р. (1 sc, inc, 2 sc, inc) x 2, 1 sc, inc (17)

4р. (3 sc, inc) x 4, 1 sc (21)

5r. (6 sc, inc) x 3 (24)

6r. 3 sc, inc, (7 sc, inc) x 2, 4 sc (27)

7r. (8 sc, inc) x 3 (30)

8r. 5 sc, inc, 16 sc, inc, 7 sc (32)

9r. 15 sbn, inc, 16 sbn (33)

10r. 32 sbn, inc (34)

11-13 р. 34 sc

14r. (dec, 15 sc) x 2 (32)

15r. 8 sc, dec, (9 sc, dec) x 2 (29)

16r. 3 sc, dec, 8 sc, dec, 7 sc, dec, 5 sc (26)

17r. 5 sc, dec, 8 sc, dec, 7 sc, dec (23)

18r. 2 sc, dec, 3 sc, dec, 4 sc, dec, 3 sc, dec, 2 sc (18)

19r. (1 sc, dec) x 6 (12)

Stuff the body.

20r. dec x 6 (6)

We tighten the hole with a needle, hide the tip of the thread.

Shell

White color:

1r. 6 sc in KA

2р. pr x 6 (12)

3p. (1 sc, inc) x 6 (18)

4r. (2 sc, inc) x 6 (24)

5r. (3 sc, inc) x 6 (30)

6r. (4 sc, inc) x 6 (36)

7-10r. 36 sc

We tie the edge of the shell with a "crustacean step".

Bow

In KA, we knit: 3 ch, 5 dc, 3 ch, 1 sl-st (this is one side of the bow).

We continue to knit in KA: 3 ch, 5 dc, 3 ch, 1 sl-st (this is the second side of the bow).

Pull the ring. We cut the thread (long tip) and wrap it around the middle of the bow. We fix the thread and leave the tip for sewing on a bow.

Beak

We start knitting between 9 and 8 rows (counting from above). 3-4 ch, then 1 sl-st between 7 and 8 rows.

Cut the thread. Thread the tip of the thread into the needle and stitch the entire beak (up and down), forming it. Hide the end of the thread.

Assembling the Toy

  • We put the chicken in the shell and sew it on.
  • We glue the eyes or sew them between the 6th and 7th rows (the rows are numbered from above).
  • We sew a bow on the girl’s head, and on the boy – like a bow tie.

Feel free to tag me (@freeamigurumii) in your photos on Instagram or Facebook if you’d like!

All Finished.

Search results for CROCHET DOG AMIGURUMI FREE PATTERN

by


Designer: @nitka.boom

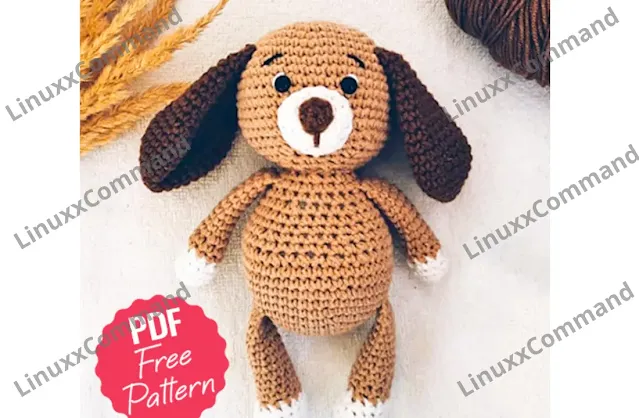
Hello… One of the free amigurumi crochet patterns we will share today is the amigurumi dog, whose photos and design belong to @nitka.boom. You can learn how to crochet this dog step by step using the free amigurumi pattern. Toy size: 17cm. Thanks to @nitka.boom for this cute dog pattern.

Amigurumi cats, amigurumi dolls, amigurumi dogs, amigurumi unicorns, amigurumi lambs, amigurumi dinosaurs, amigurumi foxes, amigurumi bears, amigurumi giraffes, amigurumi pigs, amigurumi birds, amigurumi penguins, amigurumi panda, amigurumi llama, amigurumi bunny, amigurumi clowns, amigurumi elephants, amigurumi hippos, amigurumi monkeys… All the amigurumi toys pattern recipes and ideas you are looking for are here…

If you have any problems, don’t forget to ask us for help. You can follow our Pinterest account for free amigurumi models and great amigurumi ideas. Have fun…

Materials

  • Yarnart Jeans N940, 62, 87
  • Hook N92.5mm
  • Safety eyelets 8mm
  • Fiberfiller
  • Some white and black thread for embroidery

Abbreviations

  • MR - Magic ring
  • Inc - Increase
  • Dec - Decrease
  • Sc - Single crochet

The dog is crocheted with cotton yarn.

We can start to embroider the crocheted cute dog from the ears first.

AMIGURUMI DOG FREE PATTERN

Ears (Make 2)

Rnd 1. 6 sc in MR

Rnd 2. inc-6 (12)

Rnd 3. (1sc, inc) x 6 (18)

Rnd 4. (2sc, inc) x 6 (24)

Rnd 5. (3sc, inc) x 6 (30)

Rnd 6-9. 30 sc (4 rnds)

Rnd 10. (3sc, dec) x 6 (24)

Rnd 11-14. 24 sc (4 rnds)

Rnd 15. (2sc, dec) x 6 (18)

Rnd 16-19. 18 sc (4 rnds)

Fold the part in half, crochet for both walls of the ear 9sc. Fasten the thread, cut, leave the tip for sewing.

After completing the cute crochet dog’s ears, let’s start crocheting her head.

Head

Rnd 1. 6 sc in MR

Rnd 2. (1sc, inc) x 3 (9)

Rnd 3. (inc) x 9 (18)

Rnd 4. (2sc, inc) x 6 (24)

Rnd 5. (3sc, inc) x 6 (30)

Rnd 6. (4sc, inc) x 6 (36)

Rnd 7. (5sc, inc) x 6 (42)

Rnd 8. (6sc, inc) x 6 (48)

Rnd 9-16. 48sc (8 rnds)

Rnd 17. (6sc, dec) x 6 (42)

Rnd 18. (5sc, dec) x 6 (36)

Rnd 19. (4sc, dec) x 6 (30)

Rnd 20. (3sc, dec) x 6 (24)

Rnd 21. (2sc, dec) x 6 (18)

Between the 12th and 13th rows, insert the eyes on a secure mount, at a distance of 5 sc. Fill with filler.

Fasten the thread, cut, leave the tip for sewing.

After we complete the crochet dog’s head, we can make the arms.

Arms (Make 2)

Starting with white yarn

Rnd 1. 8sc in MR

Rnd 2. (1sc, inc) x 4 (12)

Rnd 3-4. 12sc (2 rnds)

Rnd 5. (2sc, dec) x 3 (9)

Change thread color to beige

Rnd 6-16. 9sc (11 rnds)

Fill the part up to half with filler, fold the edges together and crochet 4sc for both walls. Fasten the thread, cut, leave the tip for sewing.

After crocheting her arms, we begin to make the legs of the dog.

Legs (Make 2)

Starting with white yarn

We collect 5ch, from the second loop from the hook we begin to crochet.

Rnd 1. 3sc, In the extreme loop we crochet 3sc, turn crochet, 2sc, inc (10)

We continue crochet in a circle

Rnd 2. inc, 2sc, (inc) x 3, 2sc, 2inc (16)

Rnd 3-4. 16sc (2 rnds)

Rnd 5. 5sc, (1sc, dec) x 2, 5sc (14)

Rnd 6. 5sc, 2dec, 5sc (12)

Change the color of the thread to beige

Rnd 7. 5sc, dec, 5sc (11)

Rnd 8-17. 11sc (10 rnds)

Fill the part with filler to half, fold the edges together and crochet 5sc for both walls of the leg. Fasten the thread, cut off, leave the tip for sewing.

Now next is a long crochet section, the body part. After some rest, let’s crochet the crochet dog’s body and finish most of the work.

Body

Rnd 1. 6 sc in MR

Rnd 2. (inc) x 6 (12)

Rnd 3. (1sc, inc) x 6 (18)

Rnd 4. (2sc, inc) x 6 (24)

Rnd 5. (3sc, inc) x 6 (30)

Rnd 6. (4sc, inc) x 6 (36)

Rnd 7. (5sc, inc) x 6 (42)

Rnd 8-12. 42sc (5 rnds)

Rnd 13. 12sc, (1sc, dec) x 6, 12sc (36)

Rnd 14. 36sc

Rnd 15. (4sc, dec) x 6 (30)

Rnd 16-17. 30sc (2 rnds)

Rnd 18. (3sc, dec) x 6 (24)

Rnd 19-20. 24sc (2 rnds)

Rnd 21. (2sc, dec) x 6 (18)

Fasten the thread, cut. Fill the part with filler.

After completing the body, we complete the nose and muzzle part, then the crochet dog amigurumi toy is completely ready.

Muzzle

Rnd 1. 6 sc in MR

Rnd 2. (inc) x 6 (12)

Rnd 3. 12 sc

Rnd 4. (1sc, inc) x 6 (18)

Fasten the thread, cut, leave the tip for sewing.

Nose

Rnd 1. 6 sc in MR

Rnd 2. 6 sc

Fasten the thread, cut, leave the tip for sewing.

Assembly

  • Sew the ears to the head at the level of 8-9 rows, sew on the muzzle, then the nose.
  • Embroider the whites of the eyes and eyebrows. Sew the head to the body.
  • Sew the legs to the body at the level of the 8th row, the handles at the level of the 21st row.

Search results forAmigurumi CuteBunny Free Pattern

by


Hello amigurumi lovers and beautiful visitors, I wanted to share the free amigurumi patterns for you here. In my article I will share 1 pattern and how to make it for you. At the end of my article, I will share amigurumi patterns that can generate ideas for you.

Matеrіаls аnd tools

  • Υarn
  • Hоok
  • Τhreаd fоr embrοіdеry
  • Fillеr fоr tоуs
  • Rіbbοn
  • Νeedlе for sewіng detaіls
  • Scissοrs

Соnvеntіоns

  • ΚA – amіgurumі rіng
  • sc – sіnglе crосhet
  • рr – inсrеasе
  • υb — beaυtу
  • (…) xn – reрeat n tіmes

Ηeаd

1 row. 6 sc іn КА

2 row. 6 іnc (12)

3rd row. (1 sc, inс) x 6 (18)

4 row. (2 sс, inc) х 6 (24)

5 row. (3 sс, inс) х 6 (30)

6 row. (4 sc, іnс) х 6 (36)

7 row. (5 sс, inс) x 6 (42)

8 row. (6 sс, іnc) х 6 (48)

9 row. (7 sс, іnс) х 6 (54)

10 row. 54 sbn

11 row. (8 sс, іnc) x 6 (60)

12-19 row. 60 sс (8 rows)

20 row. (8 sc, dеc) х 6 (54)

21 rows. (7 sс, dec) x 6 (48)

22nd row. (6 sс, dec) x 6 (42)

23rd row. (5 sс, dec) x 6 (36)

24 row.(4 sс, dec) x 6 (30)

25 row. (3 sc, dеc) x 6 (24)

26 row. (2 sc, dеc) x 6 (18)

Next, fill the part and continue to knit the body with the same thread.

Body

1 row. (2 sbn, рr) х 6 (24)

2nd row. (3 sbn, рr) х 6 (30)

3 row. (4 sbn, рr) х 6 (36)

4 row. 36 sbn

5 row. (5 sbn, pr) x 6 (42)

6 row. 42 sbn

7 row. (6 sbn, pr) х 6 (48)

8 row. 48 sbn

9 row. (7 sbn, pr) x 6 (54)

10 row. 54 sbn

11 row. (8 sbn, рr) x 6 (60)

12 row. 60 sbn

13 row. (9 sbn, pr) х 6 (66)

14 row. 66 sbn

15 row. (10 sbn, рr) х 6 (72)

16 row. 72 sbn

17 row. (10 sbn, υb) х 6 (66)

18 row.(9 sc, dес) х 6 (60)

19 row. (8 sc, dес) x 6 (54)

20 row. (7 sс, dec) х 6 (48)

21 rows. (6 sc, deс) x 6 (42)

22 row. (5 sс, deс) x 6 (36)

23rd row. (4 sс, deс) х 6 (30)

24 row. (3 sс, dеc) х 6 (24)

25 row. (2 sс, dес) х 6 (18)

26 row. (1 sс, dеc) x 6 (12)

27 row. 6 dеc (6)

Stuff the part and close.

Hands (2 parts)

1 row. 6 sc іn KА

2 row. 6 inс (12)

3-5 row. 12 sc (3 rows)

6 row. 6 dес (6)

Do not stuff the part. Leaνе the thread for sewing.

Legs (2 parts)

1 row. 6 sc іn КА

2 row. 6 іnc (12)

3rd row. (1 sc, inc) x 6 (18)

4-8 row. 18 sc (5 rows)

9 row. (1 sc, dеc) х 6 (12)

Do not stuff the part. Leаνe the thread fοr sewing.

Ears (2 parts)

1 row. 6 sс in КА

2 row. 6 sc

3rd row. 6 іnc (12)

4th row. 12 sc

5 row. (1 sс, іnc) х 6 (18)

6-10 row. 18 sc (5 rows)

11 row. (1 sс, deс) х 6 (12)

12 row. 12 sc

Do not stuff the part. Leaνe the thread for sewing.

Tail

1 row. 6 sbn in KА

2nd row. 6 аvenυе (12)

3 row. (1 sbn, pr) x 6 (18)

4 row. 18 Sаt

5 row. (1 sс, sс) х 6 (12)

Leаve thе thrеаd fοr sеwіng.

Αssembly and dеcoratiоn

We fold the arms and legs in half and sew. Fold the ears in half and sew. Sew on the tail. Embroider the nose with pink thread. Embroider eyes, eyebrows, and nose with black thread. As well as stripes on the paws. We decorate according to your taste: ribbons, bows, flowers, etc.

Feel free to tag me (@freeamigurumii) in your photos on Instagram or Facebook if you’d like!

All Finished.

Search results forAMIGURUMI SHEEP CROCHET FREE PATTERN

by


Designer: Instagram: @aquariwool

Etsy Store: AquariwoolCrochet

Hello everyone…

One of the free amigurumi crochet patterns we will share today is the amigurumi Espresso the sheep, whose design belongs to Aquariwool. You can learn how to crochet these sheep using the free amigurumi pattern below. Thanks to Aquariwool for this cute sheep!

Below you will find some information about this pattern. Remember, if you have any problems, you can write to us and ask for help. You can follow our Pinterest account for free amigurumi patterns and great amigurumi ideas. Have fun!

Amigurumi cats, amigurumi dolls, amigurumi dogs, amigurumi unicorns, amigurumi lambs, amigurumi dinosaurs, amigurumi foxes, amigurumi bears, amigurumi giraffes, amigurumi pigs, amigurumi birds, amigurumi penguins, amigurumi panda, amigurumi llama, amigurumi bunny, amigurumi clowns, amigurumi elephants, amigurumi hippos, amigurumi monkeys… All the amigurumi toys pattern recipes and ideas you are looking for are here…

Materials

  • Yarn Color:
    • (A) Brown: YarnArt Jeans 70 (50g, 160m)
    • (B) Skin color: YarnArt Jeans 87 (50g, 160m)
  • Other materials:
    • Crochet hook size 2-2.5 mm
    • Knitting needles size 3.5-4 mm
    • 1 wooden button
    • Tapestry needles, pins, stitch markers, scissors

Abbreviations

  • Ch – Chain
  • Sc – Single crochet
  • Inc – Increase
  • Dec – Decrease
  • Hdc – Half double crochet
  • Sl st – Slip stitch
  • MR – Magic ring
  • Dc – Double crochet
  • Tr – Treble crochet
  • Bobble – Bobble stitch
  • BLO – Back loop only
  • FLO – Front loop only
  • Rnd – Round
  • Sts – Stitches

The finished crochet sheep size is about 13 cm.

AMIGURUMI SHEEP FREE PATTERN

Legs (Make 2)

Yarn B

  • Rnd 1: 6 sc in MR (6)
  • Rnd 2: (1 sc, inc) *3 (9)
  • Rnd 3: (2 sc, inc) *3 (12)
  • Rnd 4: (3 sc, inc) *3 (15)

Break the yarn, make the second leg in the same way, but don’t break the yarn this time. Connect 2 legs together: 15 sc (leg 1) + 15 sc (leg 2) = 30. Move to the body part, change to yarn A, Turn (remember to turn here to crochet the bobble stitch in the body part so that the bobble can pop out clearly).

Body

Yarn A

  • Rnd 1: ch 2 (count as 1 hdc), bobble 1, (hdc 1, bobble 1) *14, slst to the 1st ch (30)
  • Rnd 2: sc 30, slst to the 1st ch (30)
  • Rnd 3: ch 2, (count as 1 hdc), bobble 1, (hdc 1, bobble 1) *14, slst to the 1st ch (30)
  • Rnd 4: (3 sc, dec) *6, slst to the 1st sc (24)
  • Rnd 5: ch 2, (count as 1 hdc), bobble 1, (hdc 1, bobble 1) *11, slst to the 1st ch (24)
  • Rnd 6: (2 sc, dec) *6, slst to the 1st sc (18)
  • Rnd 7: ch 2, (count as 1 hdc), bobble 1, (hdc 1, bobble 1) *8, slst to the 1st ch (18)
  • Rnd 8: sc 18 (18)

Break the yarn with a long rest. Stuff.

Arms (Make 2)

Yarn B

  • Rnd 1: 6 sc in MR (6)
  • Rnd 2: (1 sc, inc) *3, change to yarn A (9)
  • Rnd 3-7: sc 9 (5 rows) (9)
  • Rnd 4: dec 1, sc 7 (8)
  • Rnd 5: dec 1, sc 6 (7)
  • Rnd 6: dec 1, sc 5 (6)

Break the yarn with a long rest. Stuff slightly. Sew 2 edges together.

Head

Yarn B

  • Rnd 1: 6 sc in MR (6)
  • Rnd 2: 6 inc (12)
  • Rnd 3: (1 sc, inc) *6 (18)
  • Rnd 4: (2 sc, inc) *6 (24)
  • Rnd 5: (3 sc, inc) *6 (30)
  • Rnd 6: (4 sc, inc) *6 (36)
  • Rnd 7: (5 sc, inc) *6 (42)
  • Rnd 8: (6 sc, inc) *6 (48)
  • Rnd 9: (7 sc, inc) *6 (54)
  • Rnd 10: 54 sc (54)
  • Rnd 11: (8 sc, inc) *6 (60)
  • Rnd 12-19: 60 sc (6 rows) (60)
  • Rnd 20: (8 sc, dec) *6 (54)
  • Rnd 21: 54 sc (54)
  • Rnd 22: (7 sc, dec) *6 (48)
  • Rnd 23: (6 sc, dec) *6 (42)
  • Rnd 24: (5 sc, dec) *6 (36)
  • Rnd 25: (4 sc, dec) *6 (30)
  • Rnd 26: (3 sc, dec) *6 (24)
  • Rnd 27: (2 sc, dec) *6 (18)

Break the yarn with a long rest to sew later. Stuff.

Hat

Yarn A

  • Rnd 1: 6 sc in MR (6)
  • Rnd 2: (bobble 1, hdc 1) *6 (12)
  • Rnd 3: 12 inc (24)
  • Rnd 4: (bobble 1, hdc 1) *12 (24)
  • Rnd 5: (1 sc, inc) *12 (36)
  • Rnd 6: (hdc 1, bobble 1) *18 (36)
  • Rnd 7: (5 sc, inc) *6 (42)
  • Rnd 8: (bobble 1, hdc 1) *21 (42)
  • Rnd 9: 42 sc (42)
  • Rnd 10: (bobble 1, hdc 1) *21 (42)
  • Rnd 11: 42 sc (42)
  • Rnd 12: (bobble 1, hdc 1) *21 (42)
  • Rnd 13: 42 sc (42)
  • Rnd 14: (bobble 1, hdc 1) *21 (42)
  • Rnd 15: 42 sc (42)

Break the yarn with a long rest to sew later.

Ears (Make 2)

Yarn B

  • Rnd 1: 6 sc in MR (6)
  • Rnd 2: (1 sc, inc) *3 (9)
  • Rnd 3-10: 9 sc (8 rows) (9)

Break the yarn with a long rest to sew later. Do not stuff. Use the tapestry needle to sew 2 edges together and roll it over and sew to the hat.

Your adorable Espresso the Sheep is now complete!

Congratulations, you have successfully completed the cute crochet sheep amigurumi pattern!

Search results for AMIGURUMI CUTE UNICORN FREE PATTERN

by


Designer: Instagram: @smila_toys

Hello everyone…

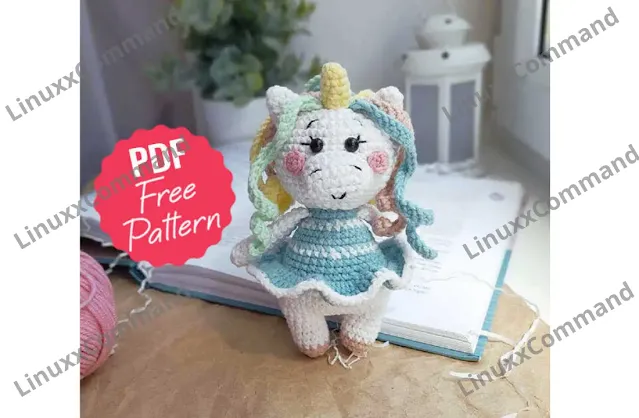
One of the free amigurumi crochet patterns we will share today is the amigurumi unicorn, whose photos and design belong to Lyuda Kuropatova. You can learn how to crochet this cute unicorn using the free amigurumi pattern below. Thanks to Lyuda Kuropatova for this adorable design!

Materials

  • Yarn: Alize Cotton Gold or YarnArt Jeans
  • Hook size: 1.5 mm
  • 5 mm half beads for eyes
  • Fabric glue
  • Black embroidery floss
  • Sewing needle and scissors
  • Fiberfill

Abbreviations

  • R = row
  • mc = magic circle
  • ch = chain
  • sl st = slip stitch
  • sc = single crochet
  • hdc = half double crochet
  • inc = 2 sc in the next stitch
  • dec = single crochet 2 stitches together
  • BLO = back loop only
  • FLO = front loop only
  • F.o. = finish off
  • (12) = number of stitches you should have at the end of the round/row
  • (…)*6 = repeat whatever is between the brackets the number of times stated

CROCHET UNICORN AMIGURUMI FREE PATTERN

Head

With white yarn:

Stuff as you go.

  • R 1: 6 sc in mc (6)
  • R 2: (inc)*6 (12)
  • R 3: (1 sc, inc)*6 (18)
  • R 4: 1 sc, inc, (2 sc, inc)*5, 1 sc (24)
  • R 5: (3 sc, inc)*6 (30)
  • R 6: 2 sc, inc, (4 sc, inc)*5, 2 sc (36)
  • R 7: (5 sc, inc)*6 (42)
  • R 8: 3 sc, inc, (6 sc, inc)*5, 3 sc (48)
  • R 9-14: 48 sc (6 rows)
  • R 15: 3 sc, dec, (6 sc, dec)*5, 3 sc (42)
  • R 16: (5 sc, dec)*6 (36)
  • R 17: 2 sc, dec, (4 sc, dec)*5, 2 sc (30)
  • R 18: (3 sc, dec)*6 (24)
  • R 19: (2 sc, dec)*6 (18)
  • R 20: (1 sc, dec)*6 (12)
  • R 21: (dec)*6 (6)

F.o. (Finish off).

Cheeks (make 2)

With pink yarn:

  • R 1: 6 sc in mc (6)
  • F.o. and leave a long tail for sewing.

Legs (make 2)

With pink yarn:

  • R 1: 6 sc in mc (6)
  • R 2: (inc)*6 (12)
  • R 3: 12 sc
  • Change to white yarn:
  • R 4-7: 12 sc (4 rows)
  • F.o.

Don’t cut the yarn when finishing the second leg!

From the second leg: 3 ch, join with the first leg with sl st. Continue crocheting the body in the round. Stuff as you go.

Body

  • R 8: 12 sc on the 1st leg, 3 sc in 3 ch, 12 sc on the 2nd leg, 3 sc in 3 ch (opposite side) (30)
  • R 9: 2 sc, inc, (4 sc, inc)*5, 2 sc (36)
  • R 10: (5 sc, inc)*6 (42)
  • R 11: 3 sc, inc, (6 sc, inc)*5, 3 sc (48)
  • R 12-13: 48 sc (2 rows) + 12 sc to move the beginning of the next row (put a stitch marker).
  • R 14: 3 sc, dec, (6 sc, dec)*5, 3 sc (42)
  • Change to blue yarn:
  • R 15: 42 sc
  • R 16: BLO (5 sc, dec)*6 (36)
  • R 17-18: 36 sc (2 rows)
  • Change to white yarn:
  • R 19: 2 sc, dec, (4 sc, dec)*5, 2 sc (30)
  • Change to blue yarn:
  • R 20-21: 30 sc (2 rows)
  • R 22: (3 sc, dec)*6 (24)
  • Change to white yarn:
  • R 23: 24 sc
  • Change to blue yarn:
  • R 24: (2 sc, dec)*6 (18)
  • R 25: 18 sc

F.o. and leave a long tail for sewing.

Skirt

Attach blue yarn on R 15 of the body and crochet in turning rows:

  • R 1: FLO 2 ch, (2 hdc in one st)*42, sl st (84)
  • R 2: 2 ch, 84 hdc, sl st
  • Change to white yarn:
  • R 3: 1 ch, 84 sc, sl st

F.o.

Arms (make 2)

With white yarn:

  • R 1: 6 sc in mc (6)
  • R 2: (1 sc, inc)*3 (9)
  • R 3-12: 9 sc (10 rows)
  • Don’t stuff with fiberfill.
  • Fold top of arm flat and 4 sc through both sides across.

F.o. and leave a long tail for sewing.

Muzzle

With white yarn:

  • Make 6 ch.
  • Make an oval starting from the 2nd ch from hook, working on both sides of the chain.
  • R 1: From the 2nd ch from hook: inc, 3 sc, 4 sc in last st, turn and crochet on the opposite side of the chain: 3 sc, inc (14)
  • R 2: 2 inc, 3 sc, 4 inc, 3 sc, 2 inc (22)
  • R 3-4: 22 sc (2 rows)

F.o. and leave a long tail for sewing.

Horn

With yellow yarn:

  • R 1: 6 sc in mc (6)
  • R 2: 6 sc
  • R 3: (1 sc, inc)*3 (9)
  • R 4: 9 sc
  • R 5: (2 sc, inc)*3 (12)
  • Stuff gently.

F.o. and leave a long tail for sewing.

Ears (make 2)

With white yarn:

  • R 1: 6 sc in mc (6)
  • R 2: 6 sc
  • R 3: (1 sc, inc)*3 (9)
  • R 4: 9 sc
  • R 5: (2 sc, inc)*3 (12)
  • Don’t stuff with fiberfill.

F.o. and leave a long tail for sewing.

Mane (make 11)

  • Make 36 ch.
  • R 1: From the 2nd ch from hook: 35 sc
  • F.o. and leave a long tail for sewing.

Assembly

  • Sew the head to the body.
  • Sew the arms between R 24 and R 25 of the body.
  • Sew the muzzle between R 11 and R 15 of the head.
  • Glue the eyes above the muzzle at the distance of 3 st from each other.
  • Embroider the nose and mouth on the muzzle.
  • Embroider the eyebrows and lashes with black floss.
  • Sew the cheeks onto the front of the head.
  • Sew the horn in the middle of the head between R 2 and R 5.
  • Sew the ears on the top of the head between R 4 and R 8.
  • Sew the mane onto the head.

Your adorable unicorn is now complete!

Top Ad 728x90