Hi there...
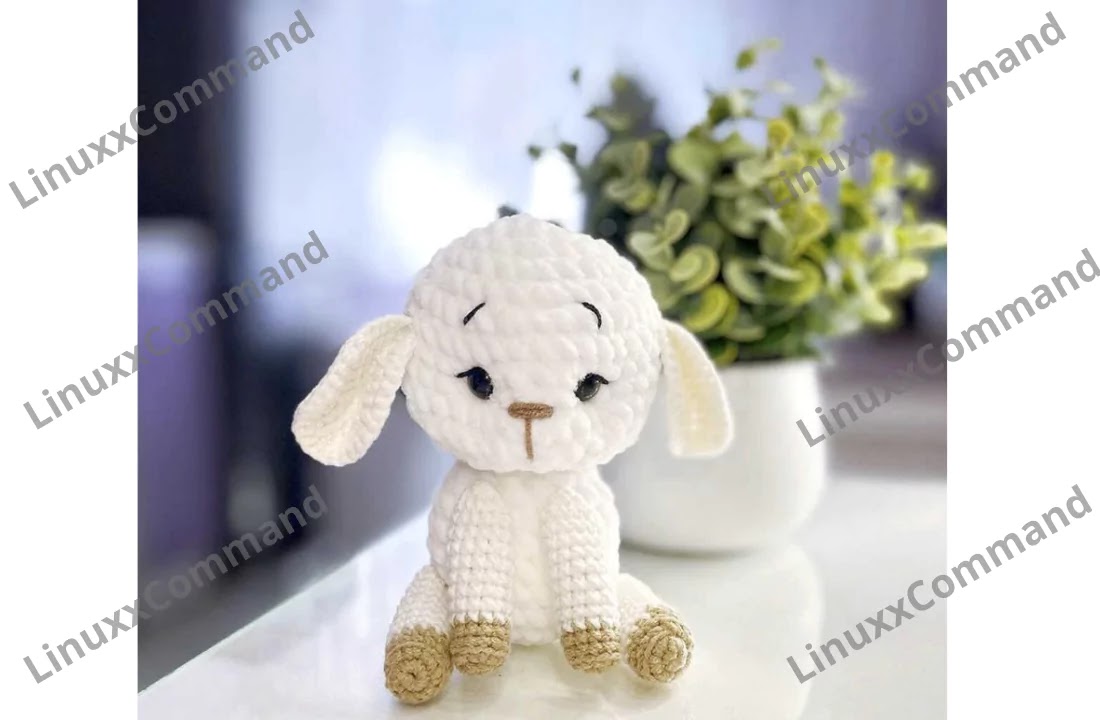
One of the free amigurumi crochet patterns we will share today is the amigurumi dog, whose photos and design belong to Alena Gaberling. You can learn how to crochet this dog using the free amigurumi pattern. Thanks to Alena Gaberling (@zlatiny_zabavy) for this cute dog.
Amigurumi cats, amigurumi dolls, amigurumi dogs, amigurumi unicorns, amigurumi lambs, amigurumi dinosaurs, amigurumi foxes, amigurumi bears, amigurumi giraffes, amigurumi pigs, amigurumi birds, amigurumi penguins, amigurumi panda, amigurumi llama, amigurumi bunny, amigurumi clowns, amigurumi elephants, amigurumi hippos, amigurumi monkeys will not be difficult for you…
Skills required to knit this toy:
- Ability to crochet single crochet and double crochet.
- The ability to make an amigurumi ring also does not hurt.
- Patience. This is perhaps the most important thing =)
The materials we need:
- Hook No. 1.6
- Filler. I am using holofiber balls.
- I used Yarnart Jeans 160m / 50g (55% cotton, 45% polyacryl) for the toy and MAGIC microfiber 152m / 50g for the beret and scarf. Instead of microfiber, you can use the same jeans.
- For a toy, you can choose absolutely any yarn at your discretion, but then the eyes may need a different size, keep this in mind. Inc and the use of this yarn, the toy turns out to be about 20 cm in size (I did not write it down, so I don’t remember exactly).
- A spout measuring 1.5 cm and eyes on a leg with a mount of 10 mm
- Acrylic buttons for decoration.
Abbreviations:
- sc – single crochet
- dc – double crochet
- inc – increase, crochet 2 single crochet in one stitch
- dec – decrease, crochet 2 stitches together
- (1 sc, inc) * 6 – repeat 6 times what is written in brackets, if specified * 2 – repeat 2 times, etc.
- ch – chain stitch
AMIGURUMI DOG FREE CROCHET PATTERN
Legs
1. 5 sc into amigurumi ring
2. inc * 5 = 10
3-11. 10 sc (9 rows), cut the thread and tie another leg. Dial 10 air loops, connect with the loop on the other leg: inclose the loop from the left leg in the one on the hook, pull up. The principle is visible in the photo below.
From here we will consider the beginning of the series. Next, we knit the body.
Body
1. 40 sc
2. 10 sc, (inc, 2 sc) * 3, inc, 20 sc = 44
3. 36 sc, inc, 5 sc, inc, 1 sc = 46
4-13. 46 sc (10 rows)
14. 7 sc, dec, 21 sc, dec, 14 sc = 44
15. 44 sc
16. 7 sc, dec, 20 sc, dec, 13 sc = 42
17-20. 42 sc (4 rows)
21. (12 sc, dec) * 3 = 39
22. 5 sc, dec, (11 sc, dec) * 2, 6 sc = 36
23. 36 sc
24. (4 sc, dec) * 6 = 30
25. 30 sc
26. (3 sc, dec) * 6 = 24
27-29. 24 sc (3 rows), in the last row inc, knit 2 sc, make a connecting post, cut the thread, leaving a small tip to sew the head to the body, fill the part with filler.
A speck on the head
1. 4 sc in amigurumi ring, reversal
2. 1 ch, inc * 4 = 8, reversal
3. 1 ch, (1 sc, inc) * 4 = 12, reversal
4. 1 ch, (2 sc, inc) * 4 = 16, tie the bottom sc, cut the thread, leaving a small tip for inc stitching the speck to the head.
Cut out small circles from white felt, make a hole in their center, insert 10 mm eyes. Then insert the eyes into the speck.
Head
1. 6 sc into amigurumi ring
2. (1 sc, inc) * 3 = 9
3. (2 sc, inc) * 3 = 12
4. (1 sc, inc) * 6 = 18
5. (2 sc, inc) * 6 = 24
6. 24 sc
7. (3 sc, inc) * 6 = 30
8. (4 sc, inc) * 6 = 36
9. 36 sc
10. (5 sc, inc) * 6 = 42
11. (6 sc, inc) * 6 = 48
12. (7 sc, inc) * 6 = 54
13. (8 sc, inc) * 6 = 60
14-21. 60 sc (8 rows)
Between the 11th and 12th rows, insert the eyes with a speck into the head, put on the fasteners on the eyes, there is no need to paint the spot to the head yet. Insert spout between rows 3 and 4.
Fill the detail with filler as you knit.
22. (8 sc, dec) * 6 = 54
23. (7 sc, dec) * 6 = 48
24. (6 sc, dec) * 6 = 42
25. (5 sc, dec) * 6 = 36
26. (4 sc, dec) * 6 = 30
27. (3 sc, dec) * 6 = 24
28. (2 sc, dec) * 6 = 18
29. (1 sc, dec) * 6 = 12
30. dec * 6 = 6, cut the thread, leaving the tip about 30-40 cm long, pull off the hole.
Remove the thread at the very bottom, in the place where the head will be attached to the body.
Fasten it there, then inc close the part completely by pulling out the needle from the bottom of the left eye closer to the edge of the speck (do not poke the speck itself), then stick the needle in the bottom. Inc new eye, again inc open the part completely, pulling out the needle with the thread at the bottom of the head. Tighten, fasten the thread.
Do this twice. You should get a little tightening.
Arms
1. 5 sc into amigurumi ring
2. inc * 5 = 10
3-23. 10 sc (21 rows), fill the part with filler 2/3, fold in half and inc tie 4 sc for both halves, cut the thread, leaving a small tip for sewing the handle to the body.
Ears
1. 6 sc into amigurumi ring
2. inc * 6 = 12
3. (1 sc, inc) * 6 = 18
4. (2 sc, inc) * 6 = 24
5-13. 24 sc (9 rows)
14. (10 sc, dec) * 2 = 22
15. 22 sc
16. (9 sc, dec) * 2 = 20
17. 20 sc
18. (8 sc, dec) * 2 = 18
19. 18 sc
20. (7 sc, dec) * 2 = 16
21. 16 sc
22. (6 sc, dec) * 2 = 14
23. 14 sc
24. (5 sc, dec) * 2 = 12
25. 12 sc, fold the part in half, inc tie 5 sc for both halves of the part, cut the thread, leaving a small tip for sewing the ear to the head.
Tail
1. 6 sc into the amigurumi ring.
2. (inc, 1 sc) * 3 = 9
3-7. 9 sc (5 rows), fold in half, inc knit 4 sc, trim, leave small tip for sewing the tail to the body.
Scarf
I knitted this scarf from microfiber, you can use any jeans-like yarn to make it the same size as in the photo. Cast on 5 stitches.
1. 2 ch-ups, 5 dc – so knit each row until the length of the scarf reaches about 60 centimeters.
Beret
1. In the ring amigurumi inc to knit: 3 ch + 11 dc, connecting column.
2. 3 ch + here 1 dc, 11 inc from dc, connecting bar = 24
3. 3 ch, (1 dc, inc from dc) * 12, connecting bar = 36
4. 1 ch, 36 sc
5. 1 ch, (4 sc, dec) * 6 = 30
6. 1 ch, 30 sc, cut the thread, leave a small tail for sewing the beret to the head.
Inc to sew a speck to the head, embroider the eyebrows, mouth, and specks at the nose. Attach the ears, beret, head, arms. Tie a scarf, buttons.
That’s all, the dog is ready!