Top Ad 728x90

Amigurumi Plush Fox Free Pattern

by


Hello dear Amigurumi Followers

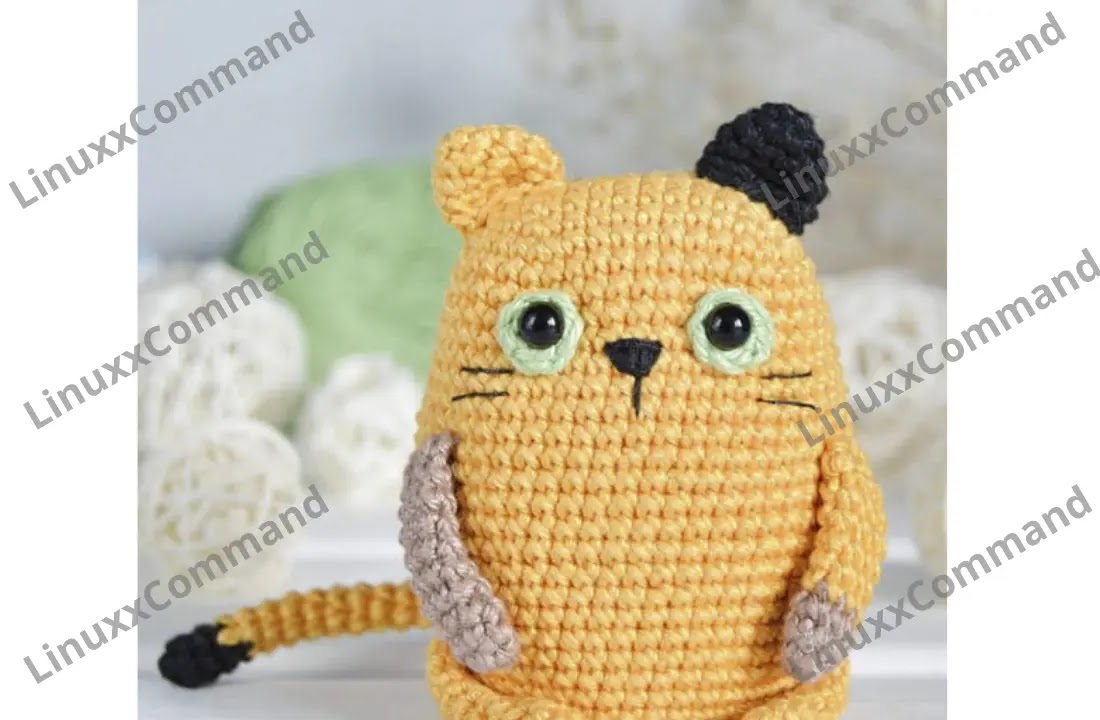
Today we share Amigurumi Plush Fox Free Pattern for you. As you know we share new free amigurumi pattern every day. An adorable crochet plush fox toy would be a great gift for kids and friends. The arms, legs, tail and ears are attached with single crochet as you crochet the body and head. You can make your own crochet fox using this free amigurumi pattern. The finished amigurumi fox is about 21-22 cm (8.2-8.6) tall, if you use the same yarn and hook.

Materials:

  • Yarn: Himalaya Dolphin Baby #80316 (orange) – less than one skein, #80337 (brown), white or milk
  • Hook size: 4.0-4.5 mm
  • 11 mm safety eyes
  • 10*11 mm safety nose
  • Black cotton yarn or embroidery floss for eyebrows and mouth
  • Tapestry needle
  • Scissors
  • Fiberfill

Abbreviations:

  • R = row
  • mc = magic circle
  • ch = chain
  • sl st = slip stitch
  • sc = single crochet
  • dc = double crochet
  • inc = 2 sc in the next stitch
  • dec = single crochet 2 stitches together
  • BLO = back loop only
  • FLO = front loop only
  • (12) = number of stitches you should have at the end of the round/row
  • (…) ×6 = repeat whatever is between the brackets the number of times stated
  • F.o. = fasten off

Amigurumi Plush Fox Free Pattern:

Ears (make 2)

  • R 1: 6 sc in mc (6)
  • R 2: 6 sc
  • R 3: (1 sc, inc) ×3 (9)
  • R 4: (2 sc, inc) ×3 (12)
  • Don’t stuff with fiberfill.
  • Fold top of ear flat and 6 sc through both sides across.
  • F.o.

Arms (make 2)

With brown yarn:

  • R 1: 6 sc in mc (6)
  • R 2: (inc) ×6 (12)
  • R 3-4: 12 sc (2 rows)
  • R 5: 3 dec, 6 sc (9)

Change to orange yarn:

  • R 6-12: 9 sc (7 rows)
  • Stuff ​3⁄4 full.
  • F.o.

Legs (make 2)

With brown yarn:

  • R 1: 6 sc in mc (6)
  • R 2: (inc) ×6 (12)
  • R 3: (1 sc, inc) ×6 (18)
  • R 4: (5 sc, inc) (21)
  • R 5: BLO: 21 sc
  • R 6: 21 sc
  • R 7: (1 sc, dec) ×6, 3 sc (15)

Change to orange yarn:

  • R 8: (1 sc, dec) ×3, 6 sc (12)
  • R 9-13: 12 sc (5 rows)
  • R 14: only 11 sc
  • Stuff ​3⁄4 full.
  • Fold top of leg flat and 6 sc through both sides across.
  • F.o.

Tail

With white yarn:

  • R 1: 6 sc in mc (6)
  • R 2: (1 sc, inc) ×3 (9)
  • R 3: 9 sc
  • R 4: (2 sc, inc) ×3 (12)
  • R 5: (3 sc, inc) ×3 (15)
  • R 6: 15 sc

Change to orange yarn:

  • R 7-9: 15 sc (3 rows)
  • R 10: (3 sc, dec) ×3 (12)
  • R 11: (2 sc, dec) ×3 (9)
  • R 12: (1 sc, dec) ×3 (6)
  • Stuff with fiberfill.
  • Fold top of tail flat and 3 sc through both sides across.
  • F.o.

Body

  • R 1: 6 sc in mc (6)
  • R 2: (inc) ×6 (12)
  • R 3: (1 sc, inc) ×6 (18)
  • R 4: (1 sc, inc) ×9 (27)
  • R 5: (2 sc, inc) ×9 (36)

Attach the legs and tail:

  • R 6: 6 sc together with sc of the 1st leg, 11 sc, 6 sc together with sc of the 2nd leg, 5 sc, 3 sc together with sc of the tail, 5 sc (36)
  • R 7: 36 sc
  • Change to dress color:
  • R 8: 36 sc
  • R 9: BLO: (2 sc, dec) ×9 (27)
  • R 10: 27 sc
  • R 11: (1 sc, dec) ×9 (18)
  • R 12-13: 18 sc (2 rows)
  • R 14: (4 sc, dec) ×3 (15)

Attach the arms:

  • R 15: 1 sc, 4 sc together with sc of the 1st arm, 3 sc, 4 sc together with sc of the 2nd arm, 3 sc, sl st (27)
  • Stuff with fiberfill.
  • F.o. and leave a yarn tail about 25-30 cm long.

Head

With white yarn:

  • R 1: 6 sc in mc (6)
  • R 2: (1 sc, inc) ×3 (9)
  • R 3: (2 sc, inc) ×3 (12)
  • R 4: (1 sc, inc) ×6 (18)

Change to orange yarn:

  • R 5: 6 sc, 6 inc, 6 sc (24)
  • R 6: 6 sc, (1 sc, inc) ×6, 6 sc (30)
  • R 7: (4 sc, inc) ×6 (36)
  • R 8-10: 36 sc (3 rows)
  • Attach ears:
  • R 11: 11 sc, 6 sc together with sc of the 1st ear, 4 sc, 6 sc together with sc of the 2nd ear, 9 sc (36)
  • R 12: 36 sc
  • R 13: (4 sc, dec) ×6 (30)
  • R 14: (3 sc, dec) ×6 (24)
  • R 15: (2 sc, dec) ×6 (18)
  • R 16: (1 sc, dec) ×6 (12)
  • Stuff with fiberfill.
  • R 17: (dec) ×6 (6)
  • Leave a yarn tail about 10-15 cm long.
  • Pull the opening, fasten and hide yarn tail inside.
  • Sew the head to the body.

Skirt

Attach dress color yarn to the front loop of R 9 of the body.

  • R 1: FLO: 2 dc in every st to the end of row.
  • F.o.

Search results for Amigurumi Soft Bear Free Pattern

by


Hello dear Amigurumi Followers

Today we share Amigurumi Soft Bear Free Pattern for you. As you know we share new free amigurumi pattern every day.

Materials:

  • Yarn: ALIZE Softy
  • Hook: 2.5 mm
  • Fiberfill
  • Plastic safety eyes
  • Tapestry needle

Abbreviations:

  • R = row
  • mc = magic circle
  • ch = chain
  • sc = single crochet
  • inc = 2 sc in the next stitch
  • dec = single crochet 2 stitches together
  • sl st – slip stitch
  • BLO – back loop only
  • F.o. = finish off
  • (12) = number of stitches you should have at the end of the round/row
  • ( ) * 6 = repeat whatever is between the brackets the number of times stated

Size: 29 cm

Amigurumi Soft Bear Free Pattern:

Head

  • R 1: 6 sc in mc (6)
  • R 2: inc*6 (12)
  • R 3: (1 sc, inc)*6 (18)
  • R 4: (2 sc, inc)*6 (24)
  • R 5: (3 sc, inc)*6 (30)
  • R 6: (4 sc, inc)* 6 (36)
  • R 7: (5 sc, inc)*6 (42)
  • R 8: (6 sc, inc)*6 (48)
  • R 9: (7 sc, inc)*6 (54)
  • R 10: (8 sc, inc)*6 (60)
  • R 11-21: 60 sc (11 rows)
  • Insert safety eyes.
  • R 22: (8 sc, dec)*6 (54)
  • R 23: (7 sc, dec)*6 (48)
  • R 24: (6 sc, dec)*6 (42)
  • R 25: (5 sc, dec)*6 (36)
  • R 26: (4 sc, dec)*6 (30)
  • R 27: (3 sc, dec)*6 (24)
  • R 28: (2 sc, dec)*6 (18)
  • R 29: (1 sc, dec)*6 (12)
  • R 30: dec*6 (6)
  • F.o.

Ears (make 2)

  • R 1: 6 sc in mc (6)
  • R 2: inc*6 (12)
  • R 3: (3 sc, inc)*3 (15)
  • R 4-6: 15 sc (3 rows)
  • Don’t stuff.
  • Fold top of ear flat and 7 sc through both sides across.
  • F.o., leaving a tail for sewing.

Muzzle

Make 6 ch. Make an oval, work on both sides of the chain.

  • R 1: From the 2nd ch from hook: 4 sc, 3 sc in next st, 3 sc, inc (12)
  • R 2: inc, 3 sc, 3 inc, 3 sc, 2 inc (18)
  • R 3: 1 sc, inc, 3 sc, (1 sc, inc)*3, 3 sc, (1 sc, inc)*2 (24)
  • R 4: 2 sc, inc, 3 sc, (2 sc, inc)*3, 3 sc (2 sc, inc)*2 (30)
  • R 5-7: 30 sc (3 rows)
  • Stuff the muzzle.
  • F.o., leaving a tail for sewing.

Body

  • R 1: 6 sc in mc (6)
  • R 2: inc*6 (12)
  • R 3: (1 sc, inc)*6 (18)
  • R 4: (2 sc, inc)*6 (24)
  • R 5: (3 sc, inc)*6 (30)
  • R 6: (4 sc, inc)* 6 (36)
  • R 7: (5 sc, inc)*6 (42)
  • R 8: (6 sc, inc)*6 (48)
  • R 9: (7 sc, inc)*6 (54)
  • R 10-18: 54 sc (54)
  • R 19: (7 sc, dec)*6 (48)
  • R 20: (6 sc, dec)*6 (42)
  • R 21: 42 sc (42)
  • R 22: (5 sc, dec)*6 (36)
  • R 23: 36 sc (36)
  • R 24: (4 sc, dec)*6 (30)
  • R 25: 30 sc (30)
  • R 26: (3 sc, dec)*6 (24)
  • R 27-28: 24 sc (24)
  • Stuff the body.
  • F.o., leaving a tail for sewing.

Legs (make 2)

Make 9 ch. From the 2nd ch from hook:

  • R 1: 7 sc, 3 sc in next st, 6 sc, inc (18)
  • R 2: inc, 6 sc, inc*3, 6 sc, inc*2 (24)
  • R 3: 1 sc, inc, 6 sc, (1 sc, inc)*3, 6 sc, (1 sc, inc)*2 (30)
  • R 4: 2 sc, inc, 6 sc, (2 sc, inc)*3, 6 sc, (2 sc, inc)*2 (36)
  • R 5: BLO 36 sc (36)
  • R 6-7: 36 sc (2 rows)
  • R 8: 12 sc, 6 dec, 12 sc (30)
  • R 9: 9 sc, 6 dec, 9 sc (24)
  • R 10: (2 sc, dec)*6 (18)
  • R 11: (4 sc, dec)*3 (15)
  • Stuff the leg.
  • R 12-22: 15 sc (11 rows)
  • R 23: (3 sc, dec)*3 (12)
  • R 24: dec*6 (6)
  • F.o.

Arms (make 2)

  • R 1: 6 sc in mc (6)
  • R 2: inc*6 (12)
  • R 3-7: 12 sc (5 rows)
  • R 8: 4 sl st, 8 sc (12)
  • R 9: 4 sl st, 8 sc (12)
  • Stuff the arm.
  • R 10-19: 12 sc (10 rows)
  • R 20: dec*6 (6)
  • F.o.

Tail

  • R 1: 6 sc in mc (6)
  • R 2: inc*6 (12)
  • R 3: (1 sc, inc)*6 (18)
  • R 4-5: 18 sc (2 rows)
  • R 6: (1 sc, dec)*6 (12)
  • F.o., leaving a tail for sewing.

Nose (pattern by Lyudmila Orlova)

Hook 1.1 mm and fine yarn.

  • R 1: 6 sc in mc (6)
  • R 2: (1 sc, inc)*6 (12)
  • R 3: (3 sc, inc)*3 (15)
  • R 4: 2 sc, inc, (4 sc, inc)*2, 2 sc (18)
  • R 5: (5 sc, inc)*3 (21)
  • R 6: 3 sc, inc, (6 sc, inc)*2, 3 sc (24)
  • R 7: (7 sc, inc)*3 (27) and so on.
  • Make increase 3 times in every next row. (Crochet so many rows as you want).
  • Crochet a triangle.
  • Fold the nose flat and sc through both sides across. F.o.
  • Sew the nose to the muzzle.

AMIGURUMI PLUSH BEAR PATTERN

by


Happy September everyone! As most of you are aware, I love working with sport weight or DK weight yarn. But this time I made an amigurumi plush bear using blanket/chenille yarn. It’s my first time designing a pattern using this type of yarn, hope you don’t mind if there’s any mistakes.

Pattern notes: This Amigurumi plush bear pattern is for personal use only. Do not copy, reproduce, alter, distribute, or sell the pattern in any way. You may sell the finished products but please credit me as the designer and link back to this post.

Instructions:

Amigurumi plush bear pattern is written in US English terms and worked in continuous rounds unless stated otherwise.

Materials needed:

  • Bulky weight blanket/chenille yarn in brown colour.
  • Worsted weight yarn in white and any colour of your choice for scarf.
  • 5 mm and 3.5 mm crochet hook.
  • Fiberfill for stuffing.
  • 12 mm safety eyes.
  • Tapestry needle.
  • Small amount of black and pink felt.
  • Small button for scarf.

Stitches/ Abbreviations:

  • R – round/row.
  • Ch – chain.
  • St(s) – stitch(es).
  • Sc – single crochet.
  • Inc – increase (2sc in one st).
  • Dec – decrease (sc 2 st together).
  • Hdc – half double crochet.
  • BLO – back loops only.
  • Sl st – slip stitch.
  • [...] – repeat the instructions given in between the brackets.
  • (...) – total number of stitches.

Head:

Using brown yarn and 5 mm hook,

  1. R1: Ch 2, 8 sc in second chain from hook (8).
  2. R2: Inc in each st (16).
  3. R3: [Sc, inc] x 8 (24).
  4. R4: [Sc 2, inc] x 8 (32).
  5. R5: [Sc 3, inc] x 8 (40).
  6. R6-10: Sc in each st (40).
  7. R11: [Sc 3, dec] x 8 (32).
  8. Insert 12 mm safety eyes between R8 and R9 with 8 stitches in between.
  9. R12: [Sc 2, dec] x 8 (24).
  10. R13: Dec x 12 (12).
  11. Stuff firmly and fasten off leaving a long tail for sewing.

Ears (make 2):

Using brown yarn,

  1. R1: Ch 2, 8 sc in second chain from hook (8).
  2. R2: [Sc, inc] x 4 (12).
  3. Fasten off leaving a long tail for sewing.

Legs (make 2):

Using brown yarn,

  1. R1: Ch 2, 8 sc in second chain from hook (8).
  2. R2: [Sc 3, inc] x 2 (10).
  3. R3-4: Sc in each st (10).
  4. Fasten off the first leg but don’t cut off the yarn in second one. Stuff the legs and continue to body part.

Body:

With the second leg, chain 1 and join to the first leg.

  1. R5: Sc 4, (inc x 2), sc 4, inc in ch space, (continue to work on the other leg) sc 4, (inc x 2), sc 4, inc in ch space (28).
  2. R6-9: Sc in each st (28).
  3. R10: Sc 6, dec, sc 5, dec, sc 5, dec, sc 4, dec (24).
  4. R11: Sc in each st (24).
  5. R12: [Sc 2, dec] x 6 (18).
  6. R13: [Sc, dec] x 6 (12).
  7. Stuff the body, fasten off and weave in the ends.

Arms (make 2):

Using brown yarn,

  1. R1: Ch 2, 6 sc in second chain from hook (6).
  2. R2: [Sc 5, inc] (7).
  3. R3-R6: Sc in each st (7).
  4. Sc through both the top layers to close.
  5. Fasten off leaving a long tail for sewing.

Muzzle:

Using white yarn (worsted weight) and 3.5mm hook,

  1. R1: 8 sc in magic ring (8).
  2. R2: Inc x 8 (16).
  3. R3: Sc 2, (inc x 4), sc 4, (inc x 4), sc 2 (24).
  4. Fasten off leaving a long tail for sewing.

Cut a small triangle shape in black felt and glue it in the middle for the nose and embroider a straight line below using black yarn.

(Alternatively, you can embroider the nose or use a triangle safety nose.)

Assembling:

  • Attach the ears between R4-R6 of the head.
  • Embroider a small curve to the side of the eyes using white yarn.
  • Sew the muzzle in between the eyes.
  • Add blush using pink felt or pink yarn.
  • Attach the head to the body using the remaining yarn tail.
  • Sew the arms one row below from the top of the body.

Scarf:

Using worsted weight yarn (any colour of your choice) and 3.5 mm hook,

  1. R1: Ch 7, hdc in third chain from hook and onto the remaining chains (5). Ch 2, turn.
  2. R2: (BLO) Hdc on each st (5). Ch 2, turn.
  3. Continue to repeat R2 instructions until you are satisfied with the length of the scarf. I made around 33 rows in total.
  4. R34: Hdc 2, ch 1, skip one st, hdc 2 (4). Ch 1, turn.
  5. R35: Sc in each st (5).
  6. Wrap the scarf around the neck to check for the right placement of the button.
  7. Place the button at the other end of the scarf (I placed it around R6).

Note: The ch 1 space in R34 is the buttonhole. Increase the chain and skip one more stitch if using a large button.

And your Amigurumi plush bear is now ready!

Search results for FREE PATTERNS WINTER BEAR AMIGURUMI

by

December is my favorite time of the year! I’m sure many have started decorating for Christmas. In this post, I am sharing a cute winter bear amigurumi pattern with you all. They make a lovely Christmas ornament and stocking stuffers. Read below for instructions.

Please note: This pattern is for personal use only. Please don’t copy, reproduce, alter, distribute, or sell this pattern in whole or in parts. You may sell the finished products but please credit me as the designer and link back to this post.

Instructions:

Winter bear amigurumi pattern is written in US English terms and worked in continuous rounds unless stated otherwise.

Materials needed:

  • DK weight cotton yarn in brown, red, cream, white, and green colours.
  • 3 mm crochet hook.
  • Fiberfill for stuffing.
  • 8mm safety eyes.
  • Black embroidery thread and needle.
  • Yarn needle, stitch markers, and scissors.

Stitches/ Abbreviations

  • R – round/row.
  • Ch – chain.
  • St(s) – stitch(es).
  • Sc – single crochet.
  • Hdc – half double crochet.
  • Inc – increase (2sc in one st).
  • Dec – decrease (sc 2 st together).
  • BLO – back loops only.
  • FLO – front loops only.
  • Sl st – slip stitch.
  • [...] – repeat the instructions given in between the bracket.
  • (...) – total number of stitches.

Head:

Using brown yarn,

  1. R1: 6 sc in a magic ring (6).
  2. R2: Inc x 6 (12).
  3. R3: [Sc, inc] x 6 (18).
  4. R4: [Sc 2, inc] x 6 (24).
  5. R5: [Sc 3, inc] x 6 (30).
  6. R6: [Sc 4, inc] x 6 (36).
  7. R7: [Sc 5, inc] x 6 (42).
  8. R8-15: Sc in each st (42) – 8 rounds.
  9. R16: [Sc 5, dec] x 6 (36).
  10. R17: [Sc 4, dec] x 6 (30).
  11. Insert 8 mm safety eyes between R12 and R13 with 7 stitches in between.
  12. R18: [Sc 3, dec] x 6 (24).
  13. R19: [Sc 2, dec] x 6 (18).
  14. Stuff firmly and fasten off leaving a long tail for sewing.

Arms (make 2):

Start with brown yarn,

  1. R1: 6 sc in magic ring (6).
  2. R2: [Sc 2, inc] x 2 (8).
  3. Switch to red colour yarn.
  4. R3: Sc in each st (8).
  5. R4: (work in BLO) Sc in each st (8).
  6. R5-7: Sc in each st (8).
  7. Stuff a little and sc through both the top layers to close.
  8. Fasten off leaving a long tail for sewing.
  9. Join red yarn to the front loop of R3, ch 1 and sc in each st (8).
  10. Sl st to the first sc, fasten off and weave in the ends.

Legs (make 2):

Using brown yarn,

  1. R1: 6 sc in magic ring (6).
  2. R2: [Inc 2, sc] x 2 (10).
  3. R3-5: Sc in each st (10).
  4. Fasten off the first leg but don’t cut off the yarn in second one. Stuff the legs and continue to body part.

Body:

R6: With the second leg, chain 2, join to the first leg and sc around the first leg (10 sts), sc in the 2 chains (2 sts), sc around the second leg (10 sts) and sc in the other side of 2 chains (2 sts). [24 sts in total].

  1. R7: [Sc 10, inc 2] x 2 (28).
  2. R8-9: Sc in each st (28).
  3. Switch to red colour yarn,
  4. R10: Sc in each st (28).
  5. R11: (work in BLO) Sc in each st (28).
  6. R12-13: Sc in each st (28).
  7. R14: [Sc 5, dec] x 4 (24).
  8. R15: Sc in each st (24).
  9. R16: [Sc 4, dec] x 4 (20).
  10. R17: Sc in each st (20).
  11. R18: [Sc 8, dec] x 2 (18).
  12. Stuff the body, fasten off and weave in the ends.
  13. Join red yarn to the front loop of R11, ch 1 and sc in each st (28).
  14. Sl st to the first sc, fasten off and weave in the ends.

Ear:

Using brown yarn,

  1. R1: 6 sc in a magic ring (6).
  2. R2: Inc x 6 (12).
  3. R3: [Sc 3, inc] x 3 (15).
  4. Fasten off leaving a long tail for sewing.

Muzzle:

Using cream yarn,

  1. R1: 6 sc in a magic ring (6).
  2. R2: Inc x 6 (12).
  3. Fasten off leaving a long tail for sewing.

Embroider the nose using 2 or 3 strands of black embroidery thread.

Scarf:

Using green yarn, Ch 52.

  1. Starting from third chain on hook, hdc 50 (50).
  2. Fasten off and weave in the ends.

Assembling:

  • Sew the muzzle in between the eyes.
  • Sew the ears between R6 – R9.
  • Attach the head to the body.
  • Sew the arms where the head meets the body.
  • Using white yarn, embroider a snowflake three rows down from the head.
  • Make a running stitch one row above and below the snowflake.
  • Finally wrap the scarf around the neck and your bear is now ready!

Cute Bunny Crochet PDF Free Amigurumi Pattern

by


Hello dear friends. Today I will share a cute amigurumi bunny pattern. The bunny crochet pattern is completely free. First, I have to say this. You can also download the PDF file if you wish. In this way, you can look at the details of the pattern more easily. The crochet bunny pattern is quite simple to make. Therefore, beginners can make this amigurumi pattern without any hesitation. The finished bunny is 17 cm in size. So an amigurumi of an average size. Very large amigurumis are no longer preferred as before. Smaller amigurumi patterns have become very popular lately.

Especially children and adults started to use this kind of crochet doll amigurumi patterns for decoration and hobby purposes. Making amigurumi is the most favorite hobby of many women lately. I share with you this magnificent amigurumi bunny pattern. Now, let’s crochet bunny amigurumi pattern step by step.

PDF Cute Bunny Crochet Free Amigurumi Pattern

Designer: vivi_toys

Materials and tools

  • Yarn:
    Bunny in the first photo: Gazzal Baby Cotton beige 3424, YarnArt Ideal violet 245 (bow), Alize Bella pink 613 (spout)
    White Bunny: Alize Cotton Gold Tweed White 55, YarnArt Jeans raspberry 59 (bow);
    Bear: YarnArt Jeans beige 48, blue 76 (bow), brown 70 (but sic)
  • Hook 2 mm
  • Eyes 6 mm
  • Filler
  • Pins and needles
  • Crocheting marker (optional)

Abbreviations

  • MR: Amigurumi Magic ring
  • sc: Single Crochet
  • inc: Increase
  • dec: Decrease
  • tr: Triple Crochet/ Treble Crochet
  • st: Stitch
  • dc: Double Crochet
  • hdc: Half Double Crochet
  • slst: Slip Stitch
  • ch: Chain
  • ..in: make increase into same stitch as many as the number which is given in front of “inc” abbreviation (e.g., 3inc, 4inc..)
  • FLO: Crochet into front loops only
  • BLO: Crochet into back loops only

Arms

  1. 5 sc in MR
  2. inc * 5 (10)
  3. 3-11. 10 sc (9 rows)
  4. 12. (3 sc, dec) * 2 (8)
  5. Fold over the floor and sew on both sides 3 sc. Cut and pull the yarn out of the loop. We hide the part inside with a needle.

Ears

  1. 1. 6 sc in MR
  2. 2. inc * 6 (12)
  3. 3. (1 sc, inc) * 6 (18)
  4. 4. (2 sc, inc) * 6 (24)
  5. 5-14. 24 sc (10 rows)
  6. 15. (10 sc, dec) * 2 (22)
  7. 16. (9 sc, dec) * 2 (20)
  8. 17. (8 sc, dec) * 2 (18)
  9. 18. (7 sc, dec) * 2 (16)
  10. 19. (6 sc, dec) * 2 (14)
  11. Cut off the yarn, leaving a long tip for sewing. Fold the eyelet down the floor and sew with a needle. Sew the ears to the head with the remaining yarn.

Legs

  1. 1. 6 sc in MR
  2. 2. inc * 6 (12)
  3. 3-8. 12 sc (6 rows)
  4. We make 1 slst. Cut off the yarn at the first leg, not at the second. We will continue to crochet the body from there. We fill both legs.

Body

From the second leg: 3 ch

  1. 1. (4 sc, inc) * 6 (36)
  2. 2-11. 36 sc (10 rows)
  3. At the end of the 5th row, in the middle, we crochet popcorn from 5 dc (tail).
  4. 12. (4 sc, dec) * 6 (30)
  5. 13. (3 sc, dec) * 6 (24). We fill.
  6. 14. (2 sc, dec) * 6 (18)
  7. 15. 18 sc (we crochet handles on the sides)
  8. 16. (1 sc, dec) * 6 (12). We fill.
  9. We do not cut the yarn, we will continue to crochet the head.

Head

  1. 17. (1 sc, inc) * 6 (18)
  2. 18. (2 sc, inc) * 6 (24)
  3. 19. (3 sc, inc) * 6 (30)
  4. 20. (4 sc, inc) * 6 (36)
  5. 21. (5 sc, inc) * 6 (42)
  6. 22. (6 sc, inc) * 6 (48)
  7. 23. (7 sc, inc) * 6 (54)
  8. 24-30. 54 sc (7 rows)
  9. 31. (7 sc, dec) * 6 (48)
  10. 32. (6 sc, dec) * 6 (42). We cling eyes between 29 and 30, near at a distance of about 5 columns.
  11. 33. (5 sc, dec) * 6 (36)
  12. 34. (4 sc, dec) * 6 (30)
  13. We fill.
  14. 35. (3 sc, dec) * 6 (24)
  15. 36. (2 sc, dec) * 6 (18)
  16. 37. (1 sc, dec) * 6 (12)
  17. We fill.
  18. 38. dec * 6 (6)
  19. We tighten the hole with a needle. Sew on the muzzle (if we crochet a bear), securing it with pins. We embroider the nose (if a bunny), whites of the eyes, and eyebrows. Sew on the ears, securing them with pins.

Optionally, you can tint with dry pastels or blush / shadows.

Bow

We crochet in the MR:

  1. (3 ch, 6 tr, 3 ch, slst) * 2, 1 ch
  2. Cut off the long yarn. We wrap it in the middle of the bow several times. Then we wrap the bunny around the neck a couple of times, fix the yarns, and hide the tips inside the toy.

Bunny ready!

Crochet The Bear Christmas Toys PDF Amigurumi Free Pattern

by


Hi everyone,

Do you want to prepare a wonderful surprise amigurumi toy for Christmas? If your answer is yes, you should start making this simple amigurumi pattern right away. You will have a lot of fun while making this amigurumi bear pattern, which is very easy to do step by step. Children will be very happy when the amigurumi completes the toy. You can free crochet amigurumi pattern for your loved ones. You can give them away on New Year’s Day. Thanks to the creator of the amigurumi bear pattern.

The amigurumi bear pattern is very easy to do. It is crocheted with brown yarn. You can change the thread color of the amigurumi bear pattern. All parts of the amigurumi bear pattern are crocheted separately. Once all the parts are prepared, they are combined into the body part. You can make eyes out of plastic accessories. You can knit with black yarn if you want. You can sew pajamas from fabrics you don’t use with the Amigurumi bear pattern. You can sew a costume for the New Year. You can knit a Christmas scarf and beret for the amigurumi bear pattern. Don’t forget to add the Amigurumi bear pattern to your favorites list.

Crochet The Bear Christmas Toys PDF Amigurumi Free Pattern

Designer
Instagram: polinkowyzakatek

Materials

  • Yarn (I use YarnArt Jeans)
  • Crochet hook 2,5 mm
  • Soft stuffing
  • Needle for sewing
  • Scissors

Abbreviations

  • MR – magic ring
  • sc – single crochet
  • ch – chain
  • inc – increase
  • dec – decrease

Let’s start knitting the amigurumi bear pattern 🙂

Let’s knit the head part of the amigurumi bear pattern

Head

  • Rnd 1. 6 sc in MR (6)
  • Rnd 2. (inc) * 6 (12)
  • Rnd 3. (1sc, inc) * 6 (18)
  • Rnd 4. (2sc, inc) * 6 (24)
  • Rnd 5. (3sc, inc) * 6 (30)
  • Rnd 6. (4sc, inc) * 6 (36)
  • Rnd 7. (5sc, inc) * 6 (42)
  • Rnd 8. (6sc, inc) * 6 (48)
  • Rnd 9-15. sc 48
  • Rnd 16. (6sc, dec) * 6 (42)
  • Rnd 17. sc 42
  • Rnd 18. (5sc, dec) * 6 (36)
  • Rnd 19. sc 36
  • Rnd 20. (4sc, dec) * 6 (30)
  • Rnd 21. sc 30
  • Rnd 22. (3sc, dec) * 6 (24)
  • Rnd 23. (2sc, dec) * 6 (18)
  • Rnd 24. (1sc, dec) * 6 (12)
  • Rnd 25. (dec) * 6 (6)
  • close the opening

After completing the head part of the Amigurumi bear pattern, we crochet the snout part. 🙂

Snout

  • Rnd 1. 6sc in MR (6)
  • Rnd 2. (inc) * 6 (12)
  • Rnd 3. (1sc, inc) * 6 (18)
  • Rnd 4. (2sc, inc) * 6 (24)
  • Rnd 5. sc 24

Let’s knit the ears of the amigurumi pattern for free 🙂

Ears (x2)

  • Rnd 1. 6sc in MR (6)
  • Rnd 2. (inc) * 6 (12)
  • Rnd 3. sc 12
  • Rnd 4. sc 12

We knit the arms and legs of the amigurumi pattern. 🙂

Arms (x2)

  • Rnd 1. 6sc in MR (6)
  • Rnd 2. (1sc, inc) * 6 (9)
  • Rnd 3-15. sc 9
  • Fold the opening and crochet both sides together

Legs (x2)

leg 1

  • Rnd 1. 6sc in MR (6)
  • Rnd 2. (inc) * 6 (12)
  • Rnd 3. (1sc, inc) * 6 (18)
  • Rnd 4. sc 18
  • Rnd 5. sc 18
  • Rnd 6. 3dec, 12 sc (15)
  • Rnd 7. sc 15

leg 2

  • Repeat round 1- round 7 but do not cut the yarn.
  • Make 5 chain stitches and join legs.

We knit the body part of the amigurumi bear pattern. Then we will sew the other prepared parts to the body part. 🙂

Body

  • Rnd 1. 15 sc (around 1 leg), 5 sc (in the chains), 15 sc (around 2 leg), 5 sc (in the chains) (40)
  • Rnd 2-5. sc 40
  • Rnd 6. (7sc, inc) * 5 (45)
  • Rnd 7-12. sc 45
  • Rnd 13. (7sc, dec) * 5 (40)
  • Rnd 14. sc 40
  • Rnd 15. (6sc, dec) * 5 (35)
  • Rnd 16. sc 35
  • Rnd 17. (5sc, dec) * 5 (30)
  • Rnd 18. (3sc, dec) * 6 (24)
  • Rnd 19. (2sc, dec) * 6 (18)
  • Rnd 20-21. sc 18
  • Fasten off. Leaving a long tail for sewing. Stuff the body.

Assembling

  • Sew the head to the body.
  • Sew the ears to the head (between round 5-10 at a distance of about 7 SC)
  • Between round 13-14, embroider teddy bear eyes.
  • Between the 13th and 23rd round sew on the muzzle.
  • Embroider the nose on the muzzle.

Congratulations, you have completed the Bear Christmas Toys amigurumi pattern! 🎉

SPRING BUNNY AMIGURUMI PATTERN

by


Free Spring Bunny Amigurumi Pattern

Spring has arrived in most parts of the world, and Easter is just around the corner. What better time to make a cute Spring Bunny amigurumi? These little bunnies will make great Easter basket stuffers for kids. So, let’s get started!

Materials:

  • Sport weight cotton yarn in light pink, pink, and green colors.
  • 2 mm crochet hook.
  • Fiberfill for stuffing.
  • A pair of 8 mm safety eyes.
  • Tapestry needle.
  • Black and pink embroidery thread and needle.

Head:

Using light pink yarn:

  1. R1: 6 sc in a magic ring (6).
  2. R2: Inc x 6 (12).
  3. R3: [Sc, inc] x 6 (18).
  4. R4: [Sc 2, inc] x 6 (24).
  5. R5: [Sc 3, inc] x 6 (30).
  6. R6: [Sc 4, inc] x 6 (36).
  7. R7: [Sc 5, inc] x 6 (42).
  8. R8-15: Sc x 42 (42).
  9. R16: [Sc 4, dec] x 7 (35).
  10. R17: [Sc 3, dec] x 7 (28).
  11. Insert 8 mm safety eyes between R13 and R14 with 7 stitches in between.

  12. Start stuffing with fiberfill and continue to stuff as you go.
  13. R18: [Sc 2, dec] x 7 (21).
  14. R19: [Sc, dec] x 7 (14).
  15. Stuff firmly and fasten off, leaving a long tail for sewing.
  16. Embroider a small line for the mouth and blush using pink thread.

Ears (Make 2):

Using light pink yarn:

  1. R1: 6 sc in a magic ring (6).
  2. R2: Inc x 6 (12).
  3. R3: [Sc, inc] x 6 (18).
  4. R4: [Sc 2, inc] x 6 (24).
  5. R5-6: Sc x 24 (24).
  6. R7: [Sc 6, dec] x 3 (21).
  7. R8: Sc x 21 (21).
  8. R9: [Sc 5, dec] x 3 (18).
  9. R10-11: Sc x 18 (18).
  10. R12: [Sc 4, dec] x 3 (15).
  11. R13: Sc x 15 (15).
  12. R14: [Sc 3, dec] x 3 (12).
  13. R15: Sc x 12 (12).
  14. R16: [Sc 2, dec] x 3 (9).
  15. Sc through both the top layers to close. Fasten off leaving a long tail for sewing.

Arms (Make 2):

Using light pink yarn:

  1. R1: 6 sc in a magic ring (6).
  2. R2: [Sc 2, inc] x 2 (8).
  3. R3-R7: Sc in each st (8).
  4. Sc through both the top layers to close. Fasten off leaving a long tail for sewing.

Legs (Make 2):

Using light pink yarn:

  1. R1: 6 sc in a magic ring (6).
  2. R2: [Sc, inc 2] x 2 (10).
  3. R3-5: Sc in each st (10).
  4. Fasten off the first leg but don’t cut off the yarn in the second one. Stuff the legs and continue to the body part.

Body:

  1. R6: With the second leg, chain 2 and join to the first leg. Sc around the first leg (10 sts), sc in the 2 chains (2 sts), sc around the second leg (10 sts), and sc in the other side of the 2 chains (2 sts). [24 sts in total].
  2. R7-14: Sc in each st (24).
  3. R15: [Sc 2, dec] x 6 (18).
  4. R16: Sc in each st (18).
  5. R17: Sc 3, dec 2, sc 5, dec 2, sc 2 (14).
  6. Stuff the body, fasten off, and weave in the ends.

Belly Patch:

Using pink yarn:

  1. R1: Ch 5, starting from 2nd ch on hook, sc 3, 3 sc in the last ch. Continue to work on the other side of the chain and sc 2, inc in last (10).
  2. R2: Inc, sc 2, inc 3, sc 2, inc 2 (16).
  3. R3: Sc, inc, sc 2, (sc, inc) x 3, sc 2, (sc, inc) x 2 (22).
  4. Fasten off invisibly, leaving a long tail for sewing.

Bow:

Using any yarn color of your choice:

  1. In magic ring: [Ch 2, dc, trc, dc, chain 2, sl st to the ring] x 2.
  2. Pull the tail to close the ring.
  3. Wrap around the middle of the bow 3 times and make a knot at the back.
  4. Fasten off, leaving a long tail for sewing.

Assembling:

  1. Attach the ears at the end of R10 on both sides of the head.
  2. Sew the arms one row below from the top of the body.
  3. Attach the head to the body.
  4. Add the belly patch at the center of the body.
  5. Finally, sew the bow just above the ears.

And your adorable Spring Bunny is now ready for Easter!

Crochet Rooster PDF Amigurumi Free Pattern

by


Free Crochet Rooster Amigurumi Pattern

Hello everyone! Today, we're bringing you a crochet rooster amigurumi toy pattern. First of all, I'd like to thank the owner of this pattern for offering it for free. Thanks to the detailed, step-by-step instructions, you'll be able to complete the crochet rooster amigurumi quickly and easily. Feel free to experiment with different colors and materials to customize your rooster to your liking. Stay tuned for more free crochet amigurumi patterns!

Designer: les.mailles.du.rocher

Materials:

  • Cotton ricorumi (brown, blue, yellow, red)
  • Crochet hook: 3 mm
  • Yarn needle
  • Fiberfill for stuffing
  • Safety eyes (5 or 6 mm)
  • Stitch marker
  • Scissors

Abbreviations:

  • Rnd: Round
  • MR: Magic Ring
  • Ch: Chain
  • Sl st: Slip Stitch
  • Sc: Single Crochet
  • Inc: Increase (2 sc in one stitch)
  • Dec: Decrease (sc 2 st together)
  • Hdc: Half Double Crochet

Head and Body:

Start with brown yarn.

  1. Rnd 1: MR, 6 sc [6]
  2. Rnd 2: (Inc)* [12]
  3. Rnd 3: (1 sc, Inc)* [18]
  4. Rnd 4: (2 sc, Inc)* [24]
  5. Rnd 5–6: 24 sc [24]
  6. Rnd 7: (3 sc, Inc)* [30]
  7. Rnd 8–9: 30 sc [30]
  8. Rnd 10: (9 sc, Inc)* [33]
  9. Rnd 11: 33 sc [33]
  10. Rnd 12: (10 sc, Inc)* [36]
  11. Rnd 13: BLO 36 sc [36]

Change to blue yarn.

  1. Rnd 14: Ch 9, crochet the first sc in the 2nd ch from hook (mark this stitch as the beginning of the round): 8 sc, 1 sc in the stitch where the foundation chain starts, 36 sc on the body, 7 sc, inc [54]
  2. Rnd 15: 2 inc, 50 sc, 2 inc [58]
  3. Rnd 16: 3 inc, 53 sc, 2 inc [63]
  4. Rnd 17–19: 63 sc [63]
  5. Insert the eyes between Rnds 7 and 8.

  6. Rnd 20: 4 sc, dec, 52 sc, dec, 3 sc [61]
  7. Rnd 21: 4 sc, dec, 50 sc, dec, 3 sc [59]
  8. Rnd 22: 4 sc, dec, 48 sc, dec, 3 sc [57]
  9. Rnd 23: 24 sc, dec, 6 sc, dec, 23 sc [55]
  10. Rnd 24: 4 sc, dec, 44 sc, dec, 3 sc [53]
  11. Rnd 25: 22 sc, dec, 6 sc, dec, 21 sc [51]
  12. Rnd 26: 4 sc, dec, 19 sc, dec, 19 sc, dec, 3 sc [48], stuff.
  13. Rnd 27: (3 sc, dec, 3 sc)* [42]
  14. Rnd 28: (5 sc, dec)* [36]
  15. Rnd 29: BLO (2 sc, dec, 2 sc)* [30]
  16. Rnd 30: (dec)* [15]. Finish stuffing.
  17. Rnd 31: (3 sc, dec)* [12]
  18. Rnd 32: (dec)* [6]
  19. Fasten off and close.

In the FLO of Rnd 28, take blue yarn and crochet 36 sc all around.

In the FLO of Rnd 12, take brown yarn.

  1. R1: (1 sl st, ch 2, 1 sl st in next stitch)*
  2. R2: (ch 3, 1 sl st in chain space of R1)*

Embroider the paws with yellow yarn.

Beak:

In yellow yarn.

  1. Rnd 1: MR, 4 sc [4]
  2. Rnd 2: (1 sc, inc)* [6]
  3. Rnd 3: (1 sc, inc)* [9]
  4. Rnd 4: 9 sc [9], 1 sl st.
  5. Fasten off, leaving a thread for sewing.

Wattle:

In red yarn.

  1. Ch 2, 1 sl st in 2nd ch from hook (ch 6, 1 sl st in the foundation chain)* 2

Comb:

In red yarn.

  1. Ch 7, 1 sl st in 2nd ch from hook (ch 4, 1 sl st in next stitch on ch)* 6

Tail Feathers:

In blue yarn.

Make 2 feathers:

  1. Ch 2, 1 sl st in 2nd ch from hook.
  2. (Ch 11, crochet along the chain: 9 sc, 1 sl st), then 1 sl st in the foundation chain)* 3

Fasten off and sew both feathers at the back of the body on top of the tail.

Congratulations, you’ve completed the cute crochet rooster amigurumi pattern!

Crochet Bunny Henri with Carrot Amigurumi PDF Pattern

by


Free Crochet Bunny Henri with Carrot Amigurumi Pattern

Hello my dears! I know you love crochet bunny patterns, and today we are adding a new one to our collection! This new pattern is super easy and quick to make. The best part is that the arms and legs are done in the same way, which cuts down on production time. I've also added a cute carrot accessory that I think looks pretty cool. So, if you’re ready, let’s get started!

Designer: les.mailles.du.rocher

Materials:

  • Cotton ricorumi yarn in white, orange, and green colors
  • Crochet hook: 3mm
  • Yarn needle
  • Fiberfill for stuffing
  • Safety eyes (5 or 6 mm)
  • Black embroidery thread
  • Stitch marker
  • Scissors

Abbreviations:

  • Rnd: Round
  • MR: Magic Ring
  • Ch: Chain
  • Sl st: Slip Stitch
  • Sc: Single Crochet
  • Inc: Increase (2 sc in one stitch)
  • Dec: Decrease (sc 2 st together)
  • Hdc: Half Double Crochet
  • BLO: Back Loops Only
  • FLO: Front Loops Only
  • 0*: Repeat until the end of the round
  • [ ]: Total number of stitches in the round

Body:

  1. Rnd 1: MR, 6 sc [6]
  2. Rnd 2: (Inc)* [12]
  3. Rnd 3: (1 sc, Inc)* [18]
  4. Rnd 4: (2 sc, Inc)* [24]
  5. Rnd 5: (3 sc, Inc)* [30]
  6. Rnd 6: BLO – (2 sc, Inc, 2 sc)* [36]
  7. Rnd 7–12: 36 sc [36]
  8. Rnd 13: (Dec, 4 sc) x 3, Dec, 16 sc [32]
  9. Rnd 14–15: 32 sc [32]
  10. Rnd 16: (Dec, 3 sc) x 3, Dec, 15 sc [28]
  11. Rnd 17–18: 28 sc [28]
  12. Stuff.
  13. Rnd 19: (Dec, 2 sc) x 3, Dec, 14 sc [24]
  14. Rnd 20: 24 sc [24]
  15. Rnd 21: (2 sc, Dec)* [18]
  16. Fasten off, leaving a tail for sewing to the head.

Head:

  1. Rnd 1: MR, 6 sc [6]
  2. Rnd 2: (Inc)* [12]
  3. Rnd 3: (1 sc, Inc)* [18]
  4. Rnd 4: 18 sc [18]
  5. Rnd 5: (2 sc, Inc)* [24]
  6. Rnd 6: 24 sc [24]
  7. Rnd 7: (3 sc, Inc)* [30]
  8. Rnd 8: 30 sc [30]
  9. Rnd 9: (2 sc, Inc, 2 sc)* [36]
  10. Rnd 10–16: 36 sc [36]
  11. Insert safety eyes between Rnds 9 & 10 with approx 16 stitches apart.

  12. Rnd 17: (Dec, 4 sc)* [30]
  13. Rnd 18: (3 sc, Dec)* [24]
  14. Rnd 19: (2 sc, Dec)* [18]
  15. Stuff.

  16. Rnd 20: (Dec, 1 sc)* [12]
  17. Rnd 21: (Dec)* [6]
  18. Fasten and close.

Ears (x2):

  1. Rnd 1: MR, 4 sc [4]
  2. Rnd 2: (Sc, Inc)* [6]
  3. Rnd 3: (1 sc, Inc)* [9]
  4. Rnd 4: 9 sc [9]
  5. Rnd 5: (2 sc, Inc)* [12]
  6. Rnd 6: (3 sc, Inc)* [15]
  7. Rnd 7: 15 sc [15]
  8. Rnd 8: (4 sc, Inc)* [18]
  9. Rnd 9–13: 18 sc [18]
  10. Rnd 14: (4 sc, Dec)* [15]
  11. Fasten off, leaving a tail for sewing.
  12. Fold the ear in half and sew both sides together.

Arms and Legs (x4):

  1. Rnd 1: MR, 6 sc [6]
  2. Rnd 2: (Inc)* [12]
  3. Rnd 3-4: 12 sc [12]
  4. Rnd 5: (2 sc, Dec)* [9]
  5. Rnd 6: 9 sc [9]
  6. Rnd 7: (1 sc, Dec)* [6]
  7. Don’t stuff. Fasten off and close, take out the thread to the inside and sew to the body (or glue).

Tail:

  1. Rnd 1: MR, 6 sc [6]
  2. Rnd 2: (Inc)* [12]
  3. Rnd 3: (1 sc, Inc)* [18]
  4. Rnd 4: (2 sc, Inc)* [24]
  5. Rnd 5–9: 24 sc [24]
  6. Rnd 10: (2 sc, Dec)* [18]
  7. Fasten off, leaving a tail for sewing. Stuff and sew to the body.

Carrot:

If you want a small size, take a 2.5mm hook.

  1. Start with orange yarn.
  2. Rnd 1: MR, 6 sc [6]
  3. Rnd 2: 6 sc [6]
  4. Rnd 3: (1 sc, Inc)* [9]
  5. Rnd 4: 9 sc [9]
  6. Rnd 5: (2 sc, Inc)* [12]
  7. Rnd 6–10: 12 sc [12]
  8. Rnd 11: BLO – (Dec)* [6]
  9. Change color to green and crochet in front loops of the next round (the remaining back loops will be used to close the hole at the end).

  10. Rnd 12: FLO – [(Ch 6, crochet along the ch: 2 sc, 3 sl st), 1 sl st in next stitch] x6
  11. Fasten off and hide the yarn.
  12. Cut orange yarn and leave a tail to close, using back loops of the last round. You can bring out the thread at the bottom of the carrot.

Assembling:

  • Sew the head to the body.
  • Sew the ears to the top of the head.
  • Attach the arms and legs to the body.
  • Sew the tail to the back of the body

Search resultsforFREE PATTERNS AMIGURUMI CAT FREE PATTERN

by


Amigurumi Cat Pattern - Free Crochet Pattern

Hi everyone! I'm a dog person at heart, but I just can't resist the cuteness of cats. If you scroll through my free patterns, you'll notice that most of them are cat-themed. So, here's another adorable amigurumi cat pattern for you to enjoy! This cute little cat is sure to bring some charm to your crochet collection.

Please note that this pattern is for personal use only. Do not copy, reproduce, alter, distribute, or sell this pattern in whole or in parts. You may sell the finished products, but please credit me as the designer and link back to this post. Thank you!

Materials Needed:

  • 5ply milk cotton yarn in tan, cream, and brown colors.
  • 3 mm crochet hook
  • Fiberfill for stuffing
  • 8 mm safety eyes
  • Tapestry needle
  • Black embroidery thread and needle

Stitches/Abbreviations:

  • R: Round/Row
  • Ch: Chain
  • St(s): Stitch(es)
  • Sc: Single Crochet
  • Inc: Increase (2 sc in one st)
  • Dec: Decrease (sc 2 st together)
  • Sl st: Slip Stitch
  • [..]: Repeat the instructions given in between the brackets
  • (..): Total number of stitches

Head:

Using tan colour yarn,

  1. R1: 7 sc in a magic ring (7)
  2. R2: Inc in each st (14)
  3. R3: [Sc, inc] x 7 (21)
  4. R4: [Sc 2, inc] x 7 (28)
  5. We’ll start switching between tan and cream yarn from R5-R9.

  6. R5: (Sc 3, inc) x 3, sc 2, sc, inc, (sc 3, inc) x 3 (35)
  7. R6: Sc 16, sc 3, sc 16 (35)
  8. R7: Sc 15, sc 5, sc 15 (35)
  9. R8: Sc 14, sc 7, sc 14 (35)
  10. R9: Sc 14, sc 8, sc 13 (35)
  11. We’ll fully work with cream yarn from R10.

  12. R10: (Sc 4, inc) x 7 (42)
  13. R11-12: Sc in each st (42)
  14. R13: [Sc 4, dec] x 7 (35)
  15. R14: [Sc 3, dec] x 7 (28)
  16. Insert 8 mm safety eyes between R9 and R10 with 6 stitches in between.

    Start stuffing with fiberfill and continue to stuff as you go.

  17. R15: [Sc 2, dec] x 7 (21)
  18. R16: [Sc, dec] x 7 (14)
  19. Stuff firmly and fasten off leaving a long tail for sewing.

Ears (Make 2):

Using tan yarn,

  1. R1: 4 sc in magic ring (4)
  2. R2: Inc in each st (8)
  3. R3: [Sc, inc] x 4 (12)
  4. R4: [Sc 2, inc] x 4 (16)
  5. Fasten off leaving a long tail for sewing.

Arms (Make 2):

Using tan yarn,

  1. R1: 6 sc in magic ring (6)
  2. R2: [Sc 2, inc] x 2 (8)
  3. R3-R7: Sc in each st (8)
  4. Sc through both the top layers to close. Fasten off leaving a long tail for sewing.

Legs (Make 2):

Using tan yarn,

  1. R1: 6 sc in magic ring (6)
  2. R2: [Sc, inc 2] x 2 (10)
  3. R3-4: Sc in each st (10)
  4. Fasten off the first leg but don’t cut off the yarn in the second one. Stuff the legs and continue to the body part.

Body:

  1. R5: With the second leg, chain 2 and join to the first leg and sc around the first leg (10 sts), sc in the 2 chains (2 sts), sc around the second leg (10 sts) and sc in the other side of 2 chains (2 sts). [24 sts in total]
  2. R6-12: Sc in each st (24)
  3. R13: [Sc 4, dec] x 4 (20)
  4. R14: Sc in each st (20)
  5. R15: [Sc 3, dec] x 4 (16)
  6. R16: [Sc 6, dec] x 2 (14)
  7. Stuff the body, fasten off, and weave in the ends.

Tail:

Start with brown colour yarn,

  1. R1: 6 sc in magic ring
  2. R2: [Sc 2, inc] x 2 (8)
  3. R3: Sc in each st (8)
  4. R4-R5: (tan colour) Sc in each st (8)
  5. R6-R7: (brown colour) Sc in each st (8)
  6. R8-R9: (tan colour) Sc in each st (8)
  7. R10-R11: (brown colour) Sc in each st (8)
  8. R12-R13: (tan colour) Sc in each st (8)
  9. Sc through both the top layers to close.

    Fasten off leaving a long tail for sewing.

Belly Patch:

Using cream colour yarn,

  1. R1: Ch 5, starting from 2nd ch on hook, sc 3, 3 sc in last ch. Continue to work on other side of the chain and sc 2, inc in last (10)
  2. R2: Inc, sc 2, inc 3, sc 2, inc 2 (16)
  3. R3: Sc, inc, sc 2, (sc, inc) x 3, sc 2, (sc, inc) x 2 (22)
  4. Fasten off invisibly. Leave a long tail for sewing.

Assembling:

  • Embroider an inverted "V" shape for the mouth.
  • Sew the whiskers one stitch away from the eyes on either side.
  • Using tapestry needle and brown yarn, sew 2 long stripes from the top of the head to R5 at the centre.
  • Sew 2 more stripes on both sides from the centre.
  • Sew the ears between R3 to R7 on either side of the head.
  • Attach the head to the body using the remaining yarn tail.
  • Sew the arms where the head and body meet.
  • Add the belly patch to the centre of the body.
  • Add two stripes on either side of the body.
  • Finally, sew the tail slantingly at the back of the body.
  • </

Zaya Velvet Crochet Bunny PDF Amigurumi Free Pattern

by


Zaya Plush PDF Crochet Bunny Amigurumi Free Pattern

Dear friends,
Hello everyone first of all. Today I will share a crochet amigurumi pattern prepared using velvet yarn for you. As you know, plush crochet amigurumi is made using velvet yarn. This is how this cute crochet bunny was crocheted. It’s usually not easy to crochet such an amigurumi, but I don’t think you’ll find it very difficult thanks to the step-by-step pattern instructions. Therefore, I can say that it is one of the good options for beginners.

First of all, there is no dress pattern in the amigurumi pattern. I’m so sorry for this. You can contact the pattern designer for the dress. However, I think it has a very impressive appearance as it is. An extremely large amigurumi pattern. The size of the finished amigurumi crochet bunny toy will be about 40 cm. I wish you success in advance, don’t forget to keep following us for new free amigurumi patterns.

Designer: j_toys1

Materials:

  • Hook, any plush yarn (1 skein) white plush yarn (for the muzzle), pink for the nose.
  • Black floss for cilia embroidery, eyes on a secure mount.
  • Filler.

Terms:

  • Single Crochet (sc)
  • Amigurumi magic ring
  • Increase (inc)
  • Decrease (dec)

Head

  1. 1. 6 sc in amigurumi magic ring
  2. 2. 6 sc (12)
  3. 3. (1 sc, 1 inc) x 6 = 18
  4. 4. (2 sc, 1 inc) x 6 = 24
  5. 5. (3 sc, 1 inc) x 6 = 30
  6. 6. (4 sc, 1 inc) x 6 = 36
  7. 7-8. 36 sc (2 rounds)
  8. 9. (5 sc, 1 inc) x 6 = 42
  9. 10-13. 42 sc (4 rounds)
  10. 14. (5 sc, 1 inc) x 6 = 36
  11. 15. (4 sc, 1 inc) x 6 = 30
  12. 16. (3 sc, 1 inc) x 6 = 24 (stuff the head)
  13. 17. (2 sc, 1 inc) x 6 = 18
  14. 18. (1 sc, 1 inc) x 6 = 12. Fasten and cut the yarn.

Ears

  1. 1. 6 sc in amigurumi magic ring
  2. 2. 6 inc = 12
  3. 3. (1 sc, 1 inc) x 6 = 18
  4. 4. (2 sc, 1 inc) x 6 = 24
  5. 5-8. 24 sc (4 rounds)
  6. 9. (6 sc, 1 inc) x 3 = 21
  7. 10. 21 sc
  8. 11. (5 sc, 1 inc) x 3 = 18
  9. 12-14. 18 sc (3 rounds). Add up in half and knit the sides together.

Muzzle

  1. 1. 6 sc in magic ring
  2. 2. 6 inc = 12
  3. 3. (1 sc, 1 inc) x 6 = 18
  4. 4. 18 sc

Spout

  1. 1. 6 sc in magic ring
  2. 2. 6 sc

Legs

  1. 1. 6 sc in magic ring
  2. 2. 6 inc = 12
  3. 3. (1 sc, 1 inc) x 6 = 18
  4. 4. (2 sc, 1 inc) x 6 = 24
  5. 5-6. 24 sc (2 rounds)
  6. 7. 6 inc, 12 sc = 18
  7. 8. 3 inc, 12 sc = 15
  8. 9. 3 inc, 9 sc = 12 (stuff the legs)
  9. 10-17. 12 sc (8 rounds)
  10. Fold in half and knit sides together.

Heels

  1. 1. 6 sc in magic ring
  2. 2. 6 sc = 12

Arms

  1. 1. 5 sc in magic ring
  2. 2. 5 inc = 10
  3. 3. (1 sc, 1 inc) x 5 = 15
  4. 4-5. 15 sc (2 rounds)
  5. 6. 3 inc, 9 sc = 12
  6. 7. 2 inc, 8 sc = 10 (stuff the arms)
  7. 8-15. 10 sc (8 rounds). Fold in half and knit the sides together.

Body

  1. 1. 6 sc in magic ring
  2. 2. 6 inc = 12
  3. 3. (1 sc, 1 inc) x 6 = 18
  4. 4. (2 sc, 1 inc) x 6 = 24
  5. 5. (3 sc, 1 inc) x 6 = 30
  6. 6. (4 sc, 1 inc) x 6 = 36
  7. 7. (5 sc, 1 inc) x 6 = 42
  8. 8. 42 sc in this round, we knit legs.
  9. 9-11. 42 sc (3 rounds)
  10. 12. (5 sc, 1 inc) x 6 = 36
  11. 13-14. 36 sc (2 rounds)
  12. 15. (4 sc, 1 inc) x 6 = 30
  13. 16-17. 30 sc (2 rounds)
  14. 18. (3 sc, 1 inc) x 6 = 24
  15. 19. 24 sc
  16. 20. (2 sc, 1 inc) x 6 = 18
  17. 21. 18 sc, in this row we knit hands.
  18. 22. 18 sc, fasten and cut the yarn. We stuff the body.

Tail

  1. 1. 6 sc in magic ring
  2. 2. 6 inc = 12
  3. 3-4. 12 sc (2 rounds)
  4. 5. 6 inc, fasten and cut the thread, stuff the tail.

Enjoy crocheting your plush bunny! Don't forget to share your work with us and follow for more patterns!

Search results for Little Crochet Cat Amigurumi Free Pattern

by


Little Cat Amigurumi Crochet Free Pattern

Dear friends, hello to all of you.
I’ve recently started dedicating a little extra space to amigurumi crochet cat patterns. Crochet cat patterns have started to attract my attention lately. This cute amigurumi cat pattern today is one of them. A pretty small amigurumi. It is the size that you can use as a keychain and can be a very nice keychain.

You can find the making of Amigurumi and its detailed step-by-step explanation below. I am adding these cute amigurumi cat pictures created with different colors as an example for you. I hope you like this cute crochet kitty. The finished amigurumi cat toy size is 9cm. Start crocheting this free amigurumi pattern now to gift handmade items to your loved ones during the holidays. Have fun.

Designer: @lucy_rose_toys

Materials and Tools

  • About 30g of 100% cotton DK yarn 50g 125m (for example, Vita cotton Lily) or sport yarn. Size of the toy made with this yarn is about 9cm.
  • Colors: Body color and color of the eyes of your choice.
  • Crochet hook according to your yarn. (I use clover 1.75 or 2.0)
  • Yarn needle, sewing needle.
  • Thread for embroidering the nose (e.g., YarnArt Canarias.) Embroidery or sewing thread for embroidering whiskers.
  • Safety eyes or button eyes diameter 6mm, sewing thread of black color to sew the eyes.
  • Polyester fiberfill.

Abbreviations

  • MR: Magic Ring
  • sc: Single crochet
  • inc: Increase
  • dec: Decrease
  • tr: Treble/Triple crochet
  • TRinc: Work 2 tr sts into the same st.
  • dc: Double crochet
  • hdc: Half double crochet
  • sl-st: Slip stitch
  • ch: Chain
  • st/sts: stitch/stitches
  • FLO: Front loop only
  • BLO: Back loop only
  • BL: Bobble Stitch: (Yarn over, insert your hook into the st, and pull up a loop. Yarn over again and pull through 2 loops) repeat the steps in the same st until you have a total of 5 loops on your hook. Yarn over and pull through all 5 loops at once.
  • Reverse single crochet: Ch 1, working from left to right, insert your hook into the next st, turn hook to the left side, grab yarn and pull through. There are now 2 loops on your hook. Draw up a loop, bring yarn over the hook again and draw this loop through both loops.
  • (…)- x times: Repeat the instructions between parentheses x times.
  • (…): Represents the number of sts you should have at the end of the round.

Body

  1. 1 rnd: 9ch, start in the second chain from the hook: 1 inc, 6 sc, 3 sc in the last st, turn and continue on the other side of the chain, 7 sc (18)
  2. Continue crocheting in spiral.
  3. 2 rnd: 2 inc, 6 sc, 3 inc, 6 sc, 1 inc (24)
  4. 3 rnd: (1 sc, 1 inc) x 2, 6 sc, (1 sc, 1 inc) x 3, 7 sc, 1 inc (30)
  5. 4 rnd: (2 sc, 1 inc) x 2, 6 sc, (2 sc, 1 inc) x 3, 8 sc, 1 inc (36)
  6. 5 rnd: (3 sc, 1 inc) x 2, 6 sc, (3 sc, 1 inc) x 3, 9 sc, 1 inc (42)
  7. 6-7 rnds: 42 sc (2 rnds)
  8. 8 rnd: 4 sc, 1 inc, 20 sc, 1 inc, 16 sc (44)
  9. 9-10 rnds: 44 sc (2 rnds)
  10. If you use safety eyes, first crochet the iris of the eyes, insert the safety eyes into the iris, then insert the eyes into the body between rounds 9 and 10. The distance between the points where you insert the eyes is 7 stitches.
  11. 11 rnd: 5 sc, 1 inc, 21 sc, 1 inc, 16 sc (46)
  12. 12 rnd: 46 sc
  13. 13 rnd: 6 sc, 1 inc, 22 sc, 1 inc, 16 sc (48)
  14. 14 rnd: 48 sc
  15. 15 rnd: 7 sc, 1 inc, 23 sc, 1 inc, 16 sc (50)
  16. 16-20 rnds: 50 sc (5 rnds)
  17. 21 rnd: 7 sc, 1 dec, 23 sc, 1 dec, 16 sc (48)
  18. 22-23 rnds: 48 sc (2 rnds)
  19. 24 rnd: 7 sc, 1 dec, 22 sc, 1 dec, 15 sc (46)
  20. 25 rnd: 46 sc
  21. 26 rnd: 2 sc, (1 dec, 3 sc) x 3, 8 sc, (1 dec, 3 sc) x 3, 6 sc (40)
  22. 27-28 rnds: 40 sc (2 rnds)
  23. 29 rnd: (3 sc, 1 dec) x 8 (32)
  24. 30 rnd: (2 sc, 1 dec) x 8 (24)
  25. 31 rnd: (1 sc, 1 dec) x 8 (16)
  26. Stuff the body tightly, but it must not be too round.
  27. 32 rnd: 8 dec (8)
  28. Add some fiberfill if you need to. Cut the yarn leaving a long tail. Close the remaining hole using a yarn needle: weave in the yarn through the front loops of all 8 stitches and pull tightly. Hide the remaining yarn tail inside the detail.

Tail

  1. 1 rnd: 6 sc in MR
  2. 2-23 rnds: 6 sc (22 rnds)
  3. Fasten off, cut the yarn leaving a long tail for sewing.

Arms (make two)

  1. 1 rnd: 6 sc in MR
  2. 2 rnd: (2 sc, 1 inc) x 2 (8)
  3. 3-9 rnds: 8 sc (7 rnds)
  4. Don’t stuff the arms.
  5. Fold the detail and crochet 4 sc joining both sides together. Fasten off, cut the yarn leaving a long tail for sewing.

Legs (make two)

  1. 1 rnd: 6 sc in MR
  2. 2 rnd: (1 sc, 1 inc) x 3 (9)
  3. 3-8 rnds: 9 sc (6 rnds)
  4. 9 rnd: 4 sc, 1 inc, 4 sc (10)
  5. 10 rnd: 10 sc
  6. Don’t stuff the legs.
  7. Fold the detail and crochet 5 sc joining both sides together. Fasten off, cut the yarn leaving a long tail for sewing.

Ears (make 2)

  1. 1 rnd: 4 sc in MR
  2. 2 rnd: 4 inc (8)
  3. 3 rnd: (1 sc, 1 inc) x 4 (12)
  4. 4-5 rnds: 12 sc (2 rnds)
  5. Don’t stuff the ears.
  6. Fasten off, cut the yarn leaving a long tail for sewing.

Iris of the Eyes (make two)

  1. 1 rnd: 6 sc in MR, 1 sl-st
  2. Don’t tighten the rings too much, we will insert the eyes in them.
  3. Fasten off, cut the yarn leaving a long tail for sewing.

Assembling

  • Sew on the ears.
  • Sew the arms on rounds 14-16.
  • Sew the legs on rounds 23-26.
  • Sew the tail in the center of the back approximately on round 25.
  • Embroider the nose on round 10, the length of the nose is 2 stitches.
  • Sew on the eyes between rounds 9 and 10. The distance between the points where you sew the eyes is 7 stitches. To make the process of sewing easier, you may enlarge the holes where the eyes are sewn with the help of tapestry needle or reverse hook end. First, match the holes in the body with the holes of the iris. Then sew the eyes over the iris.
  • Fix the iris with some stitches around. Embroider the whiskers.

Enjoy your cute little cat amigurumi!

Crochet PDF Teddy Bear Mishka Amigurumi Free Pattern

by


PDF The Bear Mishka Amigurumi Crochet Free Pattern

The Bear Mishka amigurumi is made with plush crochet. Thanks to its soft appearance, you will want to hug it all the time. The sweet face of the teddy bear will make you happy. Because it’s so cute. You should make this wonderful pattern right away and show it to your friends.

Designer: Instagram: plush_happy_toys

Abbreviations

  • MR: Magic (amigurumi) ring
  • sc: Single crochet
  • inc: Increase
  • dec: Decrease
  • (..)*n: Repeat in braces n times

Materials and Tools

  • Hook size 3.5
  • Yarn: Himalaya Dolphin Baby (100g/120m)
  • Black and white cotton yarn for muzzle and eyes decoration
  • Polyester toy filling
  • Needle and sewing thread
  • Safety eyes size 10 mm
  • Safety nose
  • Scissors

Head

White Yarn:

  1. 1. 6 sc in MR
  2. 2. 6 inc (12)
  3. 3. (1 sc, inc)*6 (18)
  4. 4. 18 sc
  5. 5. 6 sc, 6 inc, 6 sc (24)

Main Color Yarn:

  1. 6. 6 sc, (inc, 1 sc)*6, 6 sc (30)
  2. 7. (4 sc, inc)*6 (36)
  3. We insert the nose approximately between 2-3 rows.
  4. 8. (5 sc, inc)*6 (42)
  5. 9-13. 42 sc – 5 rows
  6. We insert the eyes approximately between 6-7 rows. The distance between the eyes is 6 single crochet.
  7. 14. (5 sc, dec)*6 (36)
  8. 15. (4 sc, dec)*6 (30)
  9. 16. (3 sc, dec)*6 (24)
  10. 17. (2 sc, dec)*6 (18)
  11. 18. (1 sc, dec)*6 (12)
  12. 19. 6 dec

Arms (x2)

  1. 1. 6 sc in MR
  2. 2. 6 inc (12)
  3. 3. (1 sc, inc)*6 (18)
  4. 4-5. 18 sc – 2 rows
  5. 6. (1 sc, dec)*6 (12)
  6. 7. 12 sc
  7. 8. (4 sc, dec)*2 (10)
  8. 9-14. 10 sc – 6 rows
  9. Fold together, crochet over both edges 5 sc

Legs (x2)

  1. 1. 6 sc in MR
  2. 2. 6 inc (12)
  3. 3. (1 sc, inc)*6 (18)
  4. 4. (2 sc, inc)*6 (24)
  5. 5-6. 24 sc – 2 rows
  6. 7. 6 sc, 6 dec, 6 sc (18)
  7. 8. 7 sc, 2 dec, 7 sc (16)
  8. 9. 7 sc, dec, 7 sc (15)
  9. 10-16. 15 sc – 6 rows
  10. Fold together, crochet over both edges 7 sc

Ears (x2)

  1. 1. 6 sc in MR
  2. 2. 6 inc (12)
  3. 3. (1 sc, inc)*6 (18)
  4. 4-5. 18 sc – 2 rows

Body

  1. 1. 6 sc in MR
  2. 2. 6 inc (12)
  3. 3. (1 sc, inc)*6 (18)
  4. 4. (2 sc, inc)*6 (24)
  5. 5. (3 sc, inc)*6 (30)
  6. 6. 30 sc
  7. 7. (4 sc, inc)*6 (36)
  8. 8. (5 sc, inc)*6 (42)
  9. 9. 42 sc
  10. 10. 7 sc, 7 sc with the leg, 14 sc, 7 sc with the leg, 7 sc (42)
  11. 11-13. 42 sc – 3 rows
  12. 14. 15 sc, 6 dec, 15 sc (36)
  13. 15. 36 sc
  14. 16. (4 sc, dec)*6 (30)
  15. 17. 30 sc
  16. 18. (3 sc, dec)*6 (24)
  17. 19. 24 sc
  18. 20. (2 sc, dec)*6 (18)
  19. 21. 2 sc, 5 sc with the arm, 4 sc, 5 sc with the arm, 2 sc (18)
  20. 22. (1 sc, dec)*6 (12)

Tail

  1. 1. 6 sc in MR
  2. 2. 6 inc (12)
  3. 3. (1 sc, inc)*6 (18)
  4. 4. (1 sc, dec)*6 (12)
  5. 5. 6 dec (6)

Assembly and Design

  • Sew the head and the tail to the body
  • Sew the ears to the head
  • Embroider the white of the eyes with white thread, eyebrows, and muzzle with black thread

Enjoy your finished Bear Mishka Amigurumi!

Snow White Cat Amigurumi Free PDF Pattern

by


Crochet Snow White Cat Amigurumi Free PDF Pattern

Designer: tezukuri.love.diy

My dears, today we are going to make a magnificent cat amigurumi in snow white. Making the crochet cat is a little challenging. In particular, you need to carefully do the tightening process on the cat’s face. Although this process is difficult, a very pleasant expression emerges when it is done successfully. Cat amigurumi pattern free. Now if you’re ready, let’s get started and crochet the cute cat.

Materials

  • Crochet Hook
  • Yarn:
    • White
    • Black
    • Pink
    • Blue
  • Fiberfill
  • Safety Eyes (9mm)
  • Embroidery Needle
  • Aluminum Wire

Abbreviations

  • MR: Amigurumi Magic Ring
  • sc: Single Crochet
  • inc: Increase
  • dec: Decrease
  • tr: Triple Crochet / Treble Crochet
  • st: Stitch
  • dc: Double Crochet
  • hdc: Half Double Crochet
  • slst: Slip Stitch
  • ch: Chain
  • ..in: Make increase into the same stitch as many times as the number given (e.g., 3inc, 4inc)
  • FLO: Crochet into front loops only
  • BLO: Crochet into back loops only

Front Leg (x2)

Start with white yarn:

  1. (5) 5sc in MR
  2. (10) 5inc
  3. 3-10: (10) 10sc
  4. Stuff less firmly
  5. Cut the yarn

Back Leg (x2)

Start with white yarn:

  1. (4) 4sc in MR
  2. (8) 4inc
  3. 3-6: (8) 8sc
  4. Stuff less firmly
  5. Cut the yarn, and leave a long tail

Ears (x2)

Start with white yarn:

  1. (4) 4sc in MR
  2. (8) 4inc
  3. (12) (sc, inc)*4
  4. (16) sc, (inc, 2sc)*3, inc, sc
  5. (16) 16sc
  6. (20) (3sc, inc)*4
  7. (20) 20sc
  8. Cut the yarn, and leave a long tail

Body

Start with white yarn:

  1. (8) 8sc in MR
  2. (16) 8inc
  3. (24) (sc, inc)*8
  4. (32) sc, (inc, 2sc)*7, inc, sc
  5. (40) (3sc, inc)*8
  6. (44) (9sc, inc)*4
  7. (48) 5sc, (inc, 10sc)*3, inc, 5sc
  8. 8-10: (48) 48sc
  9. (50) 24sc, (7sc, inc)*2, 8sc
  10. (52) 28sc, (inc, 8sc), inc, 12sc
  11. (48) (dec, 2sc)*3, dec, 12sc, 5sc (with leg), 4sc, 5sc (with leg), 4sc, 5sc (with leg), 11sc
  12. (48) 48sc
  13. (40) (sc, dec)*4, (7sc, dec)*4
  14. (36) 11sc, (dec, 6sc)*3, dec, 3sc
  15. (28) 4dec, (5sc, dec)*4
  16. (28) 28sc
  17. (24) 6sc, (dec, 4sc)*3, dec, 2sc
  18. (24) 24sc
  19. Cut the yarn, and leave a long tail

Head

Start with white yarn:

  1. (5) ch5
  2. (12) sc into the 2nd st from the hook, 2sc, 4sc in the same st, flip, 2sc, 3sc into the same st
  3. (20) inc, 2sc, 4inc, 2sc, 3inc
  4. (28) sc, inc, 2sc, (sc, inc)*4, 2sc, (sc, inc)*3
  5. (36) sc, inc, 4sc, (inc, 2sc)*3, inc, 4sc, (inc, 2sc)*2, inc, sc
  6. (44) 3sc, inc, 2sc, (3sc, inc)*4, 2sc, (3sc, inc)*3
  7. (52) 2sc, inc, 6sc, (inc, 4sc)*3, inc, 6sc, (inc, 4sc)*2, inc, 2sc
  8. (60) 5sc, inc, 2sc, (5sc, inc)*4, 2sc, (5sc, inc)*3
  9. (60) 60sc
  10. (68) 3sc, inc, 8sc, (inc, 6sc)*3, inc, 8sc, (inc, 6sc)*2, inc, 3sc
  11. (68) 68sc
  12. (60) 3sc, dec, 8sc, (dec, 6sc)*3, dec, 8sc, (dec, 6sc)*2, dec, 3sc
  13. 13-16: (60) 60sc
  14. (54) 4sc, (dec, 8sc)*5, dec, 4sc
  15. (54) 54sc
  16. (48) (7sc, dec)*6
  17. (48) 48sc
  18. (42) 3sc, (dec, 6sc)*5, dec, 3sc
  19. (36) (5sc, dec)*6
  20. (30) 2sc, (dec, 4sc)*5, dec, 2sc
  21. (24) (3sc, dec)*6
  22. (18) sc, (dec, 2sc)*5, dec, sc
  23. (12) (sc, dec)*6
  24. (6) 6dec
  25. Cut the yarn

Tail

Start with white yarn:

  1. (5) 5sc in MR
  2. 2-40: (5) 5sc
  3. Cut the yarn. Leave a long tail

Assembly

  • Sew back legs
  • Place eyes between round 13 and round 14 with 9 stitches between the eyes
  • Place ears on the 4th round from the top of the head and sew
  • Use aluminum wire to support the tail
  • Sew the tail on round 3
  • Use pink yarn to embroider a muzzle, black yarn to embroider a mouth
  • The top of the muzzle should be placed between rounds 12 and 11 with 3 stitches
  • The bottom part of the muzzle should be placed between rounds 10 and 9. Only use 1 stitch
  • Use black yarn to embroider whiskers
  • Use blue yarn to make lines around the eyes
  • Use pink yarn to embroider paws (3 lines per paw)
  • Do needle sculpt the face

Enjoy your finished Snow White Cat amigurumi!

Bunny in Overalls Amigurumi PDF Crochet Free Pattern

by


Amigurumi Bunny Pattern

Dear friends, today we will crochet a very different and easy bunny amigurumi. When you examine the bunny amigurumi pattern, you will see that it can be made with basic crochet knowledge. You can try to make color transitions and parts even if there are many. The bunny may look a little big, but once you start making it, you can easily finish it. As for the color, I don’t think the right choices were made. If you choose more vibrant colors, you can make a more cute amigurumi. Now let’s crochet the bunny amigurumi step by step.

Designer: toys_give_joys

Necessary Materials

  • Yarn: Alize Cotton Gold or YarnArt Jeans (main and additional colors)
  • Hook: 1.75 mm or 2 mm (whichever is convenient for you to crochet)
  • Eyes: 8mm safe eyes or beads
  • Yarn for tightening and embroidering faces
  • Holofiber or synthetic fluff
  • Rattles (optional)
  • Two buttons: 8-9mm
  • Needle

Abbreviations

  • AR – Amigurumi Magic Ring
  • LL – Lifting Loop
  • MR – Amigurumi Magic Ring
  • App – Application
  • sc – Single Crochet
  • inc – Increase
  • dec – Decrease
  • tr – Triple Crochet / Treble Crochet
  • st – Stitch
  • dc – Double Crochet
  • hdc – Half Double Crochet
  • sl-st – Slip Stitch
  • ch – Chain
  • ..in – Make increase into the same stitch as many times as the number given (e.g., 3inc, 4inc)
  • FLO – Crochet into front loops only
  • BLO – Crochet into back loops only
  • BL – Bobble Stitch: Do 5 dc all in the same stitch, then yarn over and pull through all the loops on your hook (the original loop + 1 loop for each partially completed dc)

Head

  1. 1. 6 sc in MR
  2. 2. 6 increase (12 sc)
  3. 3. (1 sc, 1 inc) x6 (18 sc)
  4. 4. (2 sc, 1 inc) x6 (24 sc)
  5. 5. (3 sc, 1 inc) x6 (30 sc)
  6. 6. (4 sc, 1 inc) x6 (36 sc)
  7. 7. (5 sc, 1 inc) x6 (42 sc)
  8. 8. (6 sc, 1 inc) x6 (48 sc)
  9. 9. (7 sc, 1 inc) x6 (54 sc)
  10. 10. (8 sc, 1 inc) x6 (60 sc)
  11. 11-15. 60 sc (5 rows)
  12. 16. 7 sc, (3 sc, 1 inc) x4, 14 sc, (3 sc, 1 inc) x4, 7 sc (68 sc)
  13. 17. 7 sc, (4 sc, 1 inc) x4, 14 sc, (4 sc, 1 inc) x4, 7 sc (76 sc)
  14. 18-20. 76 sc (3 rows)
  15. At this stage, insert safe eyes. In the 16th row, count 6 sc from the marker to the left and 6 sc to the right. Insert, secure, and fix. Start stuffing the head gradually.
  16. 21. 7 sc, (4 sc, 1 dec) x4, 14 sc, (4 sc, 1 dec) x4, 7 sc (68 sc)
  17. 22. 7 sc, (3 sc, 1 dec) x4, 14 sc, (3 sc, 1 dec) x4, 7 sc (60 sc)
  18. 23. (8 sc, 1 dec) x6 (54 sc)
  19. 24. (7 sc, 1 dec) x6 (48 sc)
  20. 25. (6 sc, 1 dec) x6 (42 sc)
  21. 26. (5 sc, 1 dec) x6 (36 sc)
  22. 27. (4 sc, 1 dec) x6 (30 sc)
  23. 28. (3 sc, 1 dec) x6 (24 sc)
  24. 29. (2 sc, 1 dec) x6 (18 sc)
  25. 30. (1 sc, 1 dec) x6 (12 sc)
  26. 31. 6 dec, close and tighten the hole, secure and cut the yarn.

Upper Legs (Hands)

  1. 1. 6 sc in MR
  2. 2. 6 increase (12 sc)
  3. 3. (1 sc, 1 inc) x6 (18 sc)
  4. 4. (2 sc, 1 inc) x6 (24 sc)
  5. 5. (3 sc, 1 inc) x6 (30 sc)
  6. 6-8. 30 sc (3 rows)
  7. Insert the rattles.
  8. 9. (3 sc, 1 dec) x6 (24 sc)
  9. 10. 24 sc (stuff the foot while crocheting)
  10. 11. (2 sc, 1 dec) x6 (18 sc)
  11. 12. (4 sc, 1 dec) x3 (15 sc)
  12. 13-27. 15 sc (15 rows)
  13. 28. Fold the crocheting in half, crochet 7 sc together. Fasten off and cut the yarn.
  14. Crochet the second foot the same way.

Lower Foot (Leg)

  1. 1. 6 sc in MR
  2. 2. 6 increase (12 sc)
  3. 3. (1 sc, 1 inc) x6 (18 sc)
  4. 4. (2 sc, 1 inc) x6 (24 sc)
  5. 5. (3 sc, 1 inc) x6 (30 sc)
  6. 6. (4 sc, 1 inc) x6 (36 sc)
  7. 7-8. 36 sc (2 rows)
  8. Insert the rattles.
  9. 9. (4 sc, 1 dec) x6 (30 sc)
  10. 10. 30 sc
  11. 11. (3 sc, 1 dec) x6 (24 sc)
  12. 12. 24 sc
  13. 13. (2 sc, 1 dec) x6 (18 sc)
  14. 14. 18 sc
  15. Do not stuff the lower legs.
  16. 15. Fold crocheting in half, crochet 9 sc. Fasten off and cut the yarn.
  17. Crochet the second foot the same way.

Shorts (Blank for Shorts)

  1. Make a chain of 26 air loops, join them into a ring, and crochet 6 rows in an additional color. Finish with a row of connecting stitches. Secure and cut the yarn.
  2. Make the second shorts piece the same way.

Assemble the Legs in Shorts

  1. Insert the finished legs into the shorts piece, fold the piece in half so that the leg is centered, and crochet everything together with 13 sc. Fasten off and cut the yarn.
  2. Repeat for the second piece.

Body

  1. Start crocheting with the additional color (for the shorts).
  2. 1. 8 sc in MR
  3. 2. 8 increase (16 sc)
  4. 3. (1 sc, 1 inc) x8 (24 sc)
  5. 4. (2 sc, 1 inc) x8 (32 sc)
  6. 5. (3 sc, 1 inc) x8 (40 sc)
  7. 6. (4 sc, 1 inc) x8 (48 sc)
  8. 7. (5 sc, 1 inc) x8 (56 sc)
  9. 8. (6 sc, 1 inc) x8 (64 sc)
  10. 9. (7 sc, 1 inc) x8 (72 sc)
  11. 10. 72 sc
  12. 11. Crochet the legs together.
  13. 12-14. 72 sc (3 rows)
  14. 15. (7 sc, 1 dec) x8 (64 sc)
  15. 16-18. 64 sc (3 rows)
  16. 19. (6 sc, 1 dec) x8 (56 sc)
  17. 20-21. 56 sc (2 rows)
  18. 22. Change the color to the main one and crochet in BLO (56 sc)
  19. 23. (5 sc, 1 dec) x8 (48 sc)
  20. 24-31. 48 sc (8 rows)
  21. 32. (4 sc, 1 dec) x8 (40 sc)
  22. 33. Crochet the legs together (focus on the lower legs). Crochet 7 sc with a foot, 14 sc, 7 sc with a foot, 14 sc (40 sc)
  23. 34. (3 sc, 1 dec) x8 (32 sc)
  24. 35. (2 sc, 1 dec) x8 (24 sc)
  25. 36. (1 sc, 1 dec) x8 (16 sc)
  26. 37. 8 dec, pull off the hole, secure and cut the yarn.

Ears

  1. Use a 2 mm hook if crocheting without changes.
  2. 1. 4 sc in MR
  3. 2. 4 increase (8 sc)
  4. 3. (1 sc, 1 inc) x4 (12 sc)
  5. 4. (2 sc, 1 inc) x4 (16 sc)
  6. 5. (3 sc, 1 inc) x4 (20 sc)
  7. 6. (4 sc, 1 inc) x4 (24 sc)
  8. 7. (5 sc, 1 inc) x4 (28 sc)
  9. 8. (6 sc, 1 inc) x4 (32 sc)
  10. 9-13. 32 sc (5 rows)
  11. 14. (6 sc, 1 dec) x4 (28 sc)
  12. 15. 28 sc
  13. 16. (5 sc, 1 dec) x4 (24 sc)
  14. 17-20. 24 sc (4 rows)
  15. 21. (4 sc, 1 dec) x4 (20 sc)
  16. 22-24. 20 sc (3 rows)
  17. 25. Fold in half and crochet 10 sc, finish crocheting and fasten yarn.

Face Decoration

  • Sew on the ears closer together.
  • Embroider the nose 2 rows below the center of the muzzle with 3 sc stitches.
  • Secure the eyes and embroider any final face details as desired.

How to Add Straps to Shorts

  1. Divide the tummy in half, and from the center to the left, crochet 7 loops for the front loops of the 22nd row. Crochet 15 sc, 1 ch (turn crocheting), continue crocheting 15 sc, 1 ch (turn crocheting), and crochet 15 sc for 6 rows.
  2. For the back straps, divide visually in half, and crochet 7 sc, 1 ch (turn crocheting). Continue crocheting 7 sc, 1 ch, from the second loop, crochet 6 sc, 1 ch, and repeat for the other side.
  3. Finally, sew the straps with buttons to the front of the shorts.

Enjoy your finished cute bunny amigurumi!

Amigurumi Sleeping Bunny Free Pattern

by


Sleeping Bunny Amigurumi Free Pattern

Abbreviations:

  • R – row
  • ch – chain
  • st – stitch
  • sc – single crochet
  • sl st – slip stitch
  • inc – increase (2 sc in one stitch)
  • dec – decrease (2 sc together)
  • […] – number of stitches you should have at the end of the row
  • (…) – repeat whatever is between the brackets the given number of times

Head

  • R 1: 6 sc in magic ring [6]
  • R 2: (inc) repeat 6 times [12]
  • R 3: (1 sc, inc) repeat 6 times [18]
  • R 4: (2 sc, inc) repeat 6 times [24]
  • R 5: (3 sc, inc) repeat 6 times [30]
  • R 6: (4 sc, inc) repeat 6 times [36]
  • R 7: (5 sc, inc) repeat 6 times [42]
  • R 8-16: 42 sc (9 rows)
  • R 17: (5 sc, dec) repeat 6 times [36]
  • R 18: (4 sc, dec) repeat 6 times [30]
  • R 19: (3 sc, dec) repeat 6 times [24]
  • R 20: (2 sc, dec) repeat 6 times [18]
  • Sl st. Fasten off.

Legs (make 2)

  • R 1: 7 sc in magic ring [7]
  • R 2-6: 7 sc (5 rows)
  • Sl st. Fasten off.

Don’t cut the yarn when you finish the second leg. Continue crocheting the body.

Body

  • R 7: Crochet 2 ch from second leg and join it with the 1st leg with sl st, 7 sc on the 1st leg, sc in next 2 ch, 7 sc on the 2nd leg, sc in next 2 ch (opposite side) [18]
  • R 8: (2 sc, inc) repeat 6 times [24]
  • R 9-13: 24 sc (5 rows)
  • R 14: (2 sc, dec) repeat 6 times [18]
  • R 15: 18 sc
  • Sl st. Fasten off, leaving a long tail for sewing.

Arms (make 2)

  • R 1: 6 sc in magic ring [6]
  • R 2-6: 6 sc (5 rows)
  • Sl st. Fasten off, leaving a long tail for sewing.

Ears (make 2)

  • R 1: 5 sc in magic ring [5]
  • R 2: (inc) repeat 5 times [10]
  • R 3: (1 sc, inc) repeat 5 times [15]
  • R 4-6: 15 sc (3 rows)
  • R 7: (5 sc, dec) repeat 2 times, 1 sc [13]
  • R 8-9: 13 sc (2 rows)
  • R 10: (4 sc, dec) repeat 2 times, 1 sc [11]
  • R 11: 11 sc
  • Sl st. Fasten off, leaving a long tail for sewing.

Search results for Amigurumi Plush Crochet Unicorn Free Pattern

by


Free Amigurumi Plush Unicorn Pattern

If you love crocheting, this plush unicorn is the perfect project for you! With easy-to-follow instructions, you'll create a beautiful, cuddly unicorn that will make any child smile!

Materials:

  • Yarn: Himalaya Dolphin Baby 1 skein of the main color, 1/4 skein of white, slightly different colors for the mane.
  • Yarn Art Jeans: white and black for decoration
  • Eyes: 16 mm
  • Hook: 3.5 mm
  • Toy-colored floss: or dental floss for tightening
  • Needle: for sewing parts
  • Filler: for stuffing

Abbreviations:

  • AR: Amigurumi Magic Ring
  • MR: Amigurumi Magic Ring
  • App: Application
  • sc: Single Crochet
  • inc: Increase
  • dec: Decrease
  • tr: Triple Crochet / Treble Crochet
  • st: Stitch
  • dc: Double Crochet
  • hdc: Half Double Crochet
  • sl-st: Slip Stitch
  • ch: Chain
  • FLO: Crochet into front loops only
  • BLO: Crochet into back loops only
  • BL: Bobble Stitch – do 5 dc all in the same stitch, then yarn over and pull through all loops on your hook (the original loop + 1 loop for each partially completed dc)

Head (White Yarn):

  1. 1. 6 in MR
  2. 2. 6 inc (12)
  3. 3. (sc, inc) x 6 (18)
  4. 4. (2 sc, inc) x 6 (24)
  5. 5. (3 sc, inc) x 6 (30)
  6. 6-7. 30 sc (2 rnds)
  7. Change the yarn to the main color
  8. 8. 30 sc
  9. 9. (4 sc, inc) x 6 (36)
  10. 10. (5 sc, inc) x 6 (42)
  11. 11. 3 sc, (4 sc, inc) x 6, 9 sc (48)
  12. 12 – 16. 48 sc (5 rnds)
  13. Eyes are inserted between rows 10 and 11, at a distance of 10 sc
  14. 17. (6 sc, dec) x 6 (42)
  15. 18. (5 sc, dec) x 6 (36)
  16. 19. (4 sc, dec) x 6 (30)
  17. 20. (3 sc, dec) x 6 (24)
  18. 21. (2 sc, dec) x 6 (18)
  19. 22. (sc, dec) x 6 (12)
  20. 23. 6 dec (6)
  21. Pull the hole, cut the yarn, and hide it.

Face Tightening:

Insert the needle approximately in the center of the head at point 1 (see photo), draw it out under the eye at point 2, retreating 2 sc, insert it at point 3, draw it out at point 4 (1 sc away from point 1), and pull it down. Insert the needle again at point 1, output at point 5, and back off 2 sc. Insert it at point 6, output at point 4, and tighten well. You can repeat this, tie the yarn, and hide the ends.

Arms (White Yarn):

  1. 1. 6 in MR
  2. 2. 6 inc (12)
  3. 3. (sc, inc) x 6 (18)
  4. 4-6. 18 sc (3 rnds)
  5. 7. (sc, dec) x 6 (12)
  6. Change the yarn to the main color
  7. 8. dec, 10 sc (11)
  8. 9. 11 sc
  9. 10. dec, 9 sc (10)
  10. 11-16. 10 sc (7 rnds)
  11. Fold in half and crochet 5 sc. Fasten and cut the yarn.

Legs (White Yarn):

  1. 1. 6 in MR
  2. 2. 6 inc (12)
  3. 3. (sc, inc) x 6 (18)
  4. 4. (2 sc, inc) x 6 (24)
  5. 5-7. 24 sc (3 rnds)
  6. 8. (2 sc, dec) x 6 (12)
  7. Change the yarn to the main color
  8. 9. (4 sc, dec) x 3 (15)
  9. 10. 15 sc
  10. 11. dec, 13 sc (14)
  11. 12-13. 14 sc (2 rnds)
  12. 14. dec, 12 sc (13)
  13. 15. 13 sc
  14. 16. dec, 11 sc (12)
  15. 17-18. 12 sc (2 rnds)
  16. Fold in half and crochet 6 sc. Fasten and cut the yarn.

Body:

  1. 1. 6 in MR
  2. 2. 6 inc (12)
  3. 3. (sc, inc) x 6 (18)
  4. 4. (2 sc, inc) x 6 (24)
  5. 5. (3 sc, inc) x 6 (30)
  6. 6. (4 sc, inc) x 6 (36)
  7. 7. (5 sc, inc) x 6 (42)
  8. 8. (6 sc, inc) x 6 (48)
  9. 9. 48 sc
  10. We crochet the legs
  11. 10. 9 sc, 6 sc with leg, 18 sc, 6 sc with leg, 9 sc (48)
  12. If it doesn’t match, shift the legs to the right positions.
  13. 11-13. 48 sc (3 rnds)
  14. 14. (6 sc, dec) x 6 (42)
  15. 15. 42 sc
  16. 16. (5 sc, dec) x 6 (36)
  17. 17. 36 sc
  18. 18. (4 sc, dec) x 6 (30)
  19. 19-20. 30 sc (2 rnds)
  20. 21. (3 sc, dec) x 6 (24)
  21. 22. 24 sc
  22. 23. (2 sc, dec) x 6 (18)
  23. We crochet hands
  24. 24. 3 sc, 5 sc with hand, 5 sc, 5 sc with hand (18)
  25. If it doesn’t match, shift the hands to the right places.
  26. 25. 18 sc, sl-st
  27. Fasten and cut the yarn, leave the yarn for sewing.

Ears:

  1. 1. 6 in MR
  2. 2. (sc, inc) x 3 (9)
  3. 3. (2 sc, inc) x 3 (12)
  4. 4-5. 12 sc (2 rnds)
  5. 6. (2 sc, dec) x 3 (12)
  6. Fasten and cut the yarn, leave the yarn for sewing.

Curls (5 pieces each):

  • Long Curls: Chain 40, from the 2nd stitch from the hook, crochet 1 inc in each stitch. Fasten and cut the yarn.
  • Medium Curls: Chain 30, from the 2nd stitch from the hook, crochet 1 inc in each stitch. Fasten and cut the yarn.
  • Short Curls: Chain 20, from the 2nd stitch from the hook, crochet 1 inc in each stitch. Fasten and cut the yarn.

Horn (Crochet from Jeans Yarn):

  1. 1. 6 in MR
  2. 2. 6 sc
  3. 3. (sc, inc) x 3 (9)
  4. 4. 9 sc
  5. 5. (2 sc, inc) x 3 (12)
  6. 6-7. 12 sc (2 rnds)
  7. 8. (3 sc, inc) x 3 (15)
  8. 9. 15 sc
  9. 10. (4 sc, inc) x 3 (18)
  10. 11-15. 18 sc (5 rnds)
  11. Fasten and cut the yarn, leave the yarn for sewing.

Assembly and Design:

  • Sew the horn in the center of the head.
  • Sew the ears on both sides of the 16th row.
  • Sew the head to the body (you can fix it with a crochet needle).
  • Sew the medium-length curls immediately under the horn, and the long ones next to them.
  • Sew the tail (short curls) in rows 10-11 of the body.
  • Embroider the eyelashes and nose with black yarn.

Enjoy your lovely crochet unicorn! It’s sure to be a hit with anyone who loves cute, handmade toys!

Top Ad 728x90